DIY Floral Decoupage Boxes
Create beautiful decoupage boxes using your favorite floral scrapbook paper! A fun craft to make for your home and office or as a gift for someone special!

Hello Crafty Friends! Today I have another flower-themed craft for you. I am in love with these handy DIY Floral Decoupage Boxes. When I visited a local scrapbook store, I found these beautiful floral papers by Graphic 45. I picked up three papers not really knowing what I would do with them until I found a set of unfinished boxes in Target’s craft section.
The boxes came as a set of three and are a great size for just about anything. After making the boxes, I ended up gifting the set of three to my mom for Mother’s Day. She uses two of the boxes for sewing storage and the middle-sized box is a planter for a little African violet.

DIY Floral Decoupage Boxes
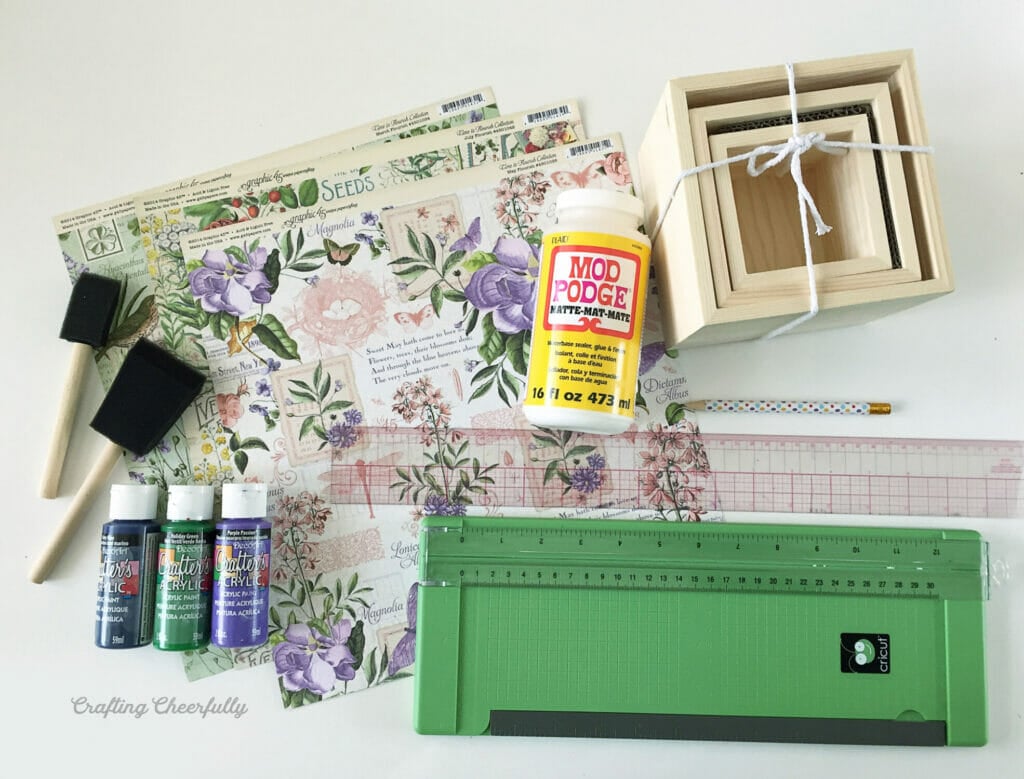
Supplies Needed for DIY Floral Decoupage Boxes:
- Wooden boxes – I found my boxes at Target. The smallest box measures 3″ x 3″
- Update: The boxes from Target are no longer available but here are a few options I found online that are similar
- 3 Square Nesting Boxes – Joann Fabrics (slightly larger in size than the ones I used)
- Medium Plain Box – Joann Fabrics
- 5 Nesting Boxes – Amazon
- 4 Nesting Boxes – Amazon
- Update: The boxes from Target are no longer available but here are a few options I found online that are similar
- Scrapbook paper 12″x12″, one sheet per box. I used paper by Graphic 45.
- Mod Podge
- Acrylic paint in complementary colors
- Paint brush
- Paper trimmer
- Glue
- Ruler and pencil
How to Decoupage the Wooden Boxes
Step One: Paint the inside and outside of the boxes with acrylic paint. I chose a color of paint that coordinated with each scrapbook paper I planned to use. Give the boxes two coats of paint to get a nice solid color. I was running out of green paint so I didn’t do two coats in the center of my large box since each side would be covered up with scrapbook paper.

Step Two: Measure your boxes and cut scrapbook paper into squares that will fit the sides of each box. A couple of my wooden boxes did not measure the same on each side. To make sure the paper fit perfectly on each side, I numbered the sides of the boxes and paper squares so I could match them up and everything would fit perfectly.

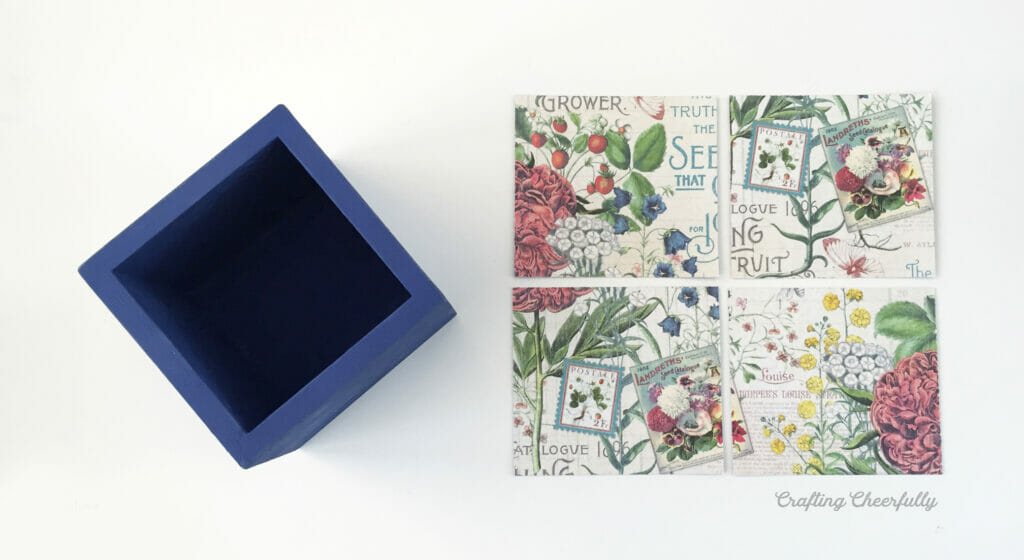
Step Three: Glue the paper squares to the sides of the boxes

Step Four: Cover the outside of the box in Mod Podge, smoothing the paper as you go and being careful not to shift it around or rip it. My paper seemed to ruffle and bulge out a little, but once the Mod Podge dried, it was unnoticeable. I did each box in shifts so I could apply the Mod Podge along the top edge of the box and the bottom as well – this will seal the paper edges down.
I love the way the boxes turned out. This is such a simple craft and the decorative paper you choose really decides the outcome of the project. This was the perfect use for my pretty paper since it is definitely put on display. The three nesting boxes from Target were perfect and inexpensive. I picked up another set because I already have other ideas for them. There are so many possibilities with unfinished boxes!

Other Flower-Themed Crafts
- Greenhouse Gift Box – free printable!
- Flower Seed Treat Boxes – free printable!
- How to Make Floral Flowers
- Accordion Flower Photo Album – free PDF and SVG!