DIY Fairy Easter Eggs
Create sweet and sparkly fairy Easter eggs using paint and paper! A fun way to decorate Easter eggs for the holiday!

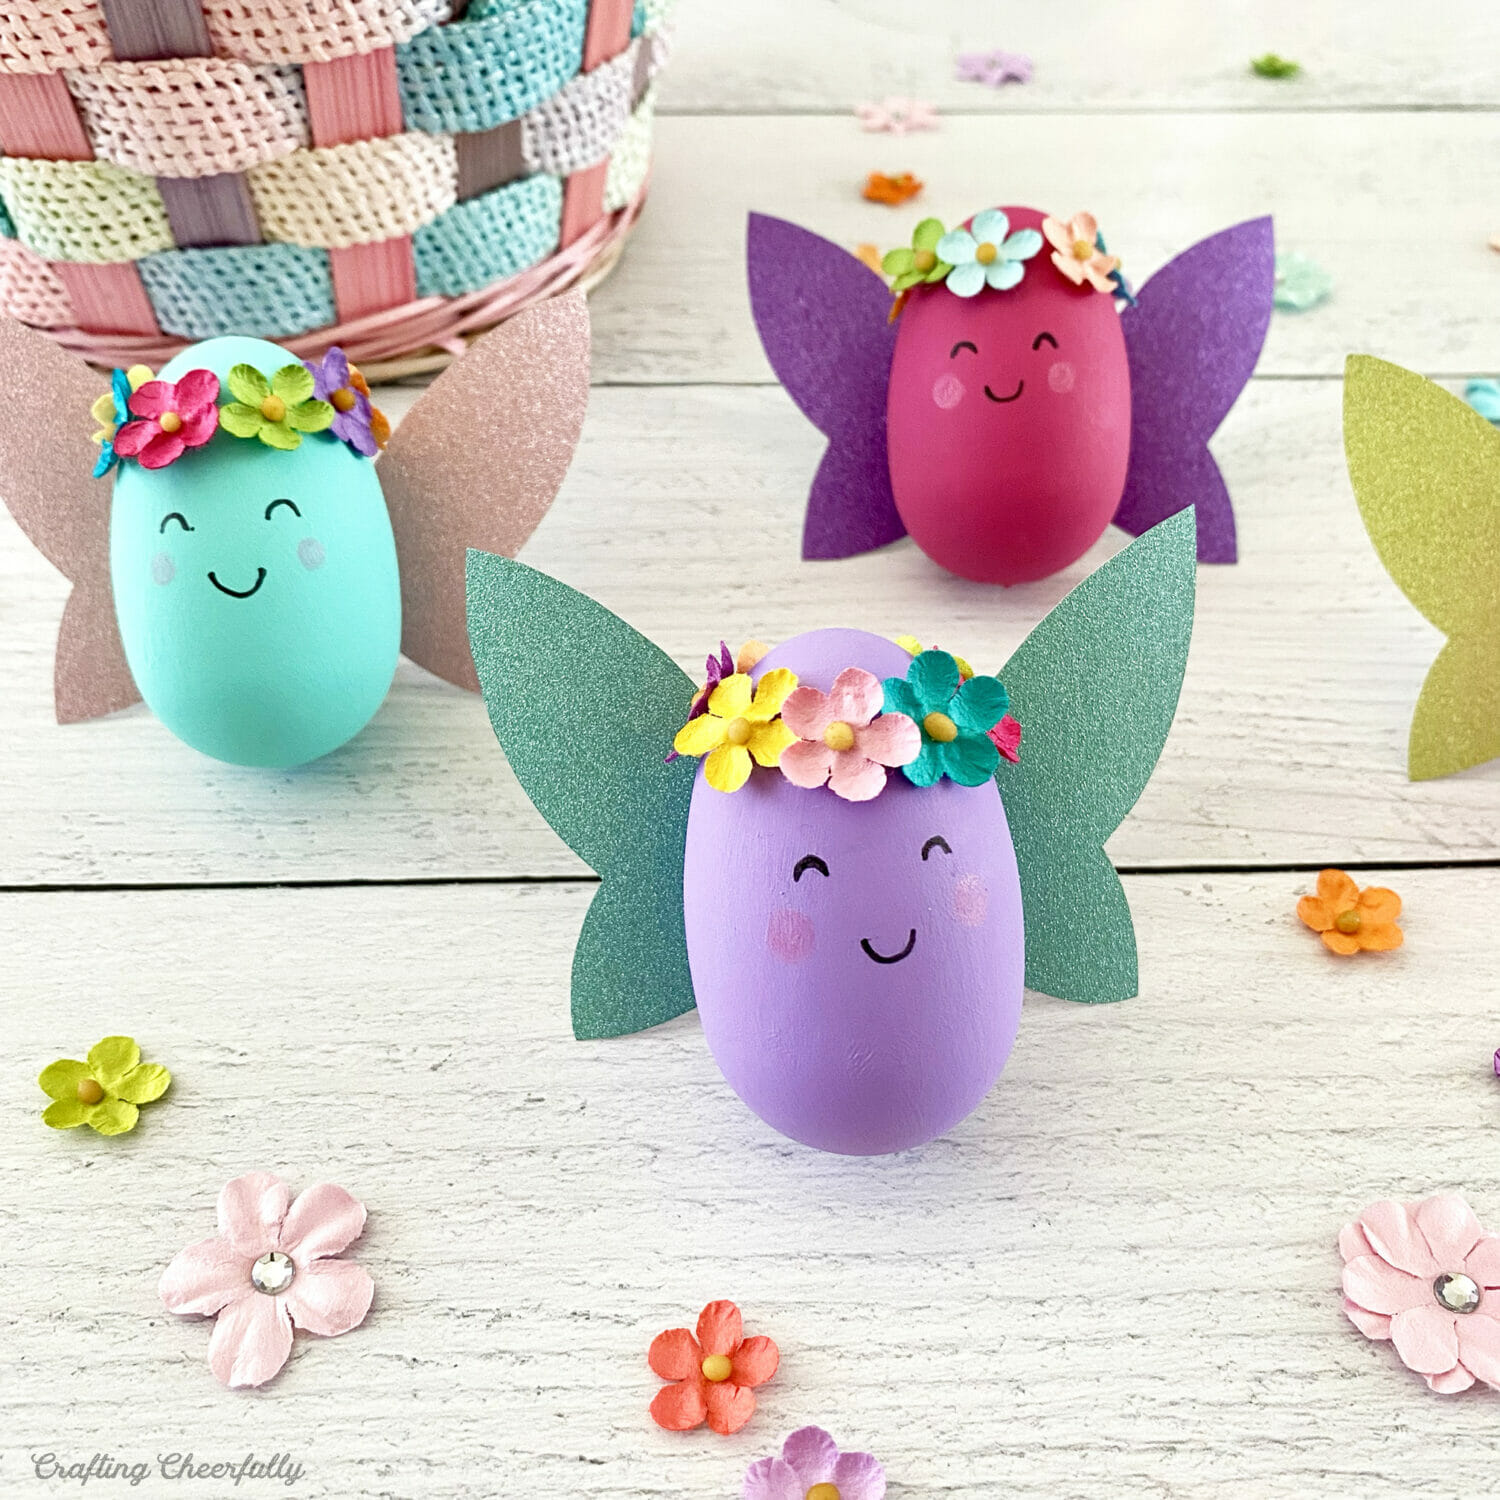
Hello Crafty Friends! Easter is coming up and it’s time for a new Easter egg decorating tutorial! This time I created sweet DIY fairy Easter eggs using paint and paper. My daughter is very into fairies right now so we had a lot fun making these colorful eggs.
We used wooden eggs for our fairies so they will last forever, but these eggs can be made using real eggs, plastic eggs, paper mache eggs or wooden eggs. They only take a few supplies including glittery paper, tiny paper flowers and of course eggs! These eggs are fun to make on your own and are also a great kid-friendly craft.

I used a little bit of wall putty to help my eggs stand up for these photos but you can find wooden eggs with flat bottoms so they can stand on their own.
More Fun Easter Egg Ideas
- Harry Potter Easter Eggs
- Eric Carle Hungry Caterpillar Easter Eggs
- Easter Egg Coloring Pages
- Fabric Scrap Easter Eggs
- Paper Easter Egg Banner
How to Make Cute Fairy Easter Eggs
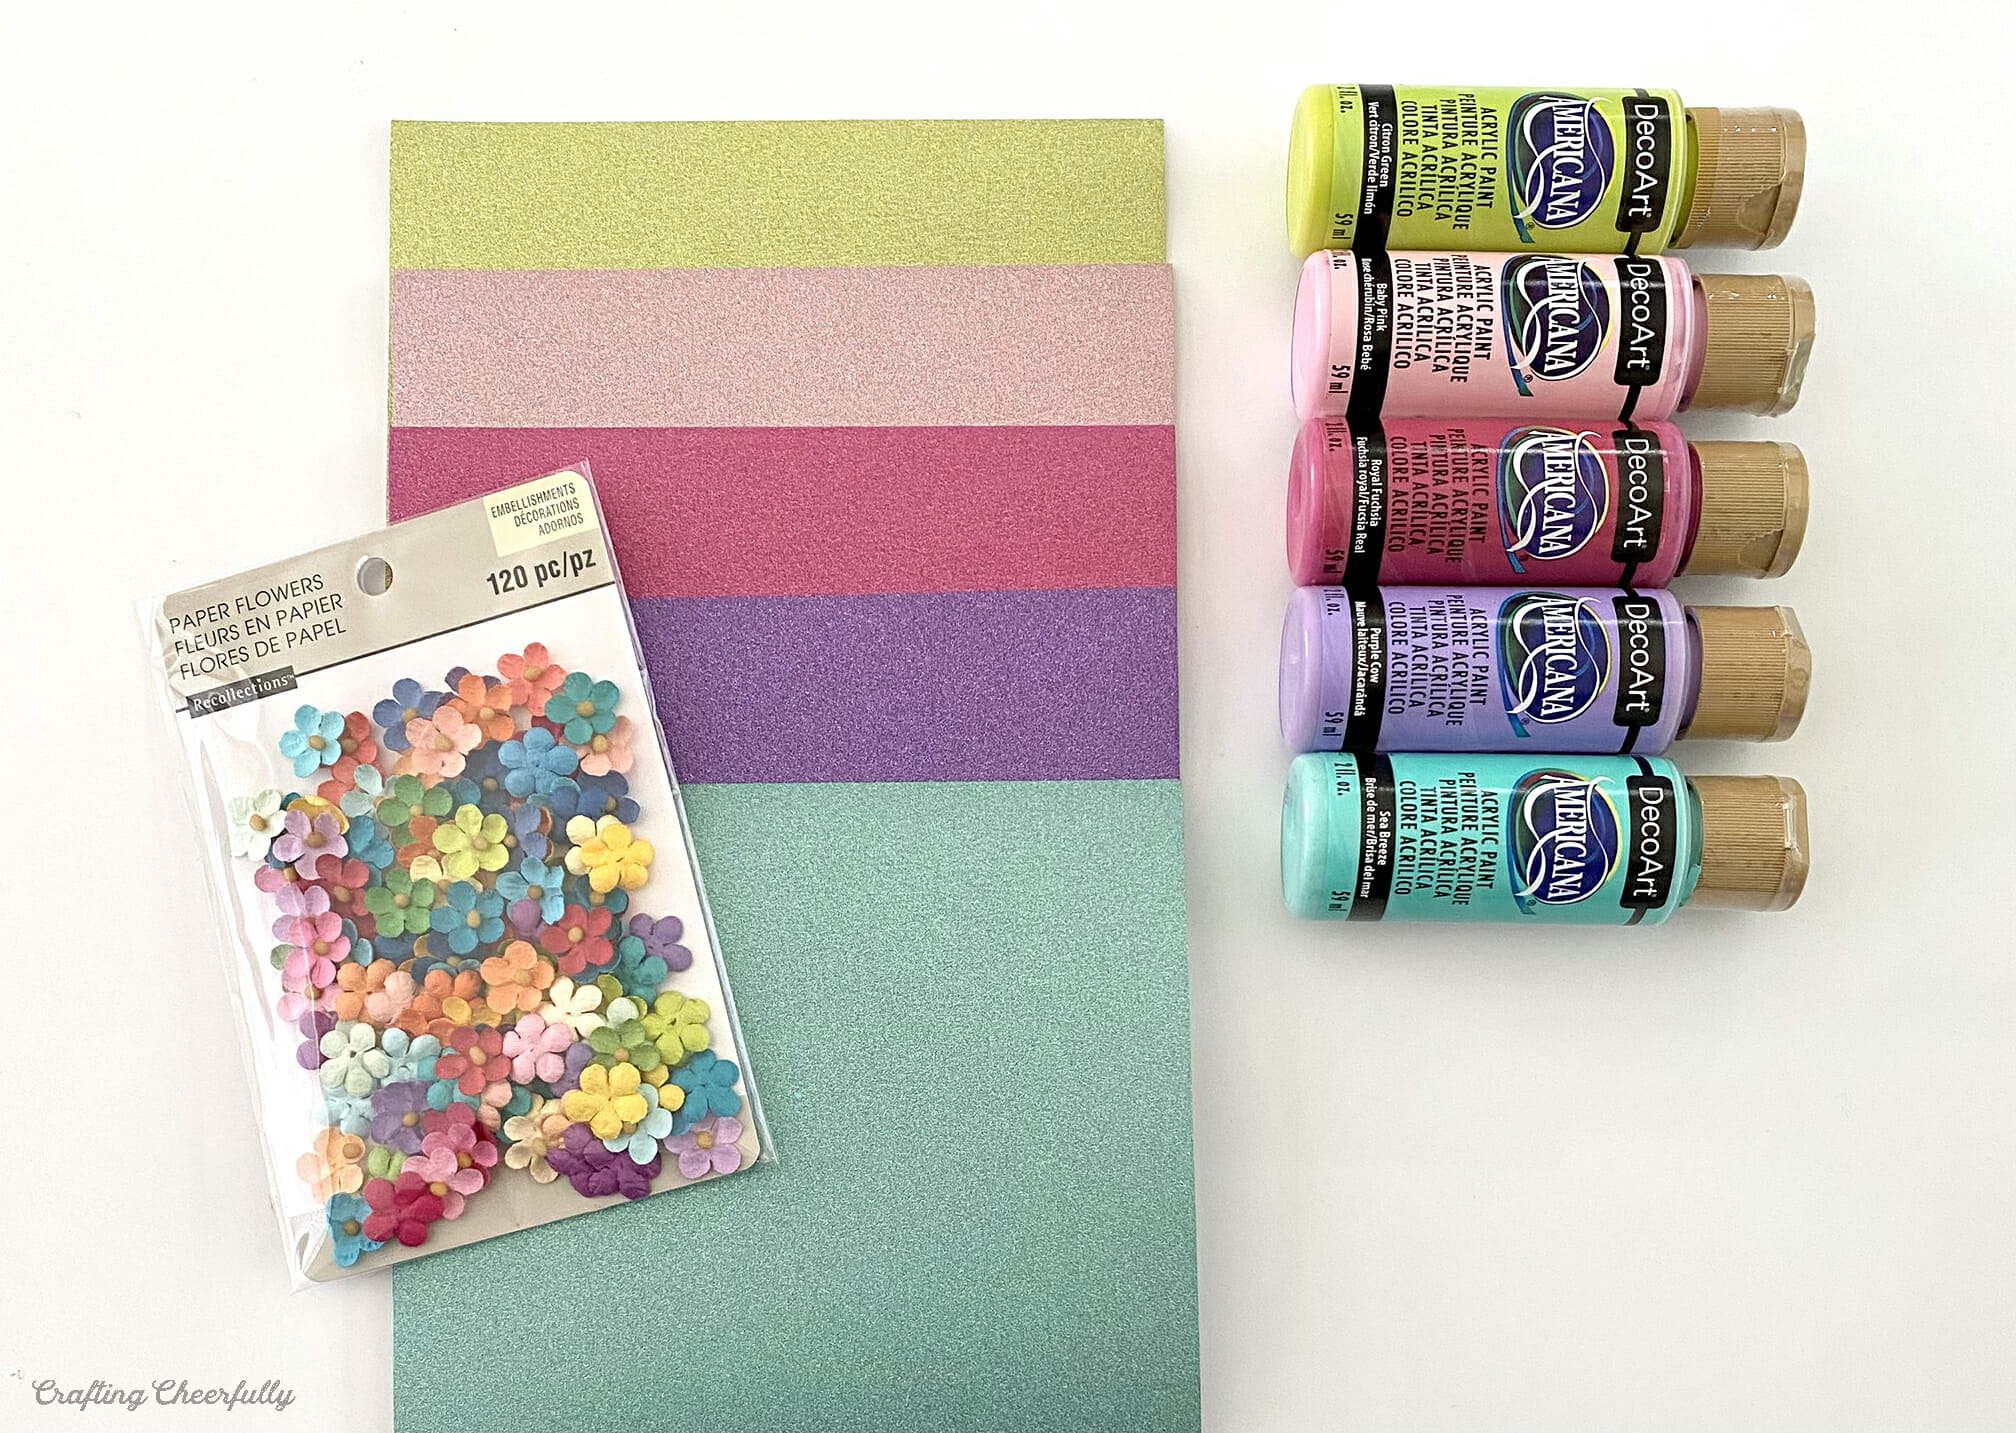
Supplies Needed:
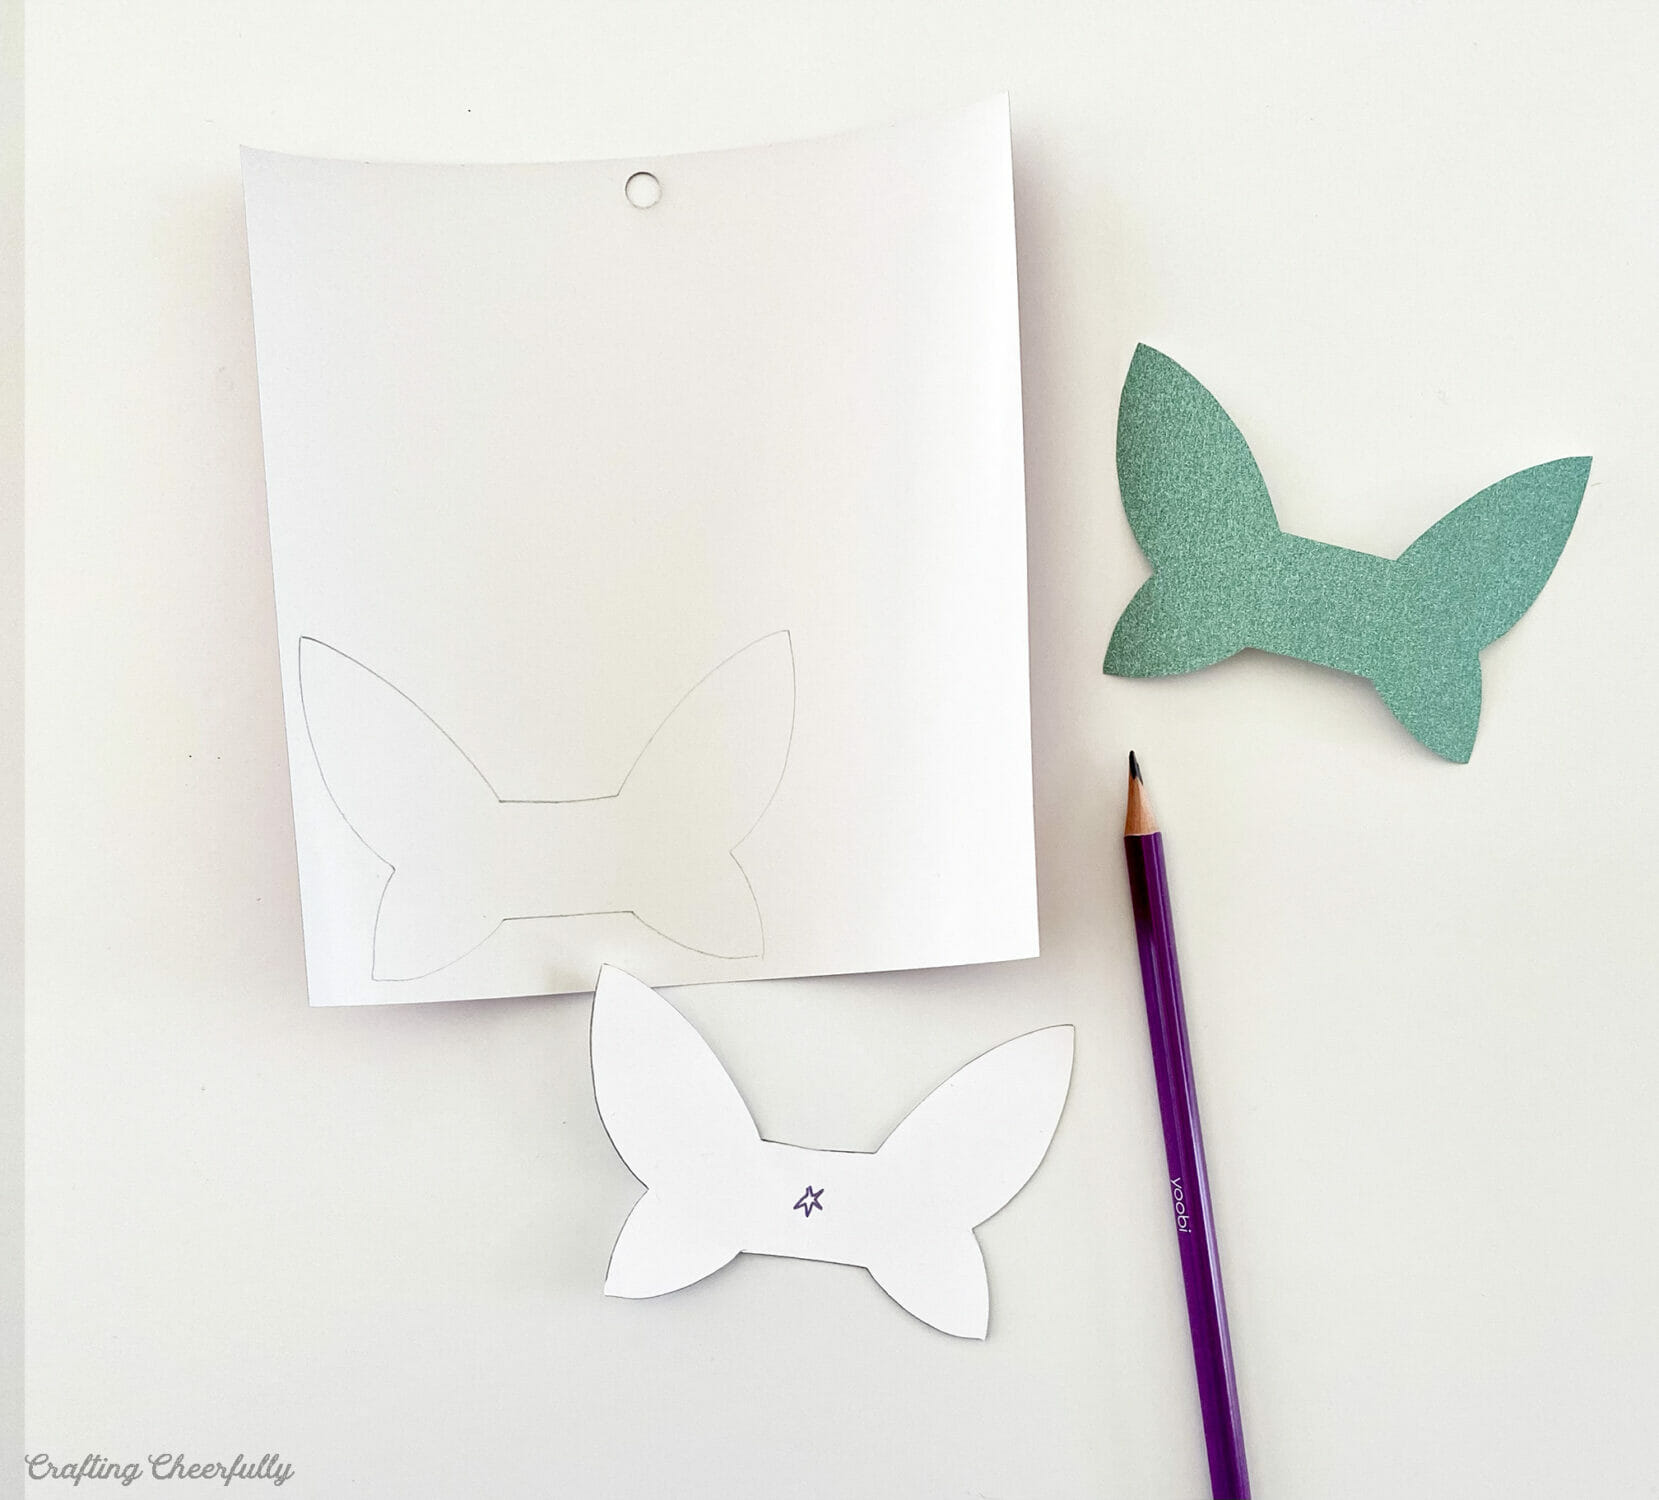
- Wing Template – Grab the free wing template by filling out the purple form at the end of this post.
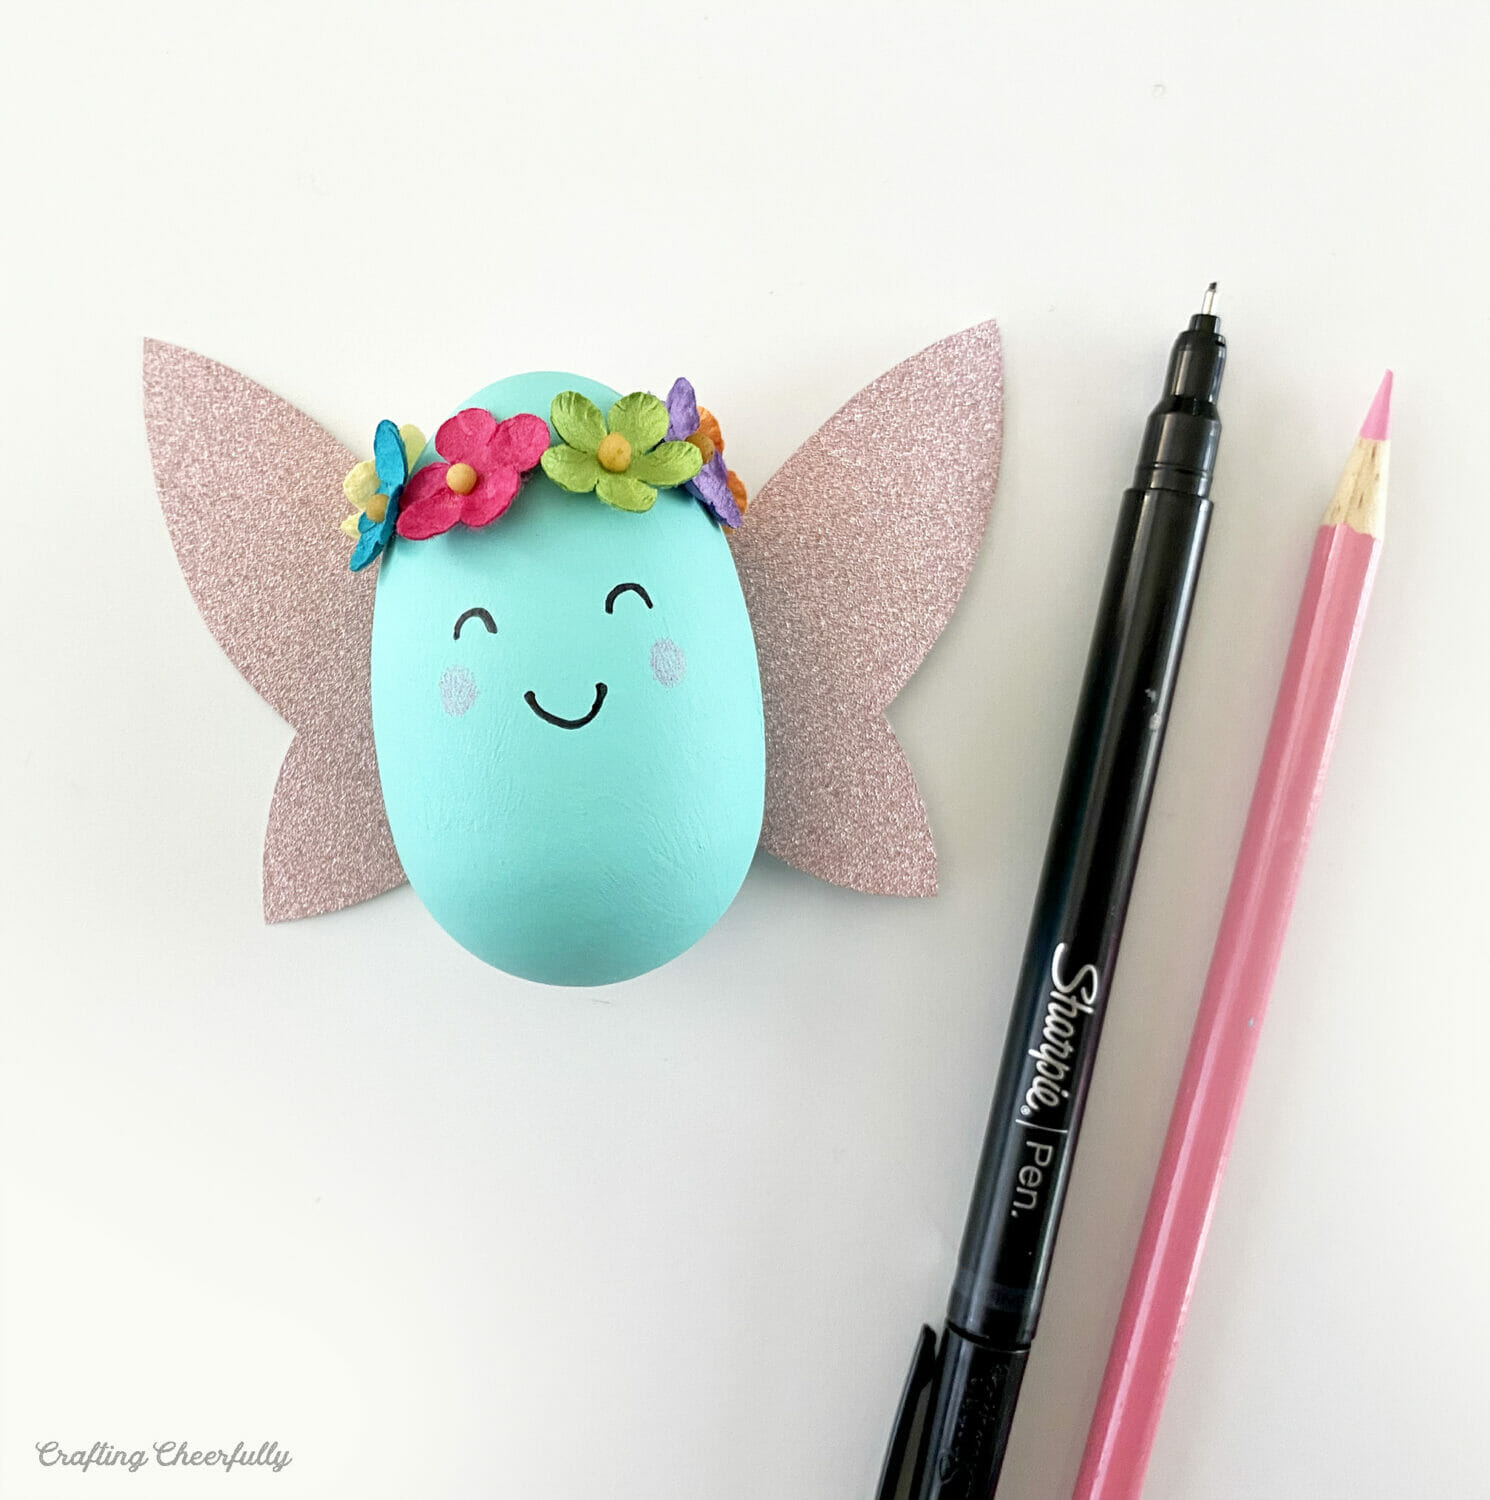
- Eggs – I used Darice wooden eggs but any kind of egg works – hard-boiled dyed eggs, colored plastic eggs, wooden eggs or paper mache eggs. These wooden eggs have flat bottoms so the eggs will stand up.
- Acrylic Paint – I used Deco Art Americana in Baby Pink, Purple Cow, Sea Breeze, Royal Fuchsia and Citron Green.
- Black Sharpie and pink colored pencil
- Colored glitter paper
- Tiny paper flowers – I found mine at Michael’s craft store. These paper flowers on Amazon look similar, though smaller.
- Zots Glue Dots

Step by Step Tutorial
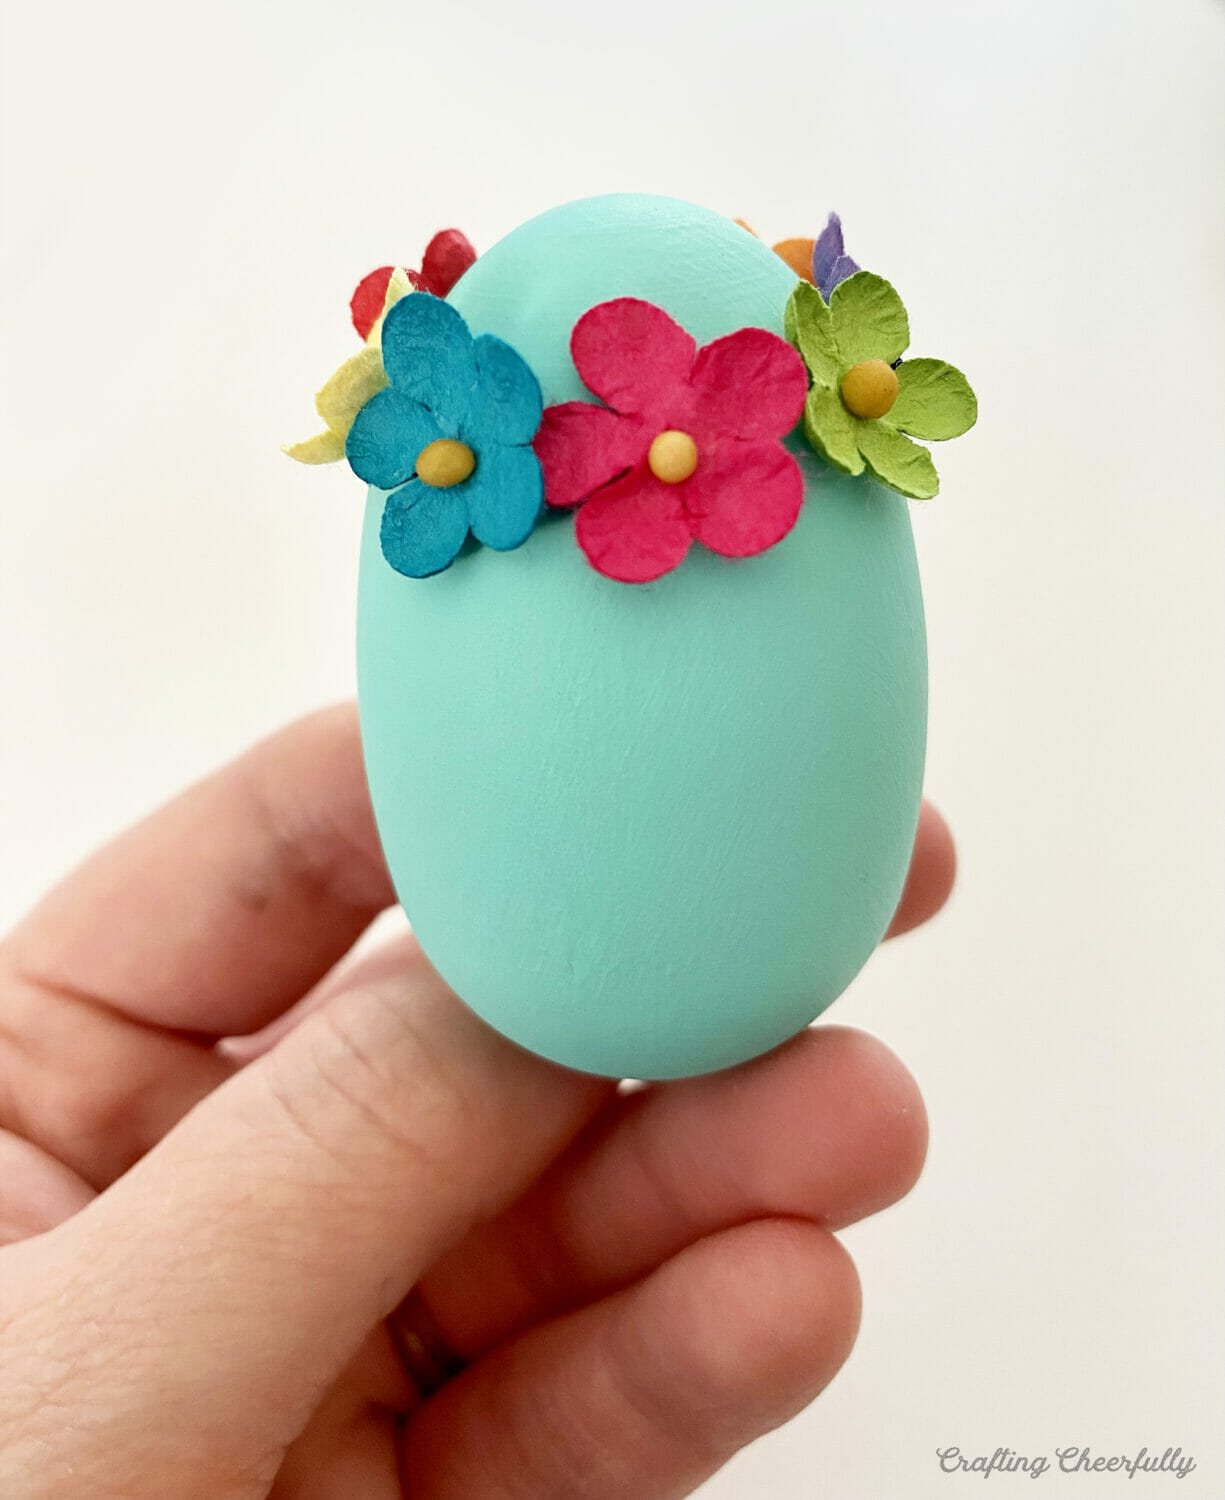
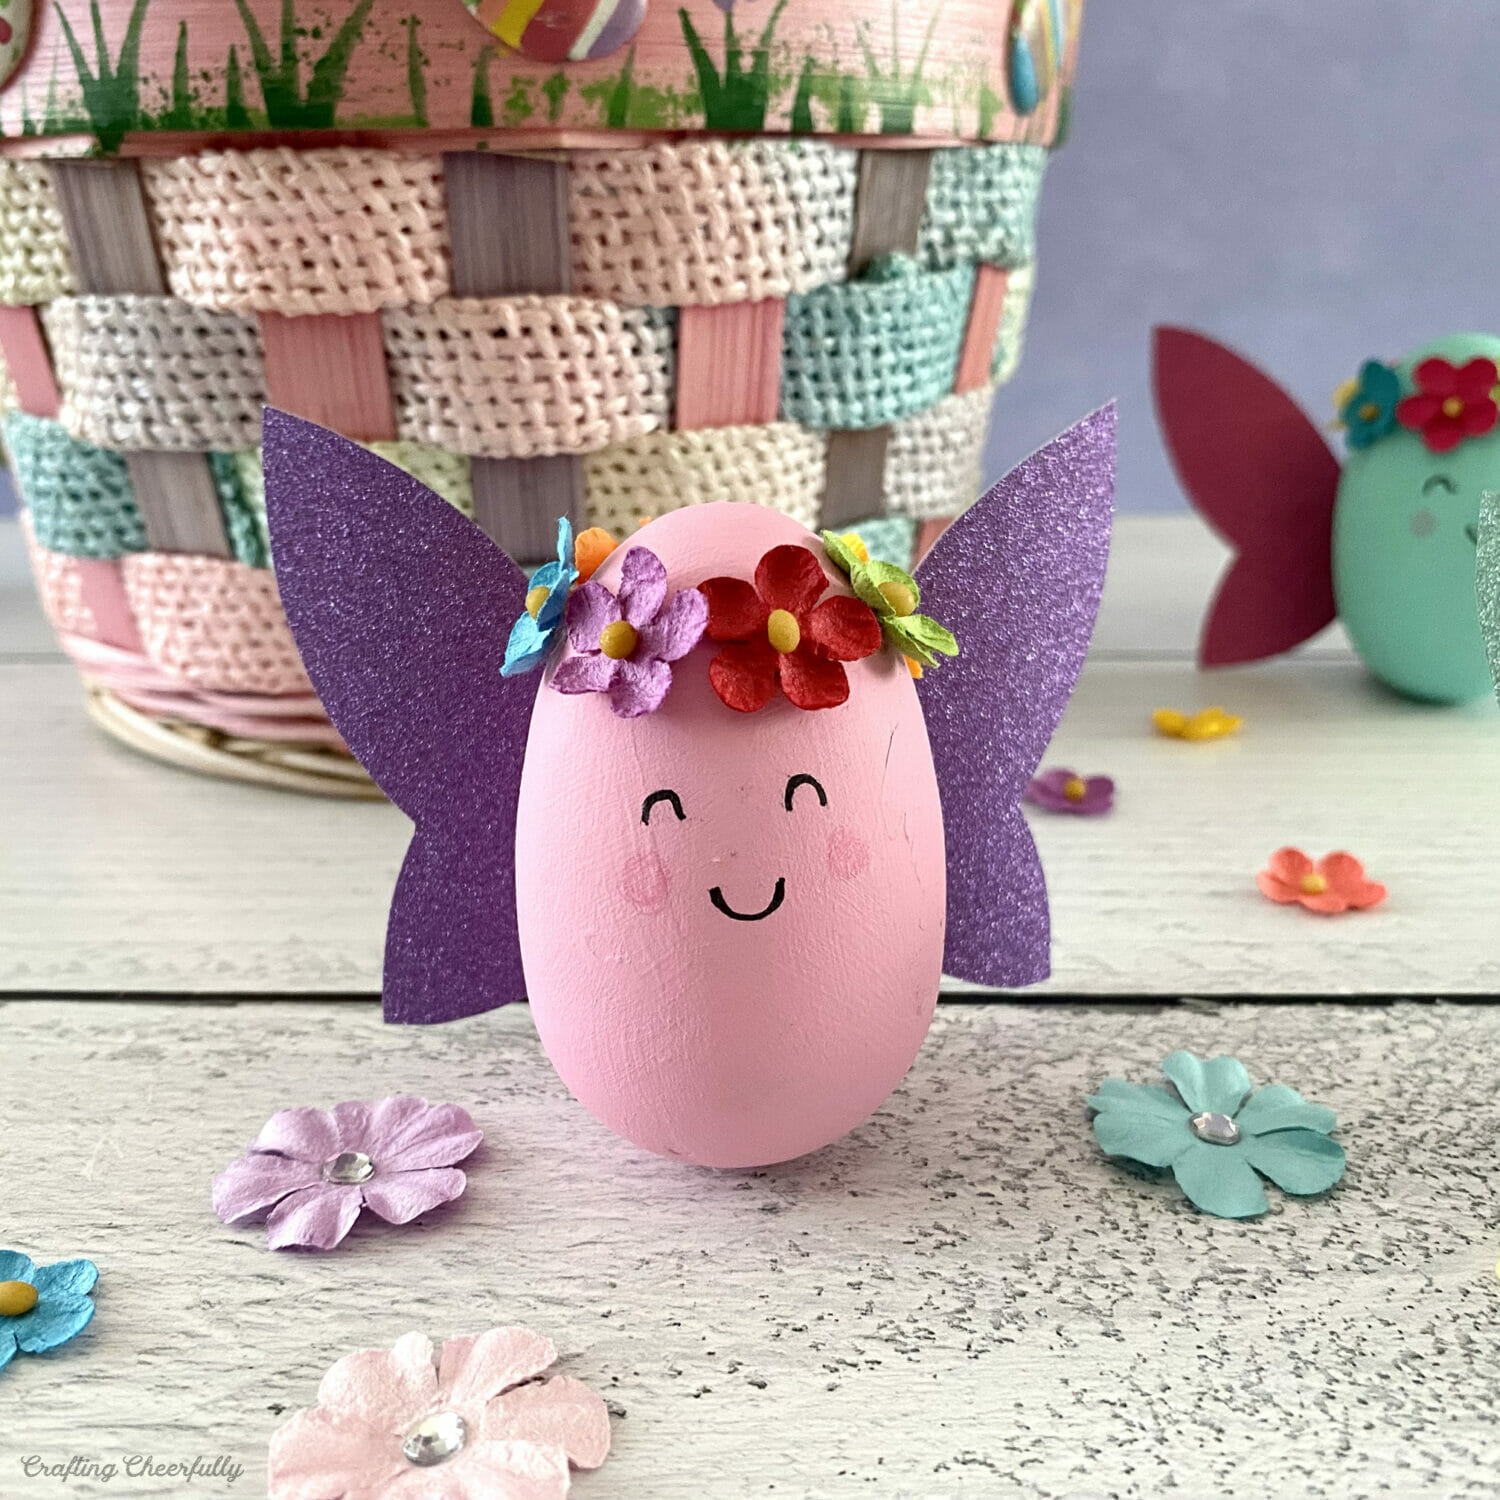
Step One: Color your eggs! I painted my wooden eggs using acrylic paint. You could also dye hard-boiled eggs or use plastic eggs that are already colorful.

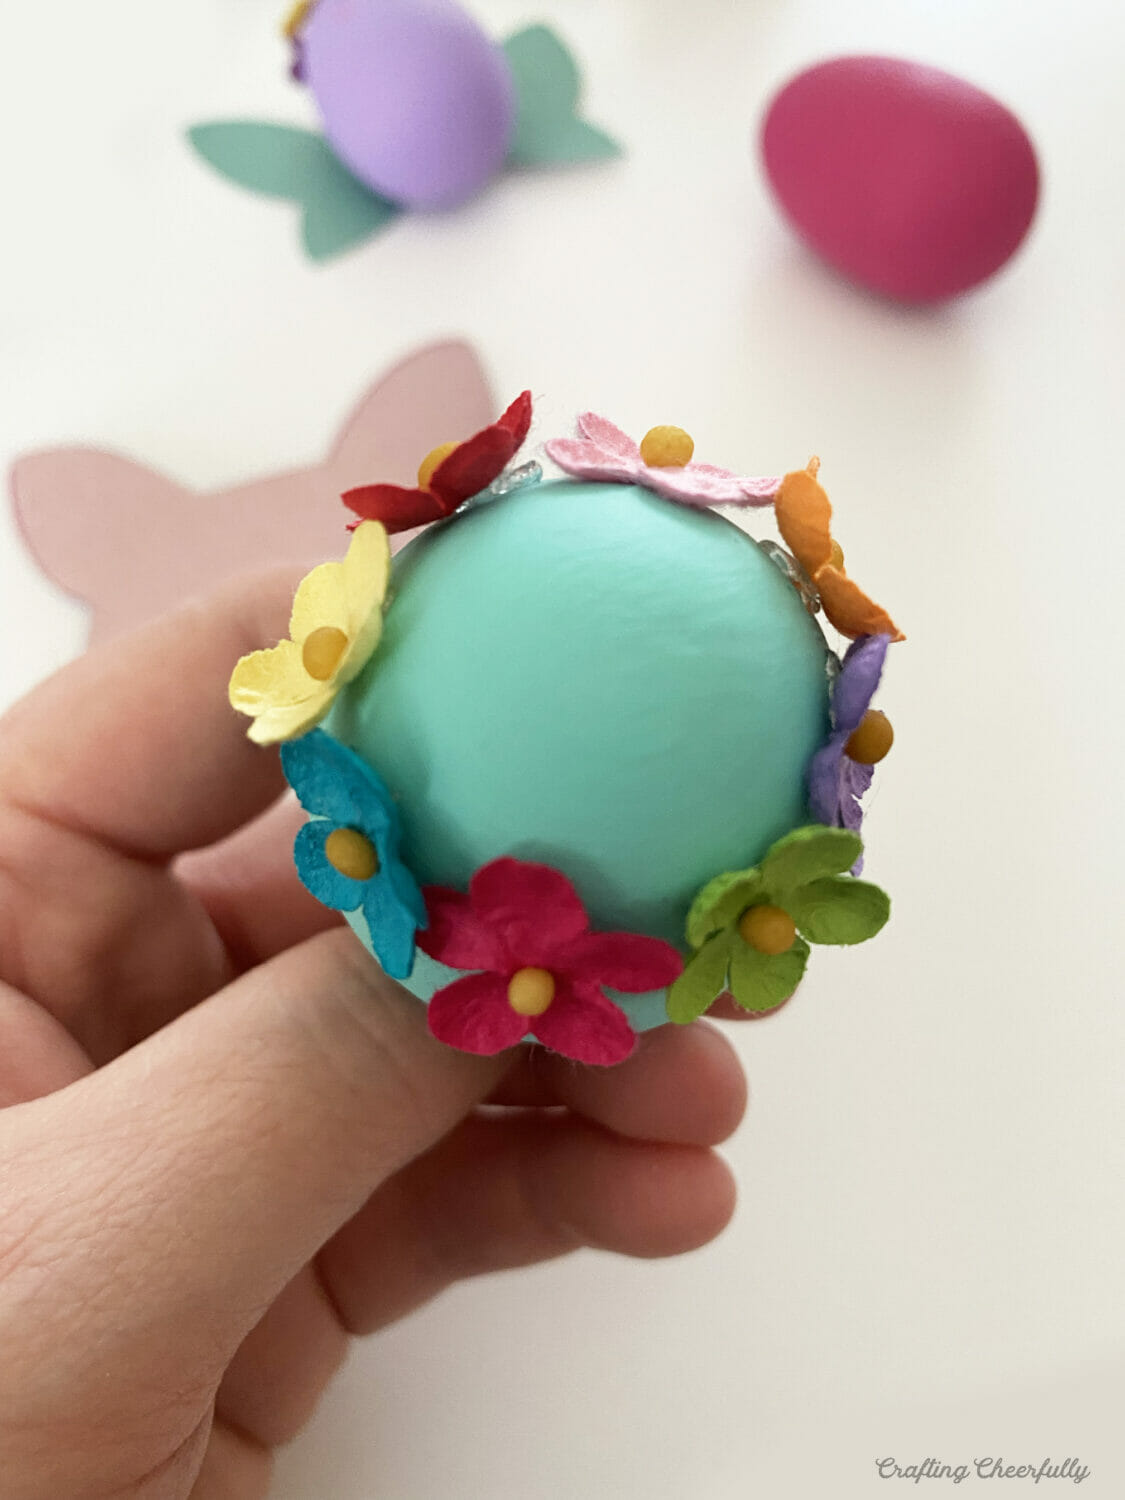
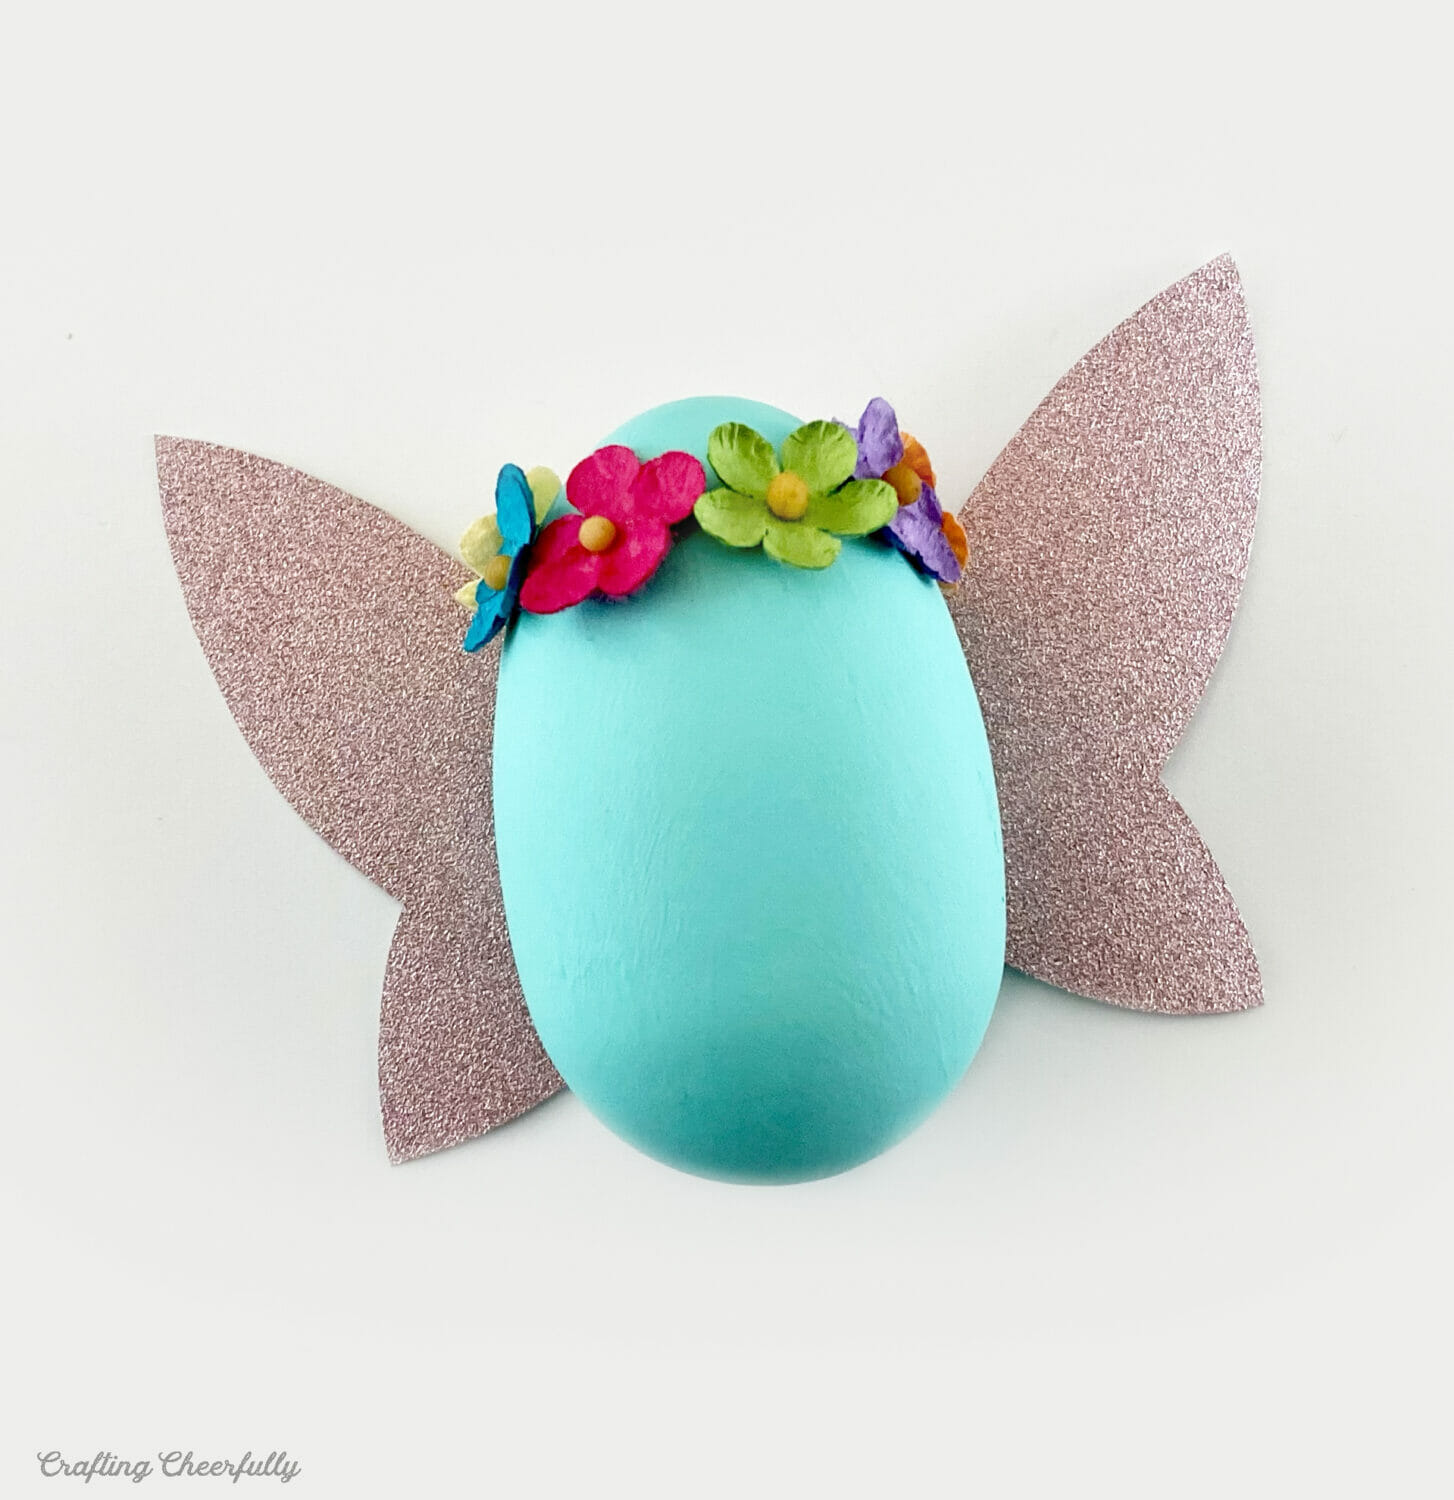
Step Two: Add a fairy flower crown. Create a sweet flower crown using tiny paper flowers. I found my flowers at Michaels and used little adhesive dots to attach each one.

Step Three: Give each fairy egg a set of glittering wings! I used my favorite glitter paper, the Glitzy stack by DCWV. I like it because the paper is super glittery without leaving glitter on your hands when you touch it. There is a free template in my Resource Library you can use as a guide to cut the wings.
Step Four: Give each fairy egg a face. Use pencil to draw a face on the egg, then use a black Sharpie to trace it. Add rosy cheeks using a pink colored pencil or pink paint.
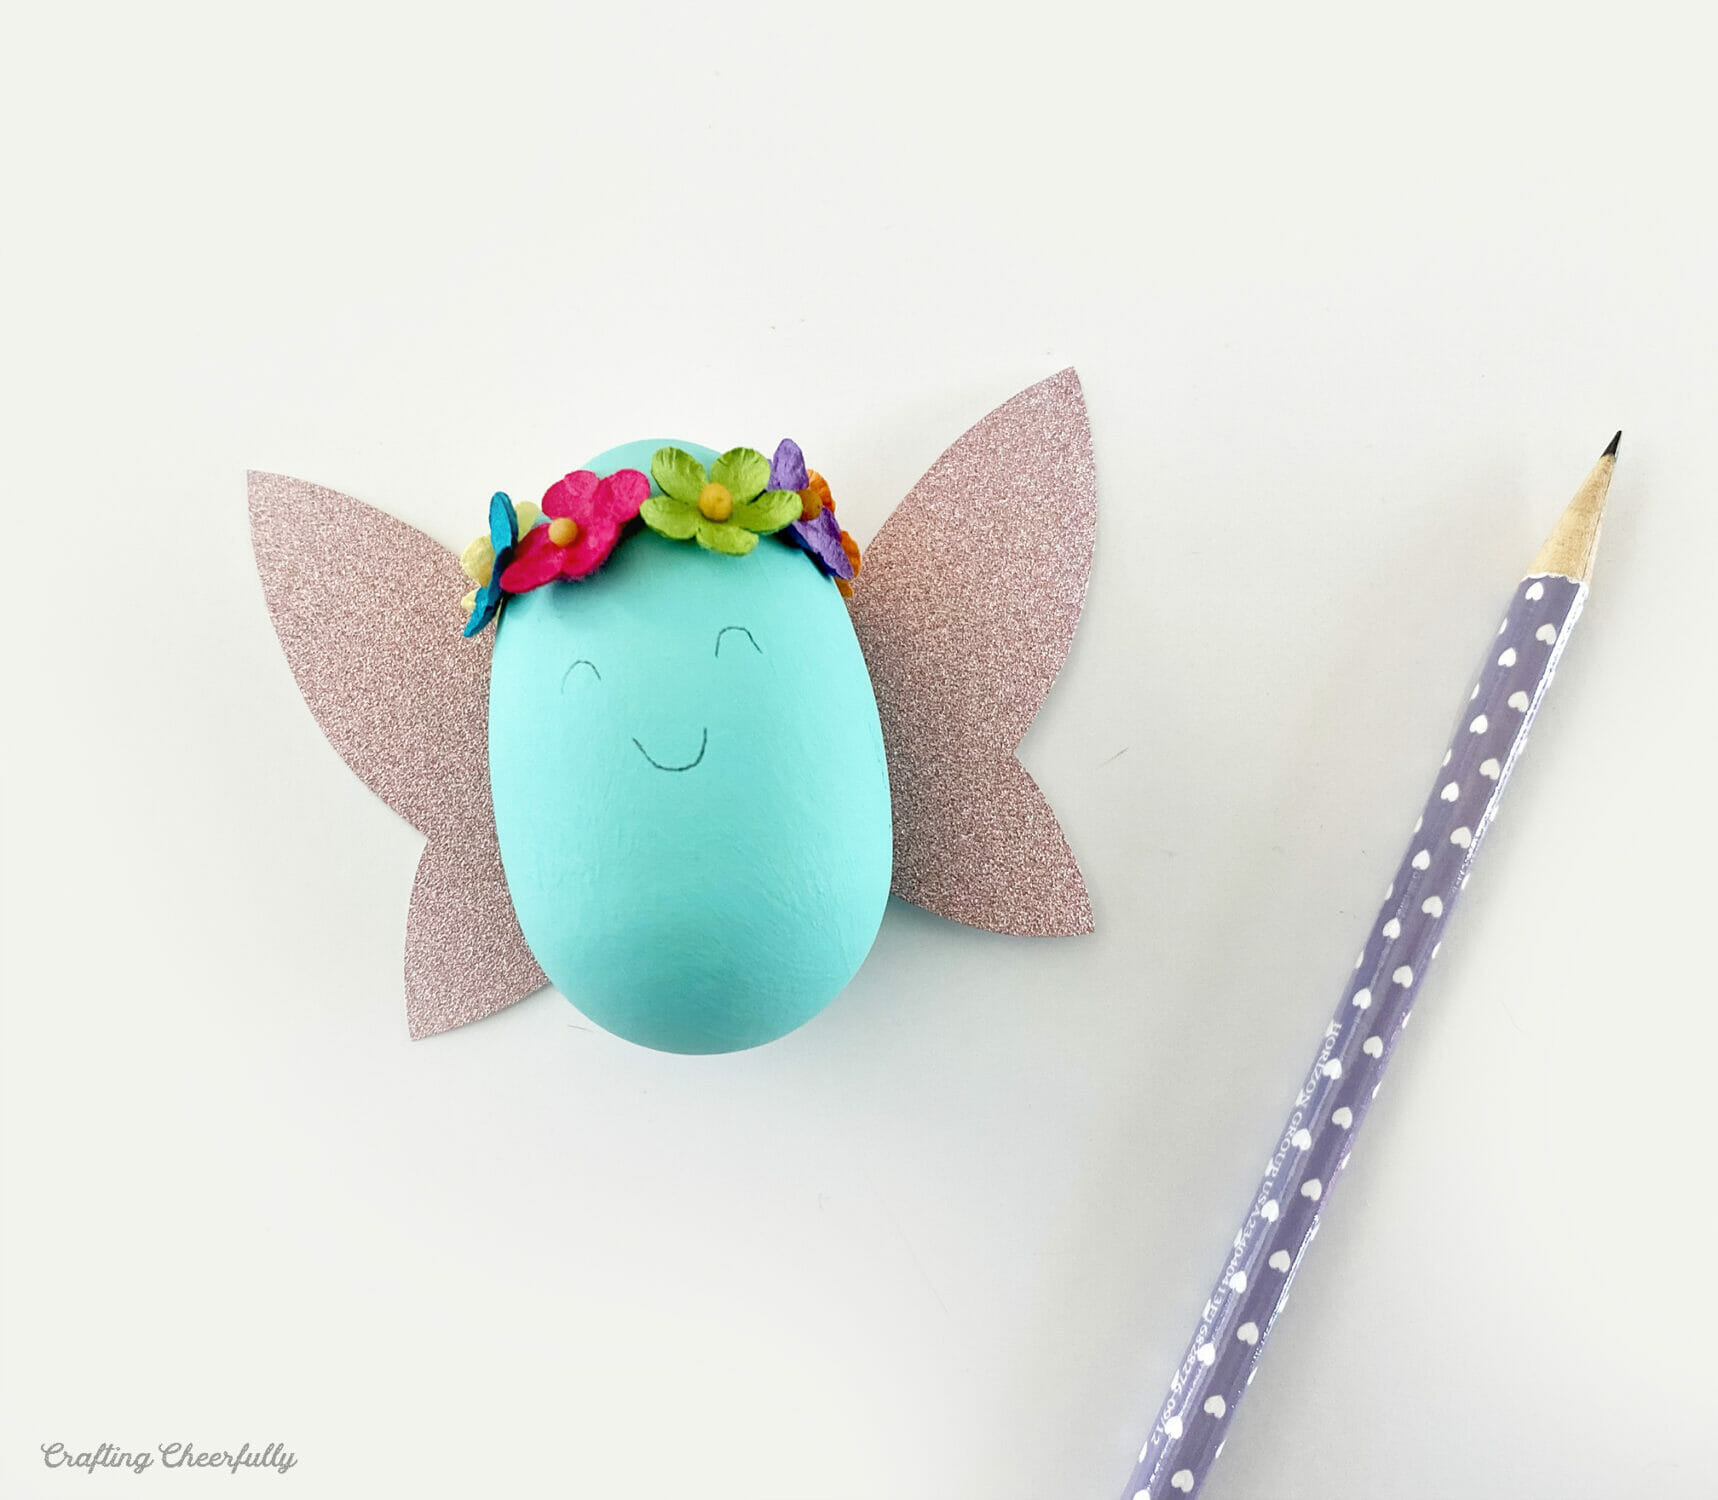
The fairy eggs are finished! I loved mixing the colorful paper, paint and flowers to create each fairy. They are perfect for spring-time and SO much fun to make.

I hope you enjoyed this sweet Easter craft :) Be sure to visit my Easter crafts page for more fun DIY craft tutorials for the holiday.

Get the Free Fairy Easter Egg Wing Template!
Fill out the purple form below with your first name and email address! The free file will be sent straight to your inbox! If you have already filled out the form below, don’t worry – you won’t be added to my list twice! This freebie is for personal use only. I hope you enjoy crafting something special. Please let me know if you have any questions :)