
DIY Fox Notepad – Free Pattern and Cut File
Create a fun DIY Fox Notepad! The first in my series of animal notepads! These notebooks are made with scrapbook paper to fit a 3″ x 5″ notepad.

Hello crafty friends! I have a fun DIY project to share with you today – Fox Notepads! I made these cute little foxes to give out as game prizes at our Woodland Animal birthday party. Since the majority of our party guests were adults, I wanted to make something they could use after the party, yet something that was still “in theme” and fun.
I had a bunch of 3″x5″ notepads left over from a different project, so I decided to use those and make them into foxes. They took a little while to plan out, but after a few trials, I had a nice pattern to use. I was pretty excited when I figured out I could close the notepads using the fox’s nose. It’s the little things :)

Since making these cute fox notepads, I have made a more animal notepads including a penguin, sloth, owl, panda bear and cat. They have made really cute and unexpected gifts for family, friends and coworkers over the years.
These notepads are a fun paper craft you can make with your cutting machine, or by hand with a little extra patience. I originally made my fox and penguin notepads by hand before having a cutting machine, so these are the easiest to do by hand. I hope you’ll give one a try!
Animal Notepads
- Fox Notepad
- Penguin Notepad
- Sloth Notepad
- Owl Notepad and Hedwig Snowy Owl Notepad
- Panda Notepad
- Cat Notepad and Halloween Cat Notepad

Below is the tutorial for the DIY Fox Notepad! These come together quickly after you get the hang of it. I made them assembly-line style and it went fairly fast. These are great because they take very few supplies – just paper, notepads and a black Sharpie! :)


How to Make a DIY Fox Notepad
Supplies Needed (with a Cutting Machine)
- Free Cut File – Grab the free file by filling out the purple form at the end of this post.
- 3″ x 5″ Notepads
- Cardstock – orange, white and black
- Adhesive – Double-Sided Tape or Glue Stick
- Cutting Machine and mat
- VELCRO Brand 3/8″ Thin Clear Fasteners *optional
Supplies Needed (Without a Cutting Machine)
- Free Pattern – Grab the free file by filling out the purple form at the end of this post.
- 3″ x 5″ Notepads
- Cardstock – orange and white
- Black Sharpie or black marker
- Adhesive – Double-Sided Tape or Glue Stick
- Scissors – a paper trimmer is also helpful
- Scoring Board
- Craft knife and mat
- Pencil and ruler
- VELCRO Brand 3/8″ Thin Clear Fasteners *optional

Step by Step Tutorial
Step One: Cut out the pieces using the free SVG cut file or PDF pattern.

Step Two: Score the pieces that wrap around the notepad. If you are using the cut file with a machine that scores, this step will be done for you. You can also score by hand using a scoring board and stylus. Follow the scoring guide that comes with the pattern to see where you should score.
Step Three: Create the fox’s ears. If you are making this notepad without a cutting machine you will need to make the fox’s ears. Mark 5/8″ in from either side along the top 1/4″ score line.

Once you have your marking, draw two lines from it. One straight up, the other diagonal to the corner. You will now have two triangles. Use a black marker or Sharpie to color a smaller triangle for the center of the fox’s ears. Next, cut along the pencil lines to form to ears.


If you are using the cut file the ears are already formed. Add the small black triangles to them with a glue stick or glue pen.

Step Four: Create the fox’s head. Start by glueing the white curved triangle pieces to the top of the fox’s face. Then use a black marker to draw the eyes and nose.

Use a black marker or black Sharpie to mark two eyes and color a nose. If you are using a cutting machine, glue the eyes to the fox face and wait to add the nose.

Step Five: Attach the fox’s head to the body. Start by creating a slit for the body to attach to the head. If you are using the cut file, skip ahead to the next step. Mark 5/8″ in from either side along the score line closest to the flat edge.

With a craft knife and cutting mat, carefully cut between the two markings along the score line.

Slide the fox head and body pieces together and glue both flaps down with a glue stick. The center flap of the fox body piece will be inside and not visible from the outside. You will be left with two ears poking up.
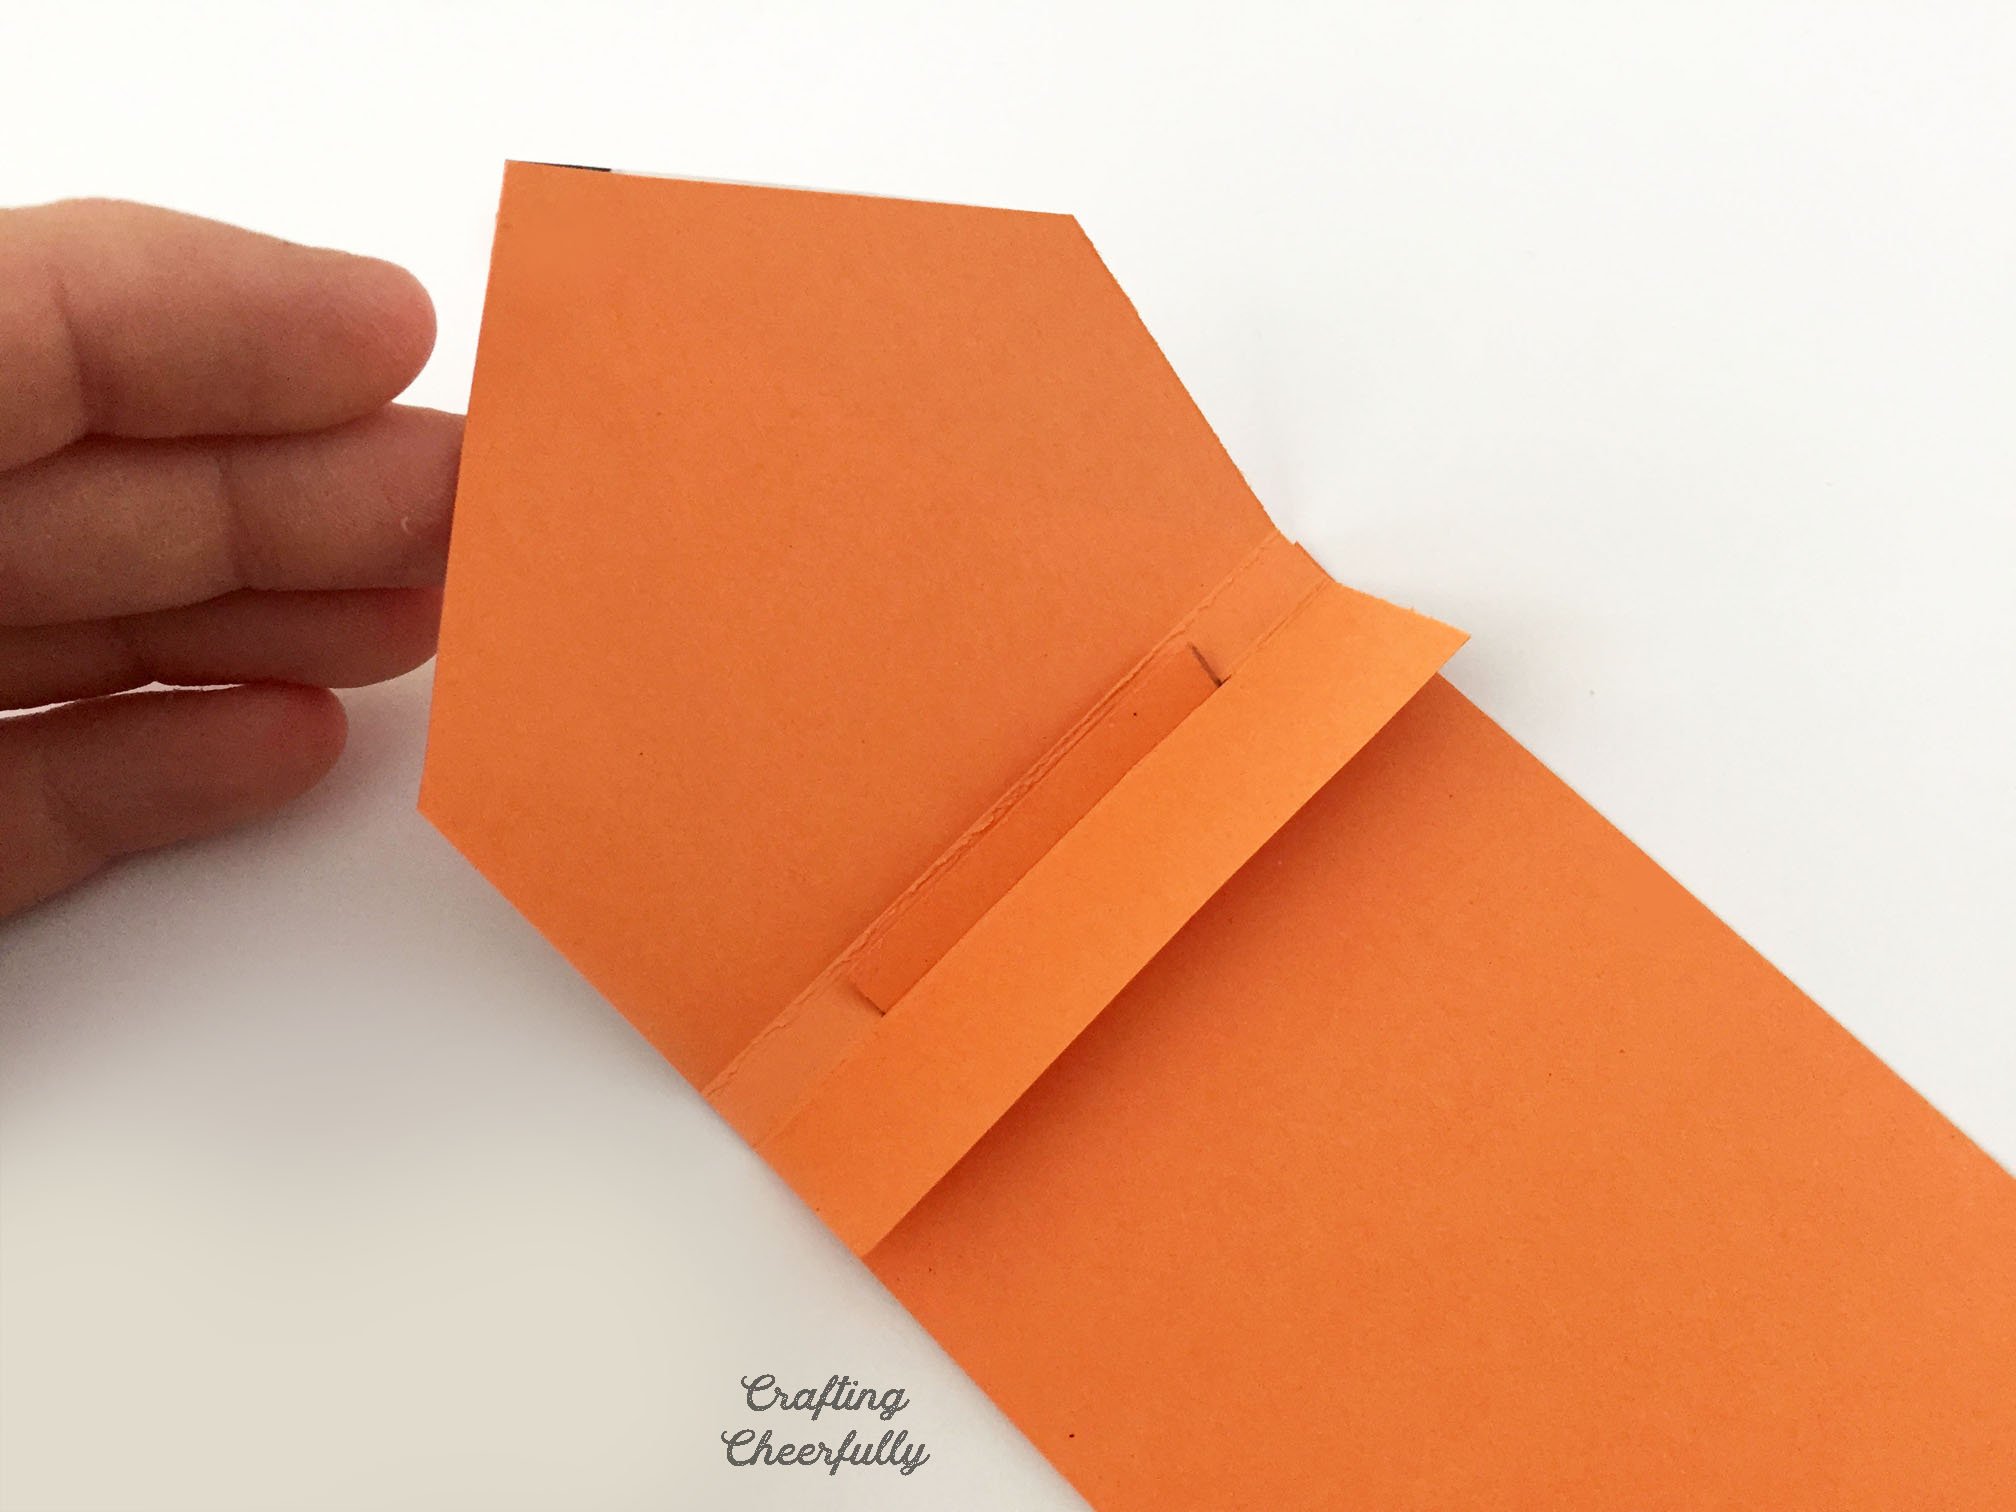

Step Six: Cover the notepad and insert the notepad. Cover the top of the 3″ x 5″ notepad with the small rectangle piece. Fold it around the notepad and adhere it into place using a glue stick or double-sided tape.

Next, attach the main body of the fox to the notepad. Cover the back of the notepad in adhesive and attach it, making sure the top flap is also adhered to the top edge of the notepad.


Step Seven: Add a closure for the fox notepad. This can be done two ways! The first is to use a Velcro dot, or thin clear fastener to keep it closed. This is how my other notepads close. This fox notepad can be closed a second way, but creating a slot for the nose to slip into. To do this, close the notepad and mark around the fox’s nose. Draw a curved line to finish the nose and then color it in with black marker or Sharpie. Next, carefully cut along just the top of the nose, along the curved line you drew. Make sure to place the cutting pad directly underneath the flap of paper you are cutting so you don’t accidentally cut through to the notepad. Now when you close the notepad, you can slide the fox’s face under the nose you just created. This will keep the notepad closed!

If you are using the cut file, there is already a cut out spot for the nose to close. Glue the black nose piece to the body of the notepad. You can then color in a nose on the fox’s face for when the notepad is open.

Step Eight: Add the fox’s tail. Finally, add the fox’s tail to the front of the notepad. Carefully draw around the tail with a thin black Sharpie to outline it.


If you are using the cut file, layer the white and orange pieces with the black pieces before adhering the tail together.

The fox notepad is finished! You can add cute details to it if you’d like, like the flowers I added to some of mine!

The fox notepad is finished! I love how cute these little notepads are! After making one they really do go quickly. These make adorable party favors, party prizes, gifts or are great to make for yourself! Who wouldn’t want to jot down a few notes on a cute fox notepad? :) For some of my notepads I added cute flowers
 I have a few more project tutorials to share with you from our Woodland Animal party. I also have the tutorial (and free template!) for my Storybook Party Backdrop coming up after a bunch of requests from readers! Lots of exciting projects this month so be sure to visit again :)

Get the Free Fox Notepad Files!
Fill out the purple form below with your first name and email address! The free file will be sent straight to your inbox! If you have already filled out the form below, don’t worry – you won’t be added to my list twice! This freebie is for personal use only. I hope you enjoy crafting something special. Please let me know if you have any questions :)


Oh my gosh they are SOOOO cute!! I love them. Pinned and shared on Facebook. Thank you for sharing at Merry Monday!
Yay thank you!!
Love these. Thank you :)
Thank you!
This is such a cute idea!
Thank you!
I love these little fox notepads!
Thank you!