Felt Ghost Candy Holder
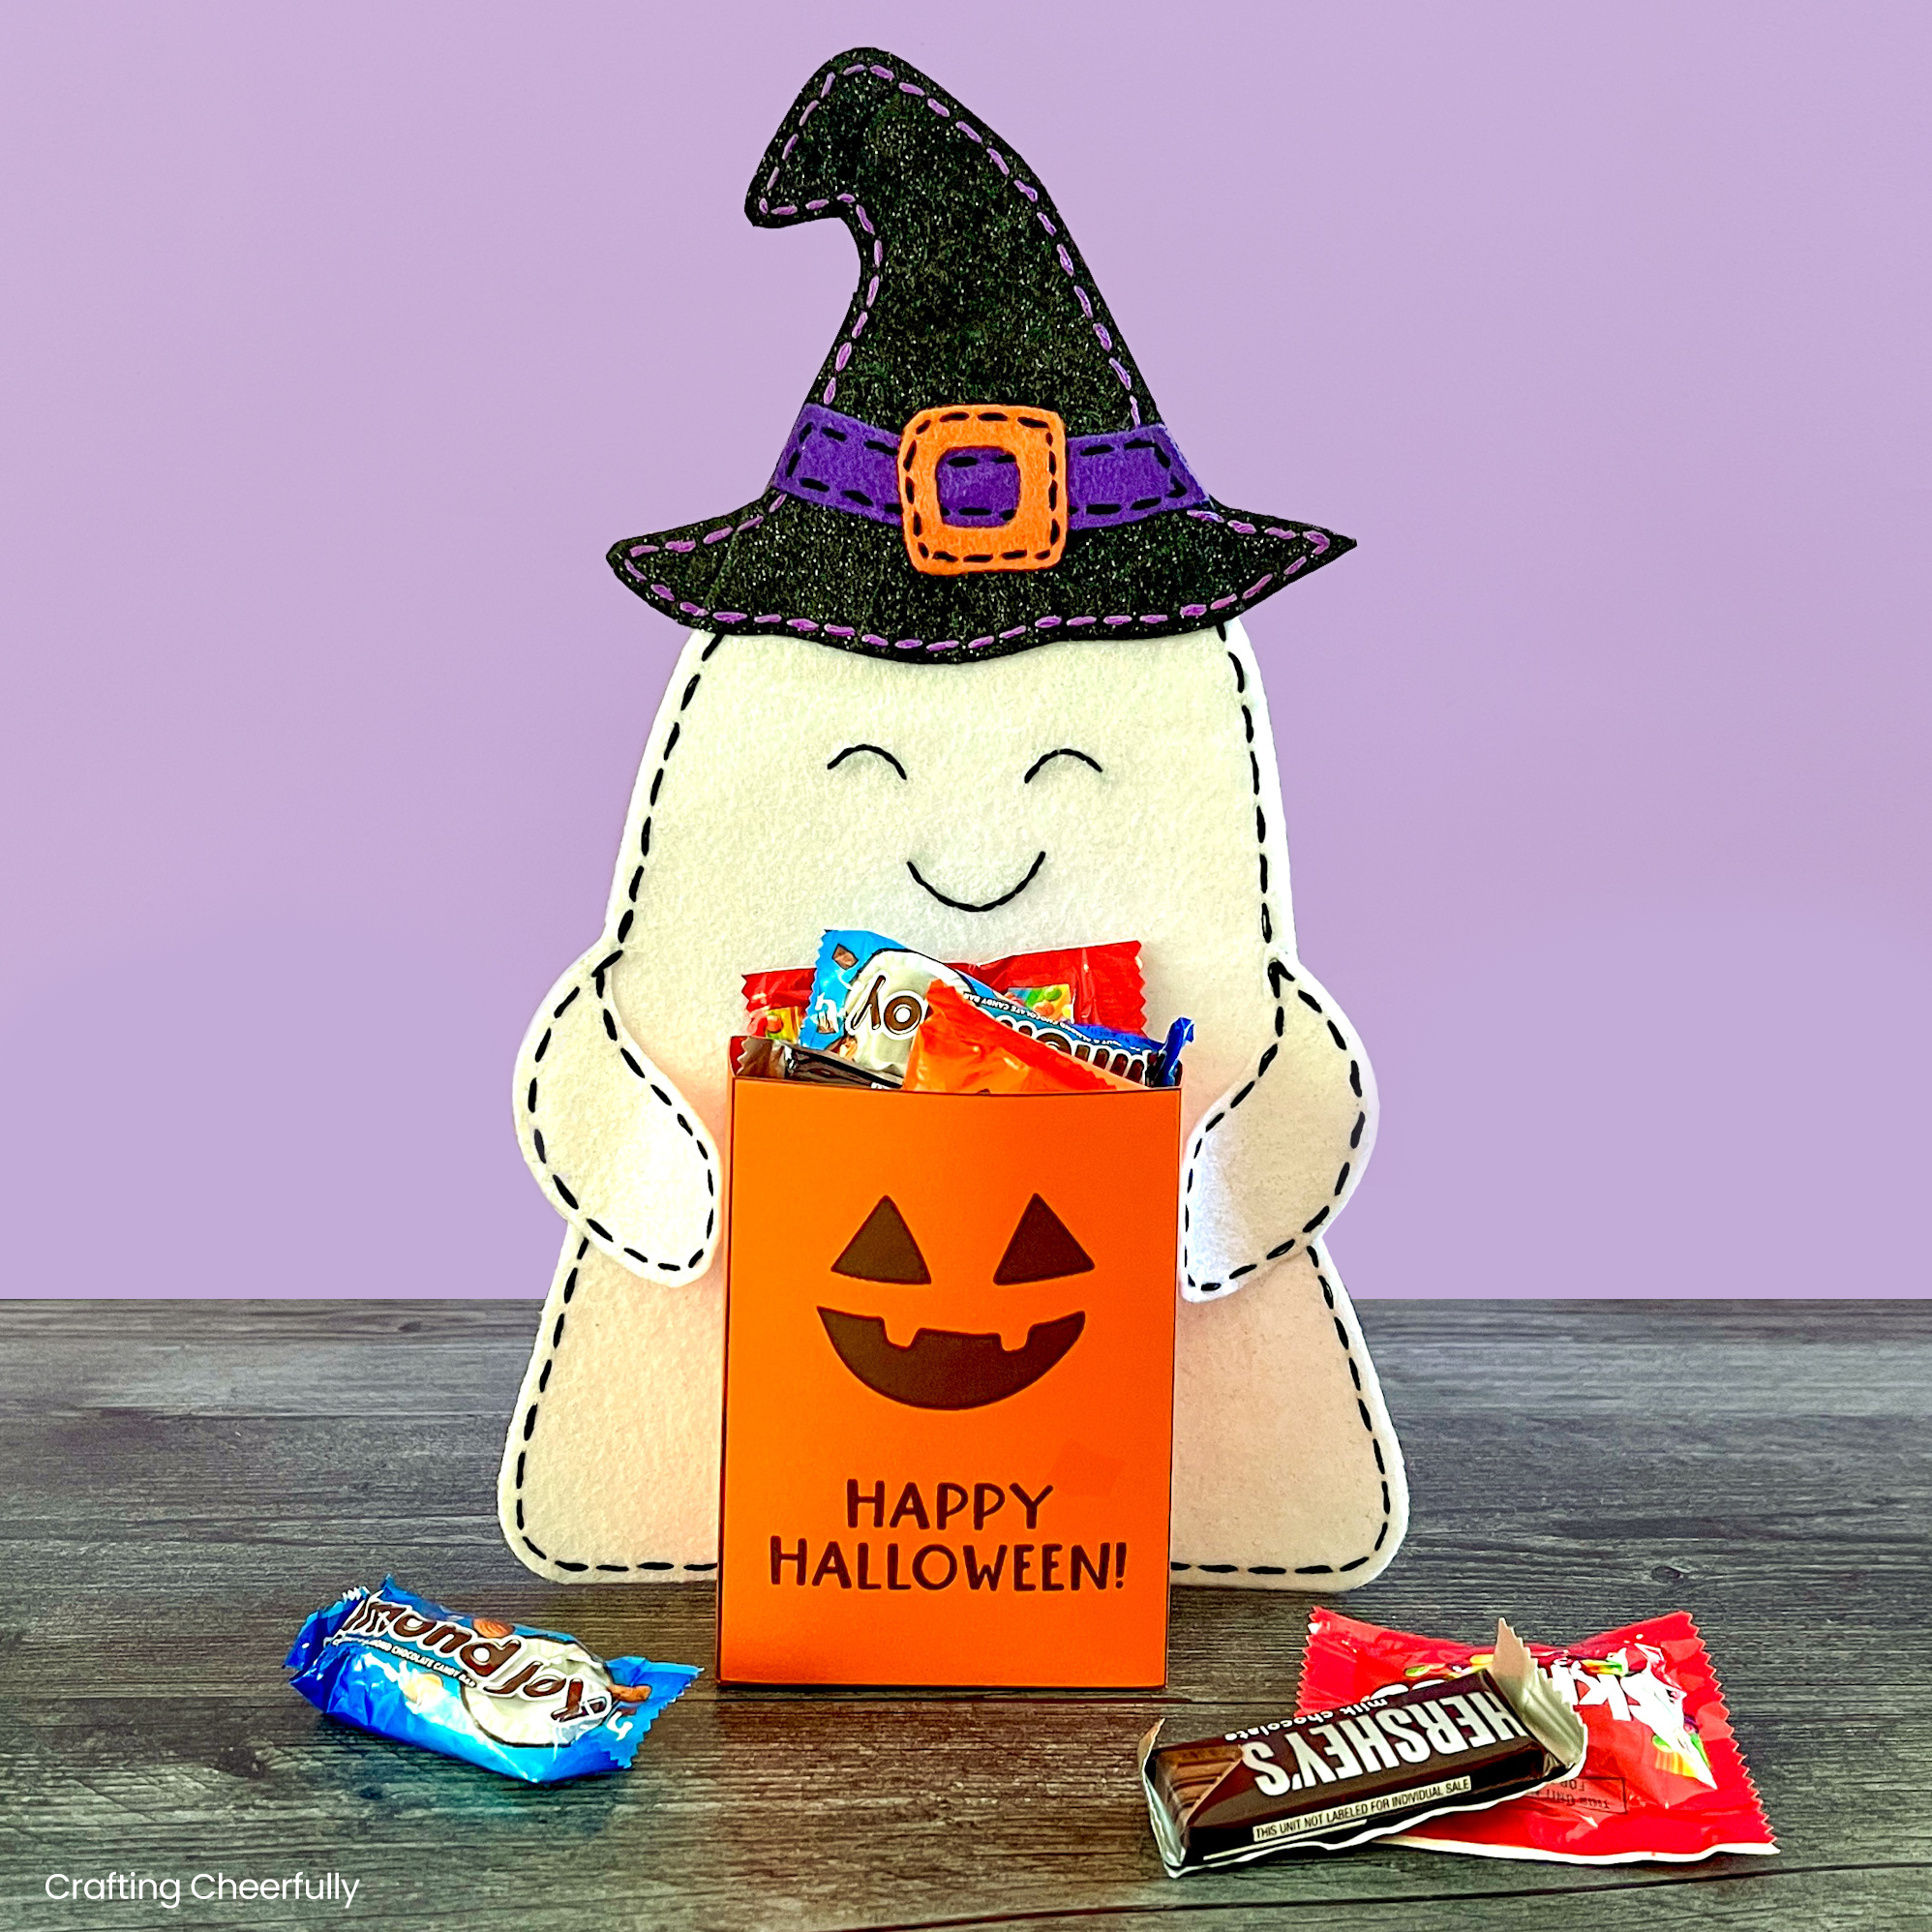
Create an adorable Felt Ghost Candy Holder for Halloween! This cute felt craft is perfect for displaying during the Halloween season. Fill it with your favorite Halloween sweets and treats!
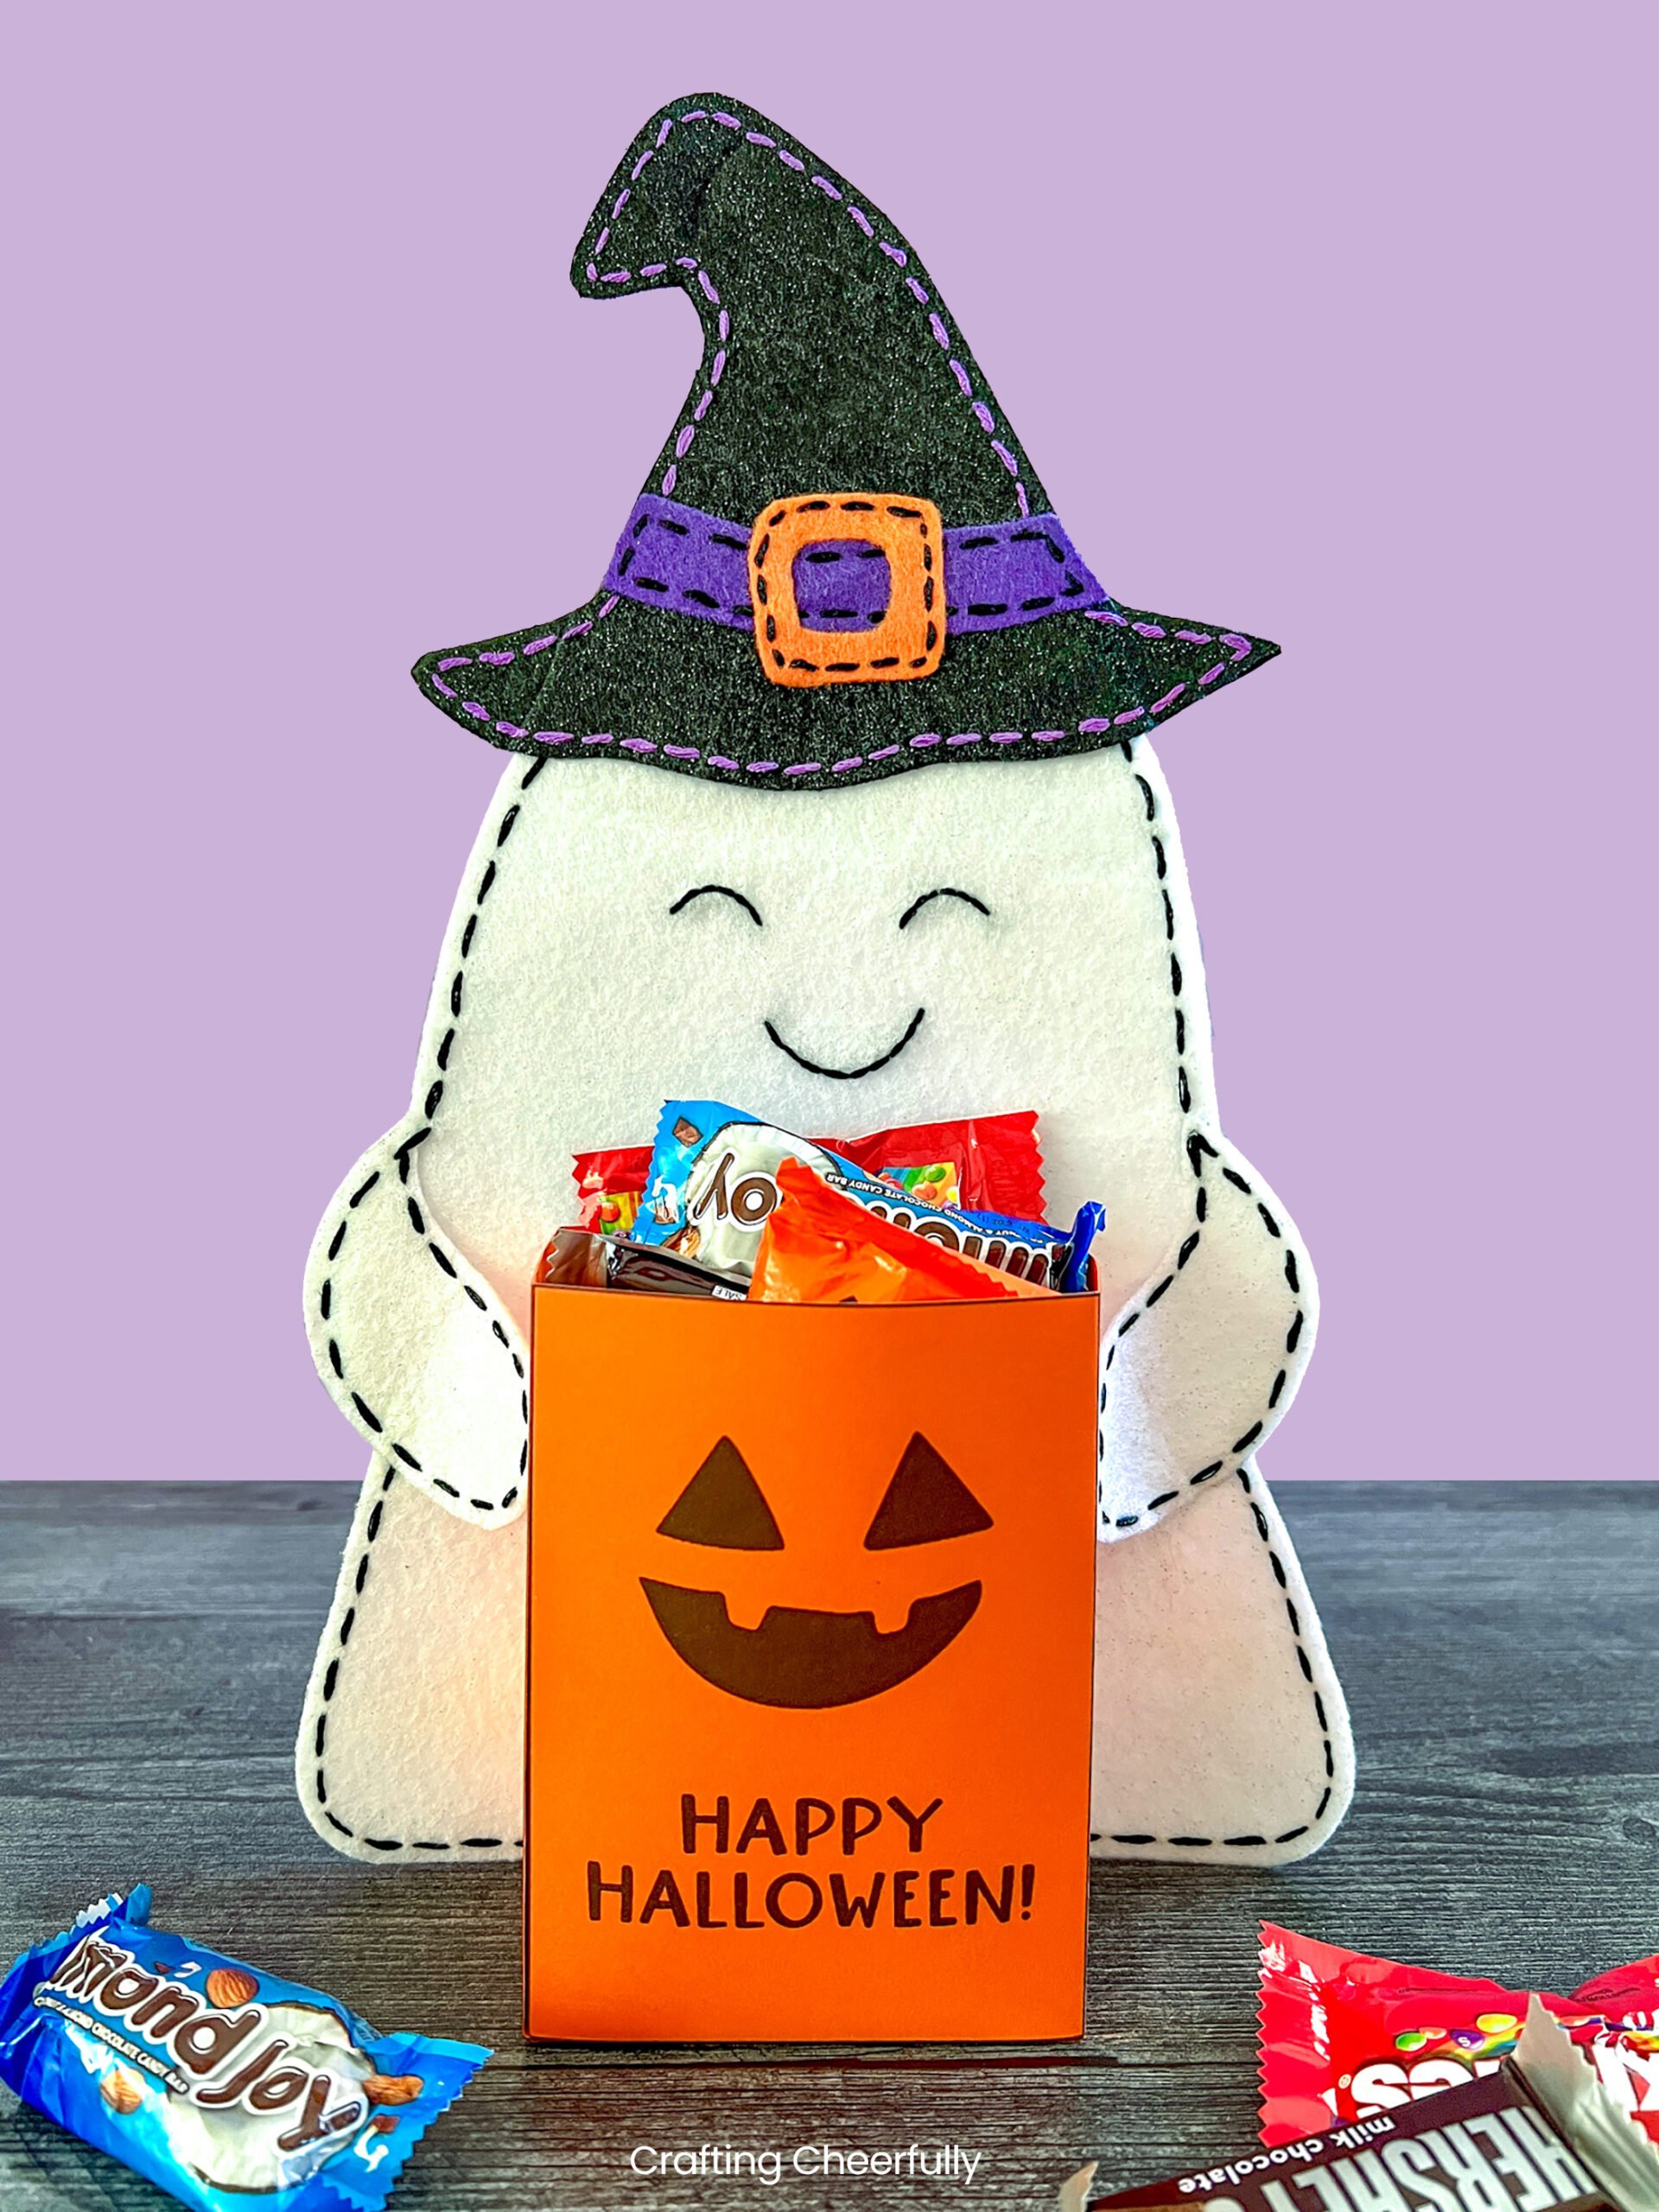
Hello Crafty Friends! Today I’m sharing how to create the cutest felt ghost candy holder for Halloween! Because really, what is better than a box of candy? An adorable ghost holding a box of candy! This fun felt project only uses a few supplies and requires only simple hand sewing.
This candy holder is perfect for displaying during the Halloween season in your home, at the office, or at school. It also makes a terrific gift especially if it’s filled with the recipient’s favorite treats!
You may recognize the jack-o’-lantern paper box the ghost is holding – I posted a tutorial for them yesterday! They make cute treat boxes on their own but can also be used for this ghost craft.
Below is the tutorial for creating this fun felt ghost. You can download the free pattern at the end of this post by filling out the purple box.
DIY Halloween Ghost Candy Holder
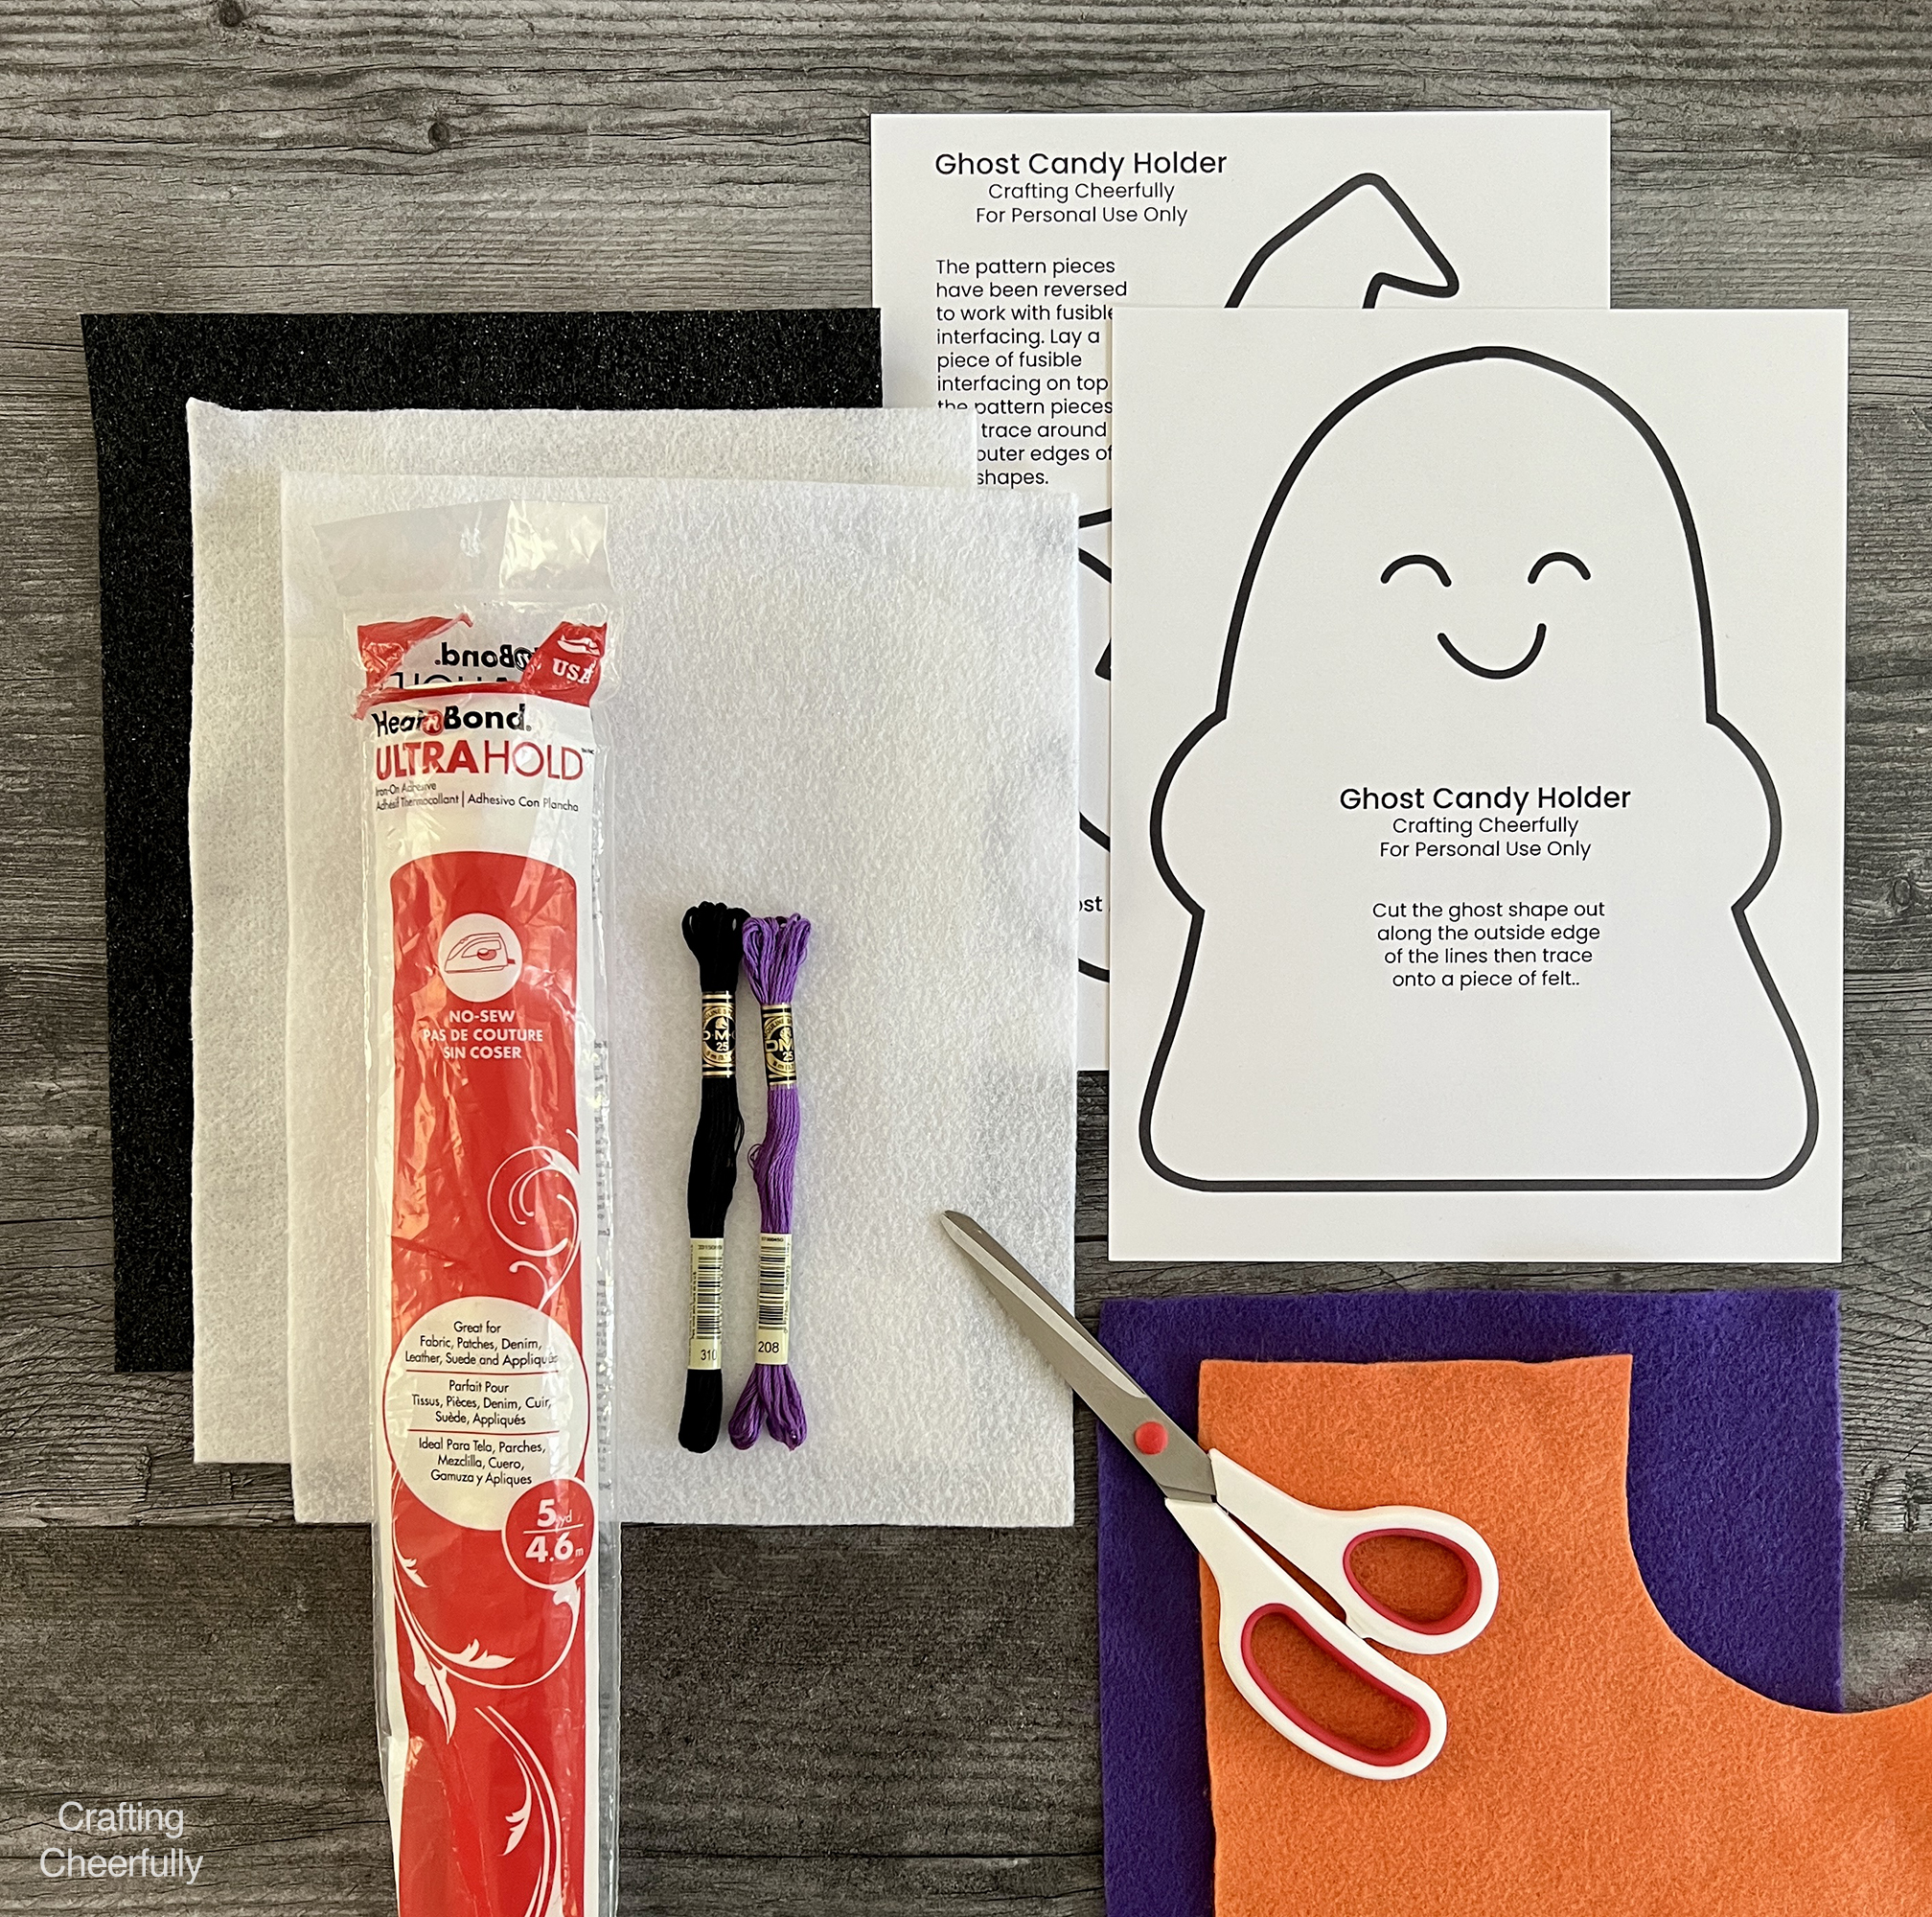
Supplies Needed:
- Ghost
- Free Printable Pattern – Grab the freebie by filling out the purple form towards the end of this post.
- White felt – 2 sheets
- Black, orange and purple felt – for hat
- Black and orange embroidery floss
- HeatnBond Ultrahold Fusible Interfacing
- Fabric scissors
- Pencil
- Pumpkin Treat Box
- Free Printable – Included with the Ghost Pattern
- 65lb Orange cardstock – two sheets of 8.5″ x 11″
- Double-Sided Tape
- Paper Trimmer and/or paper scissors
- Scoring board
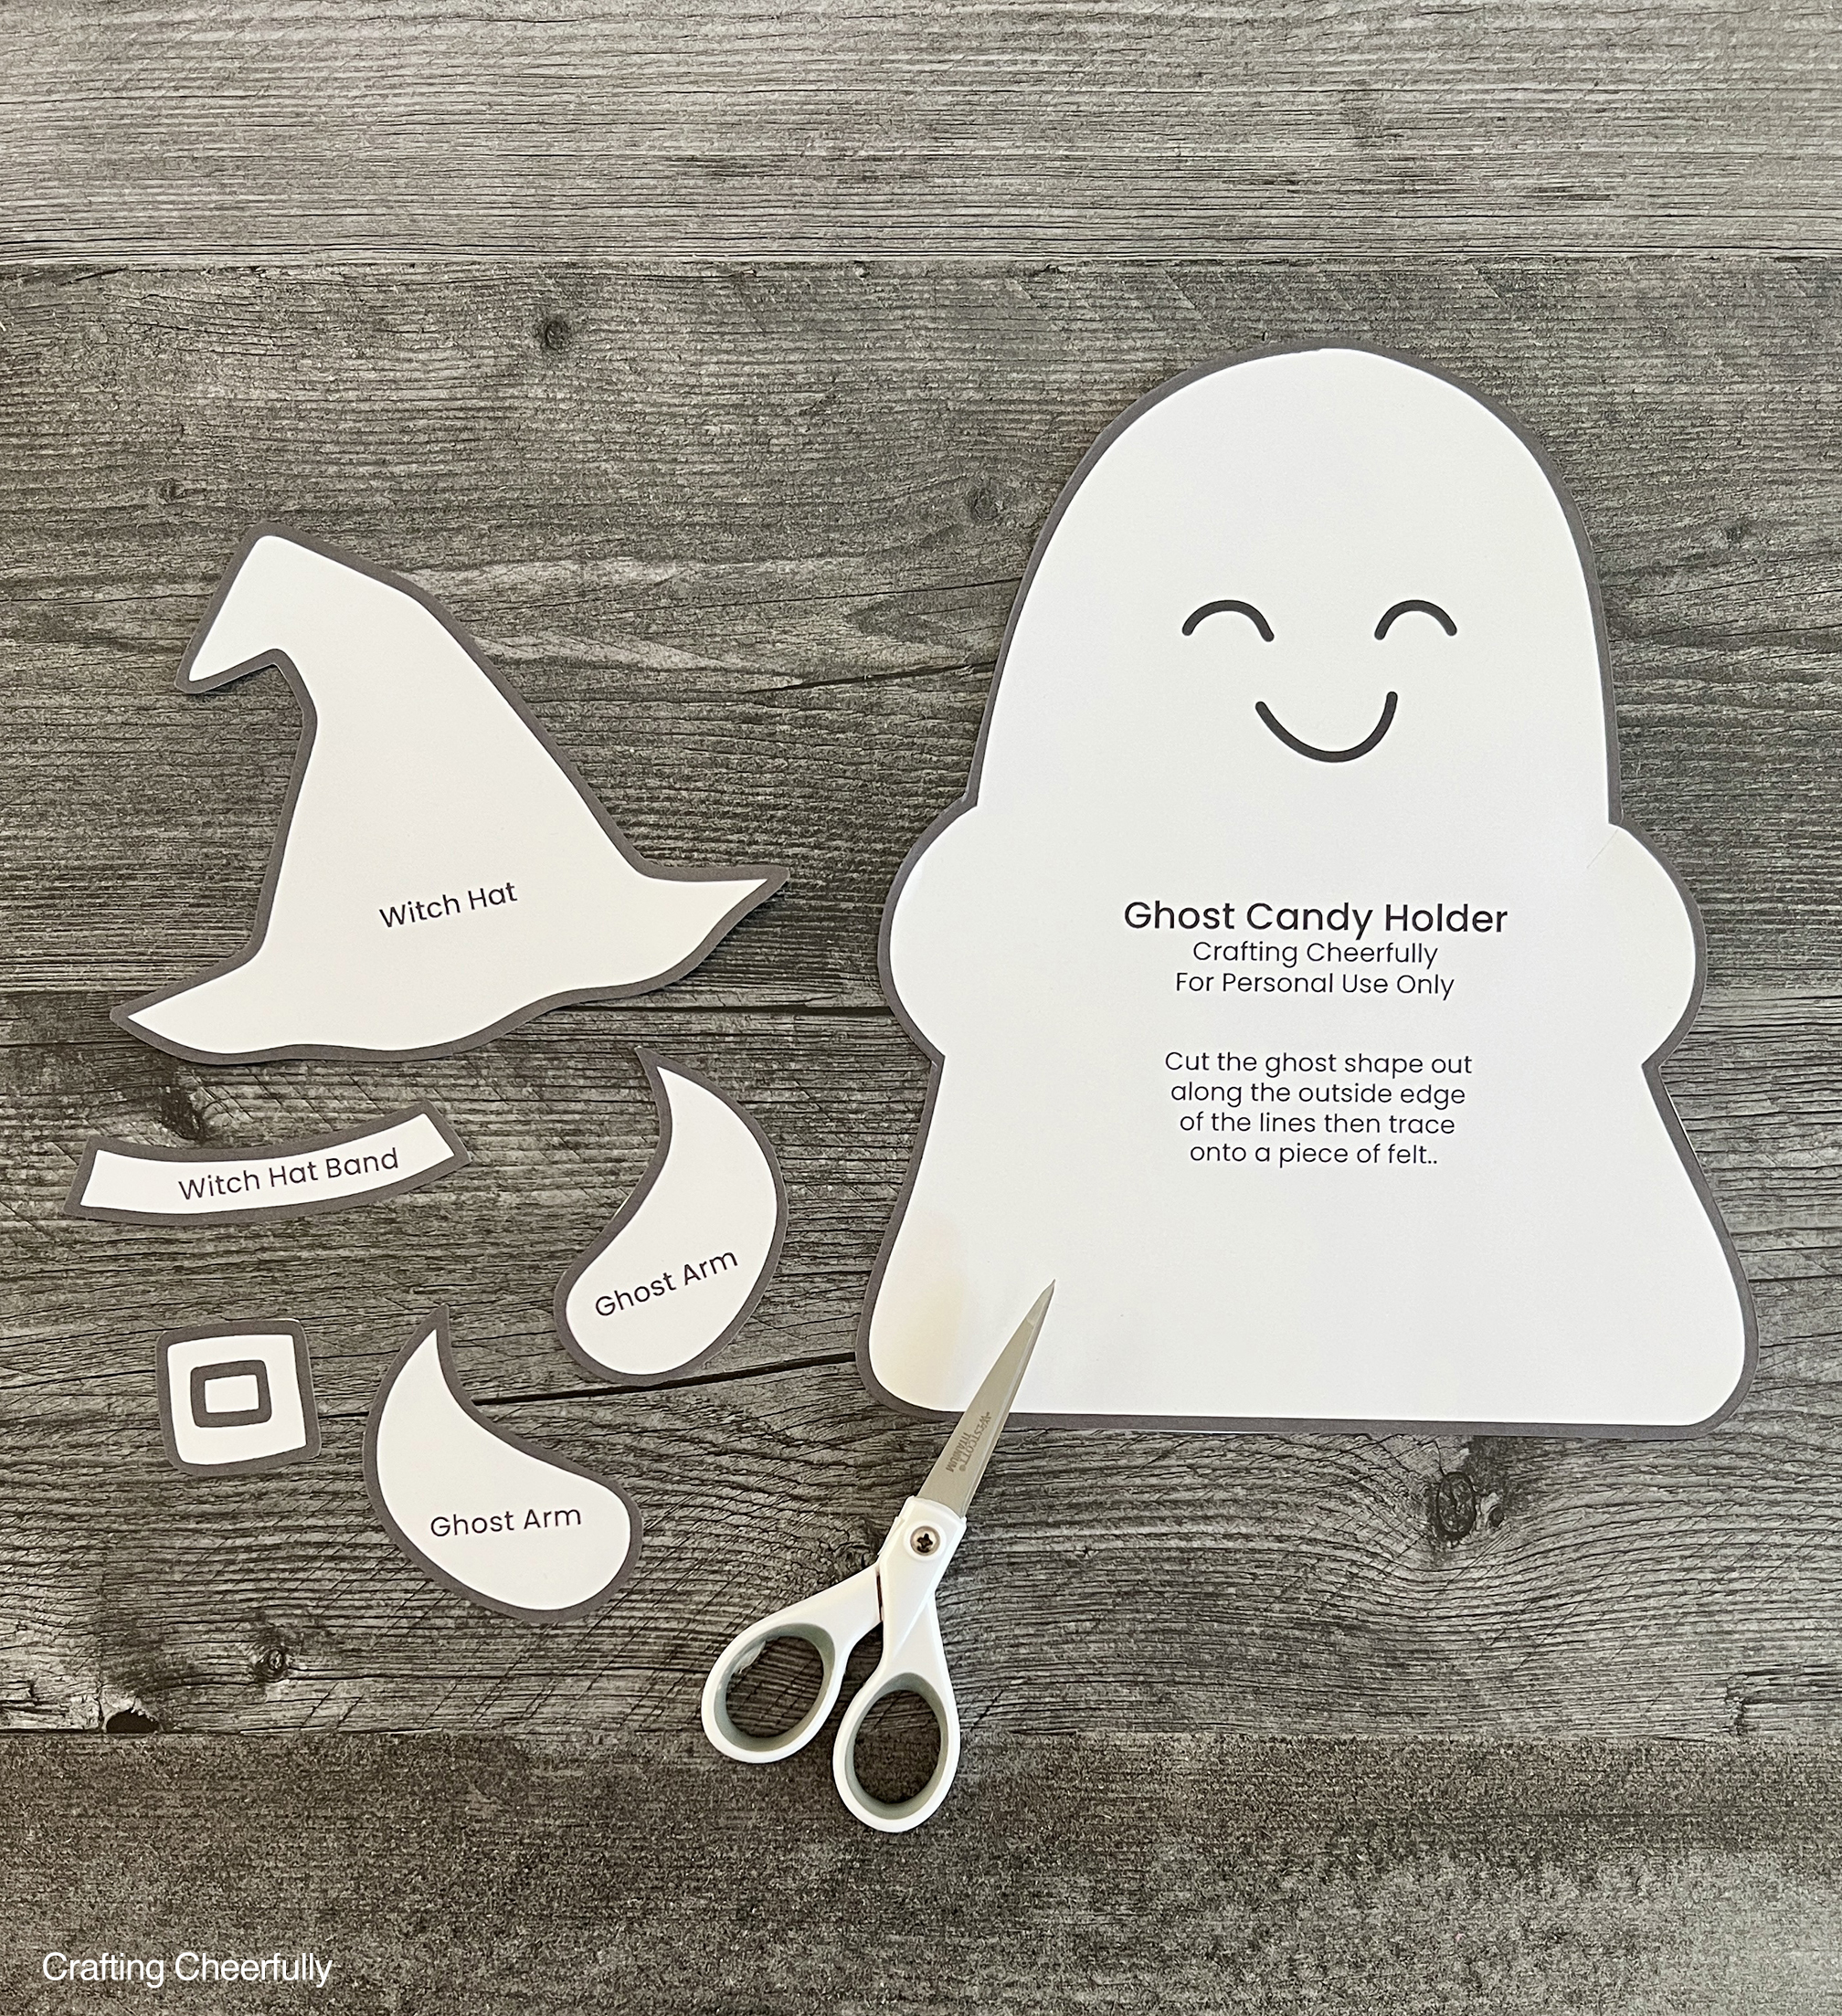
Cutting the Felt Pieces
Step One: Download, print and then cut out the pattern pieces. You should have a ghost, two ghost arms, a hat, hat band and hat buckle.
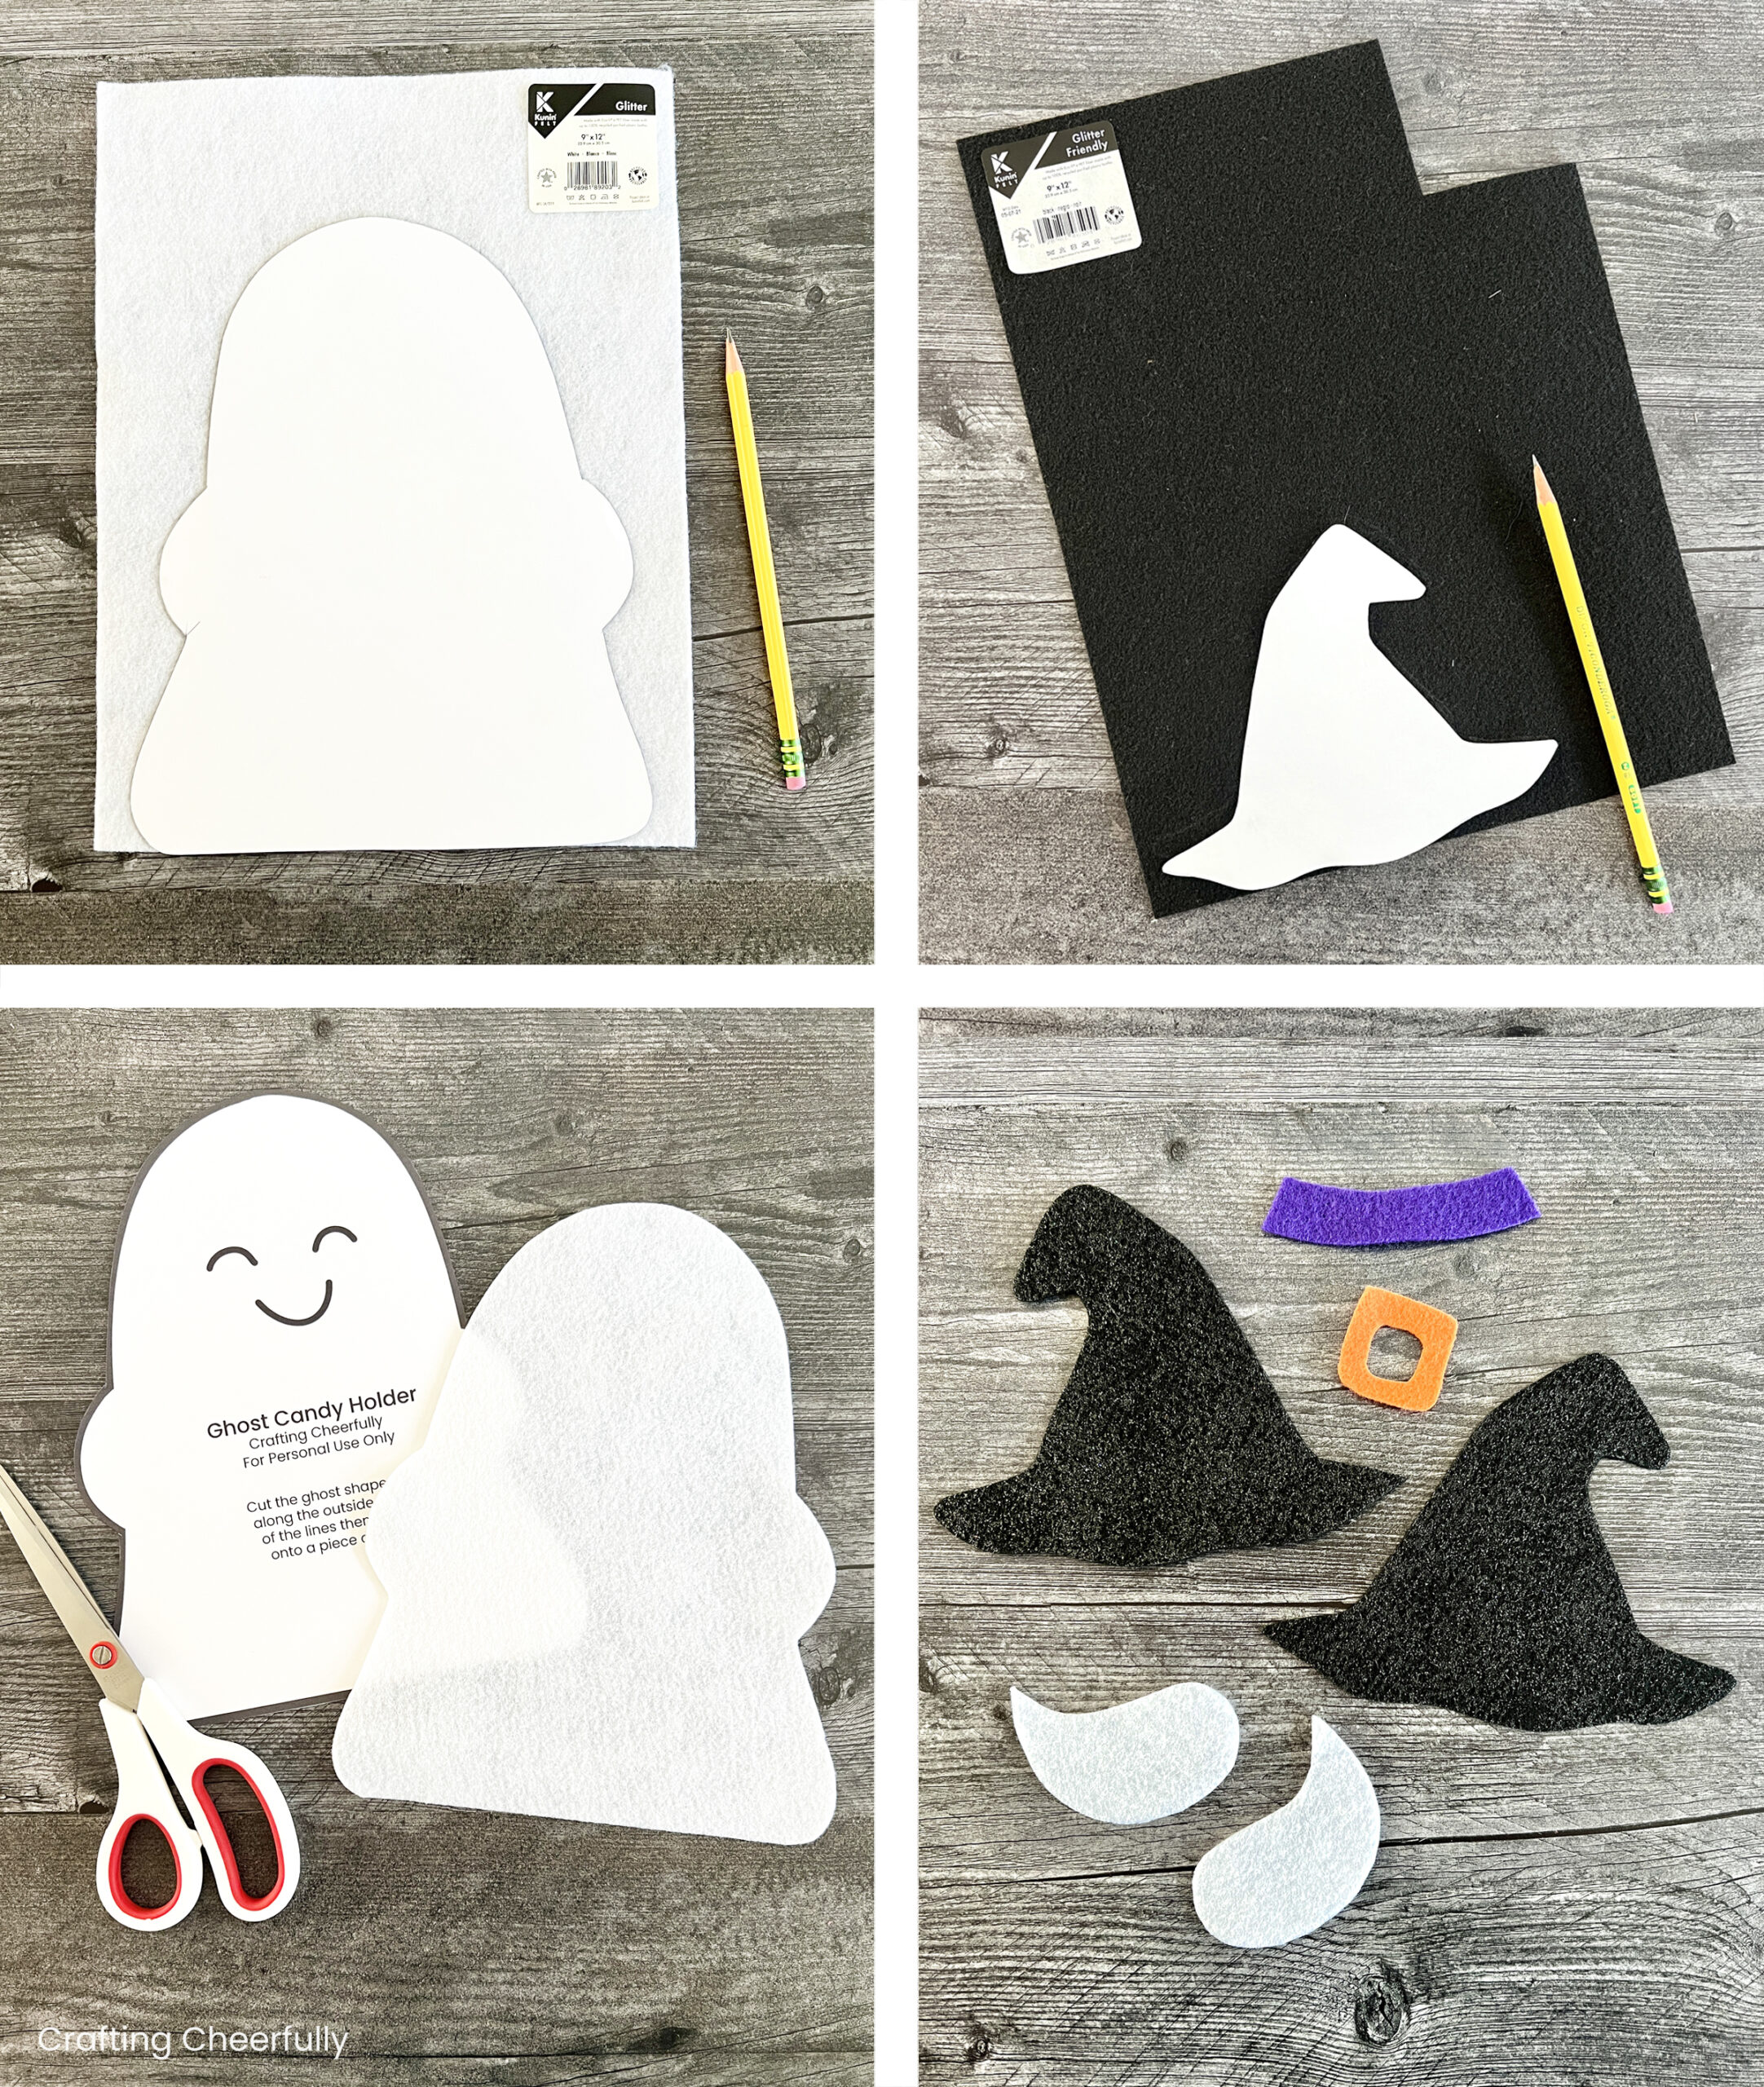
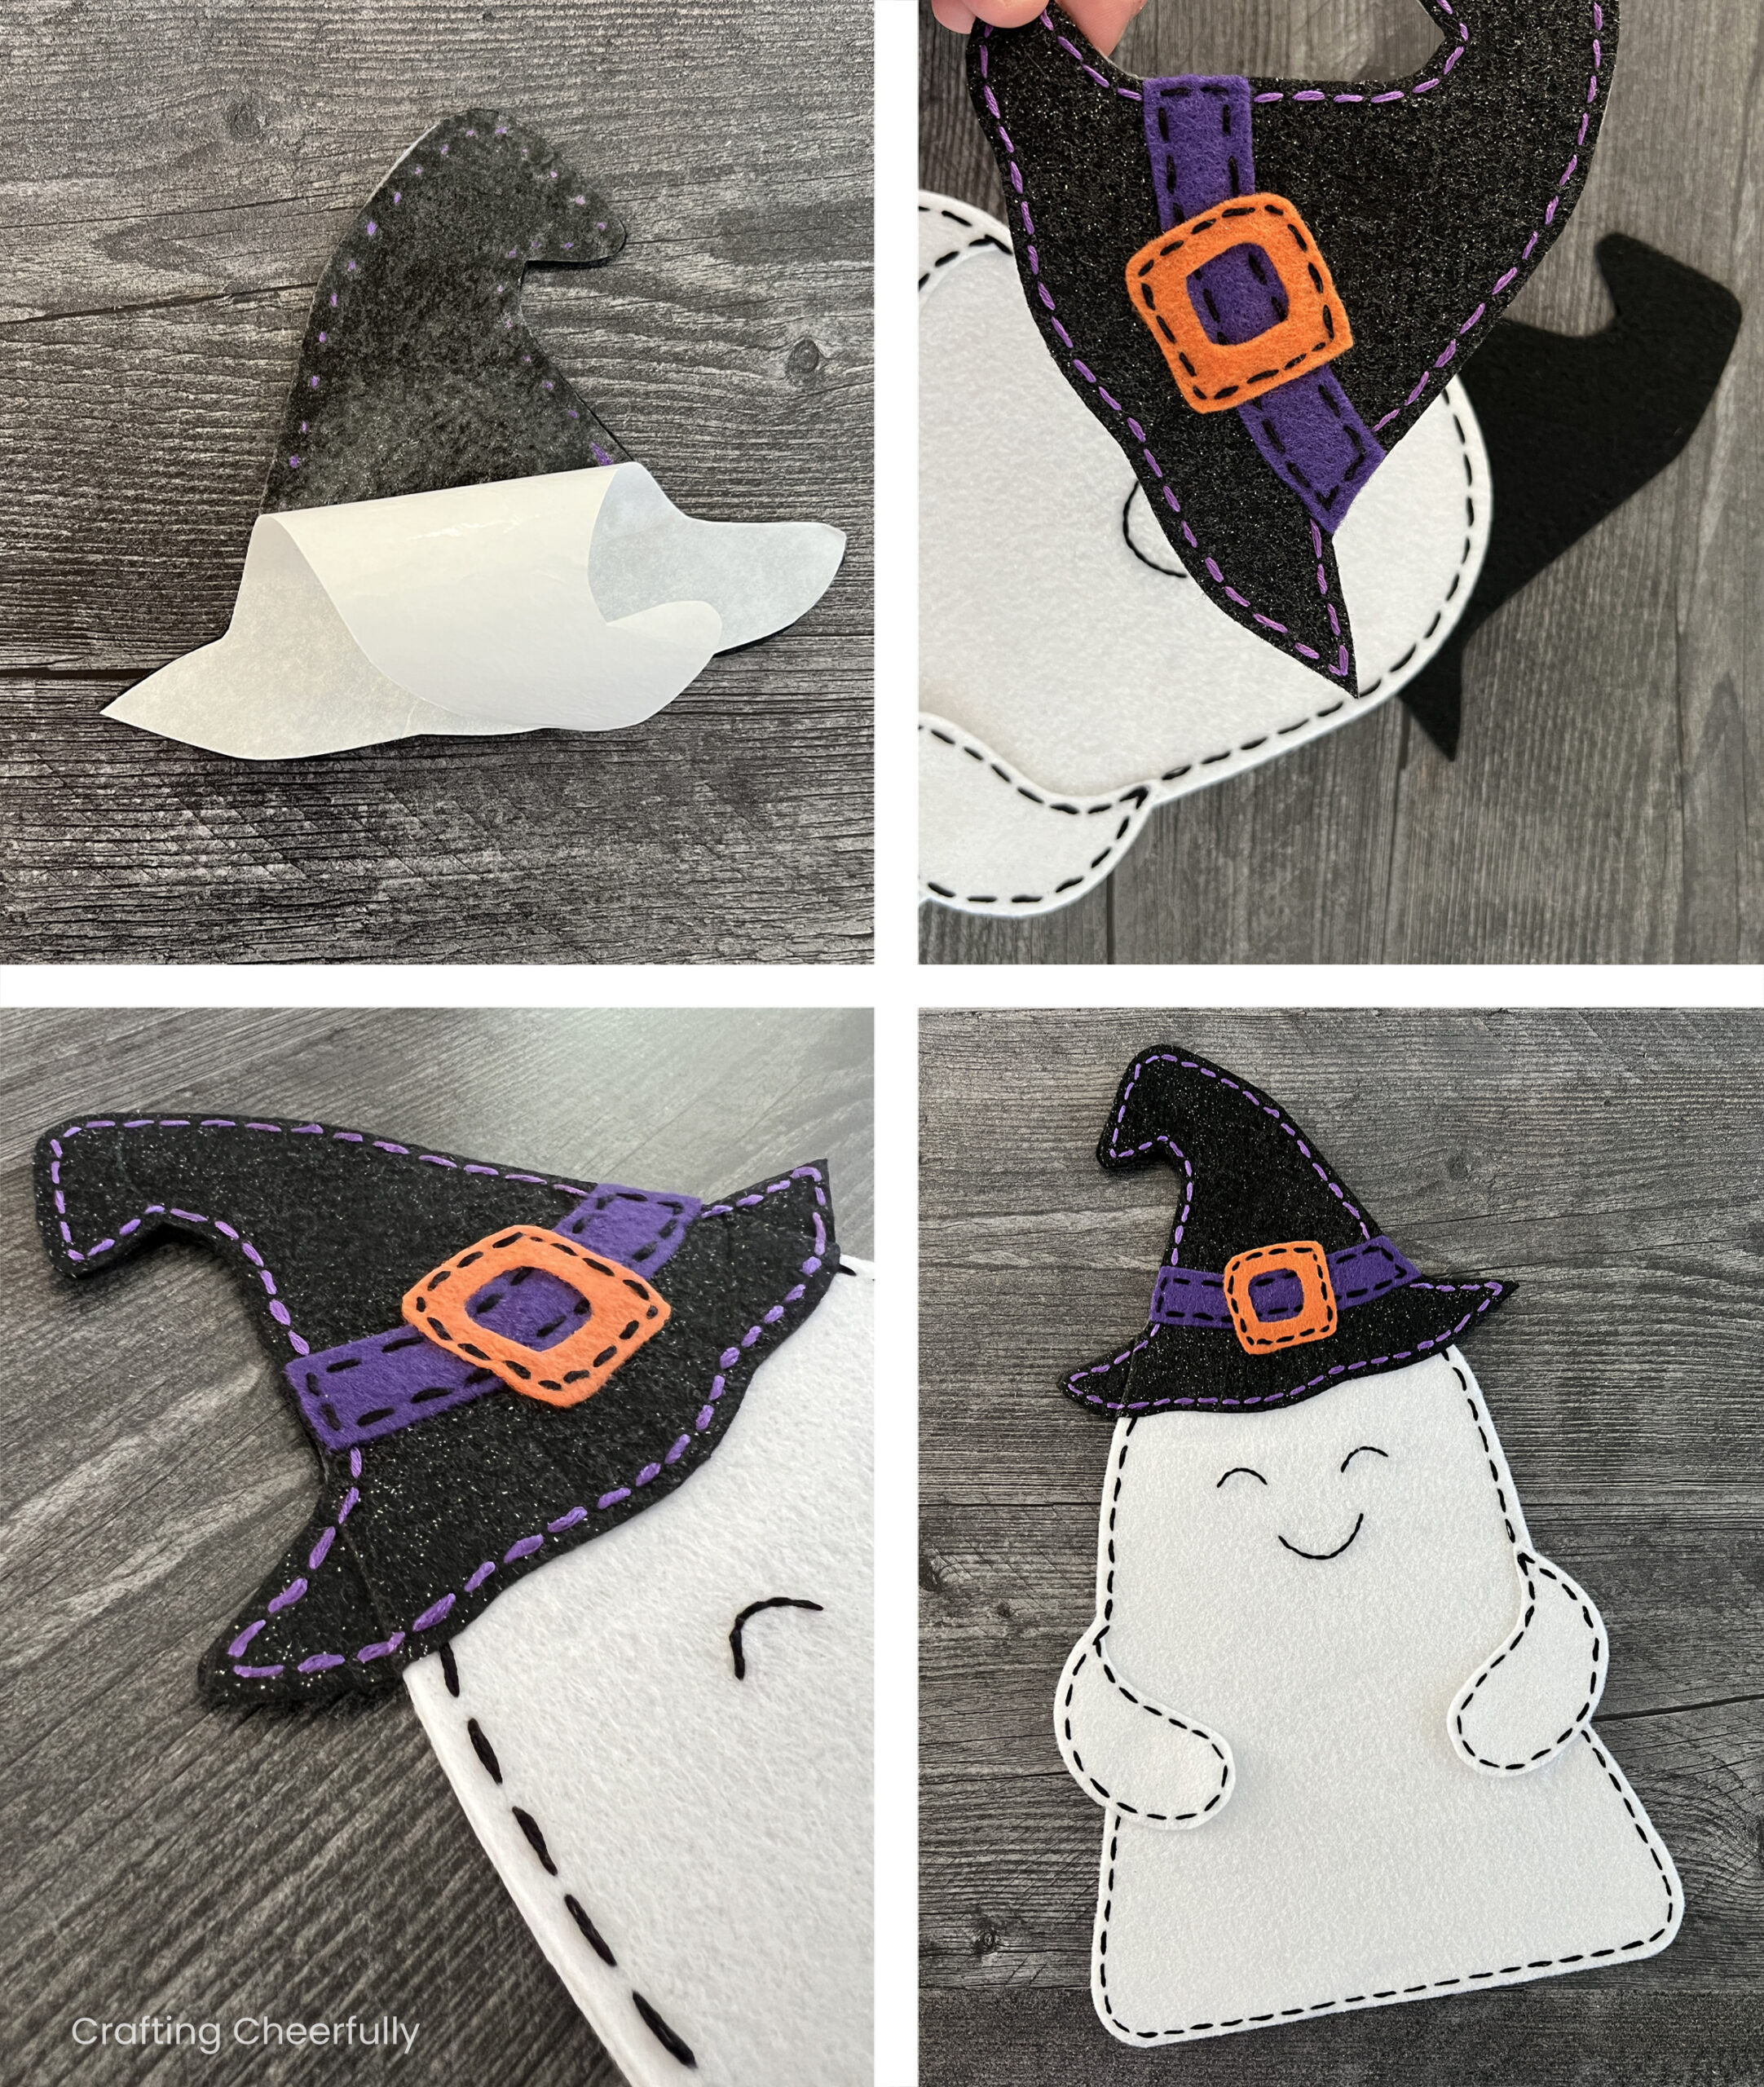
Step Two: Use the pattern pieces to cut out the felt pieces needed for the ghost. Lay the pattern pieces down on the felt so the text is not showing. Trace around the pieces then cut the felt shapes out. The hat is a little special – you will need to cut two hat pieces from black felt. Cut one with the pattern piece face down (no text showing) and one with it face up (text showing). This will create a front and back for the hat.
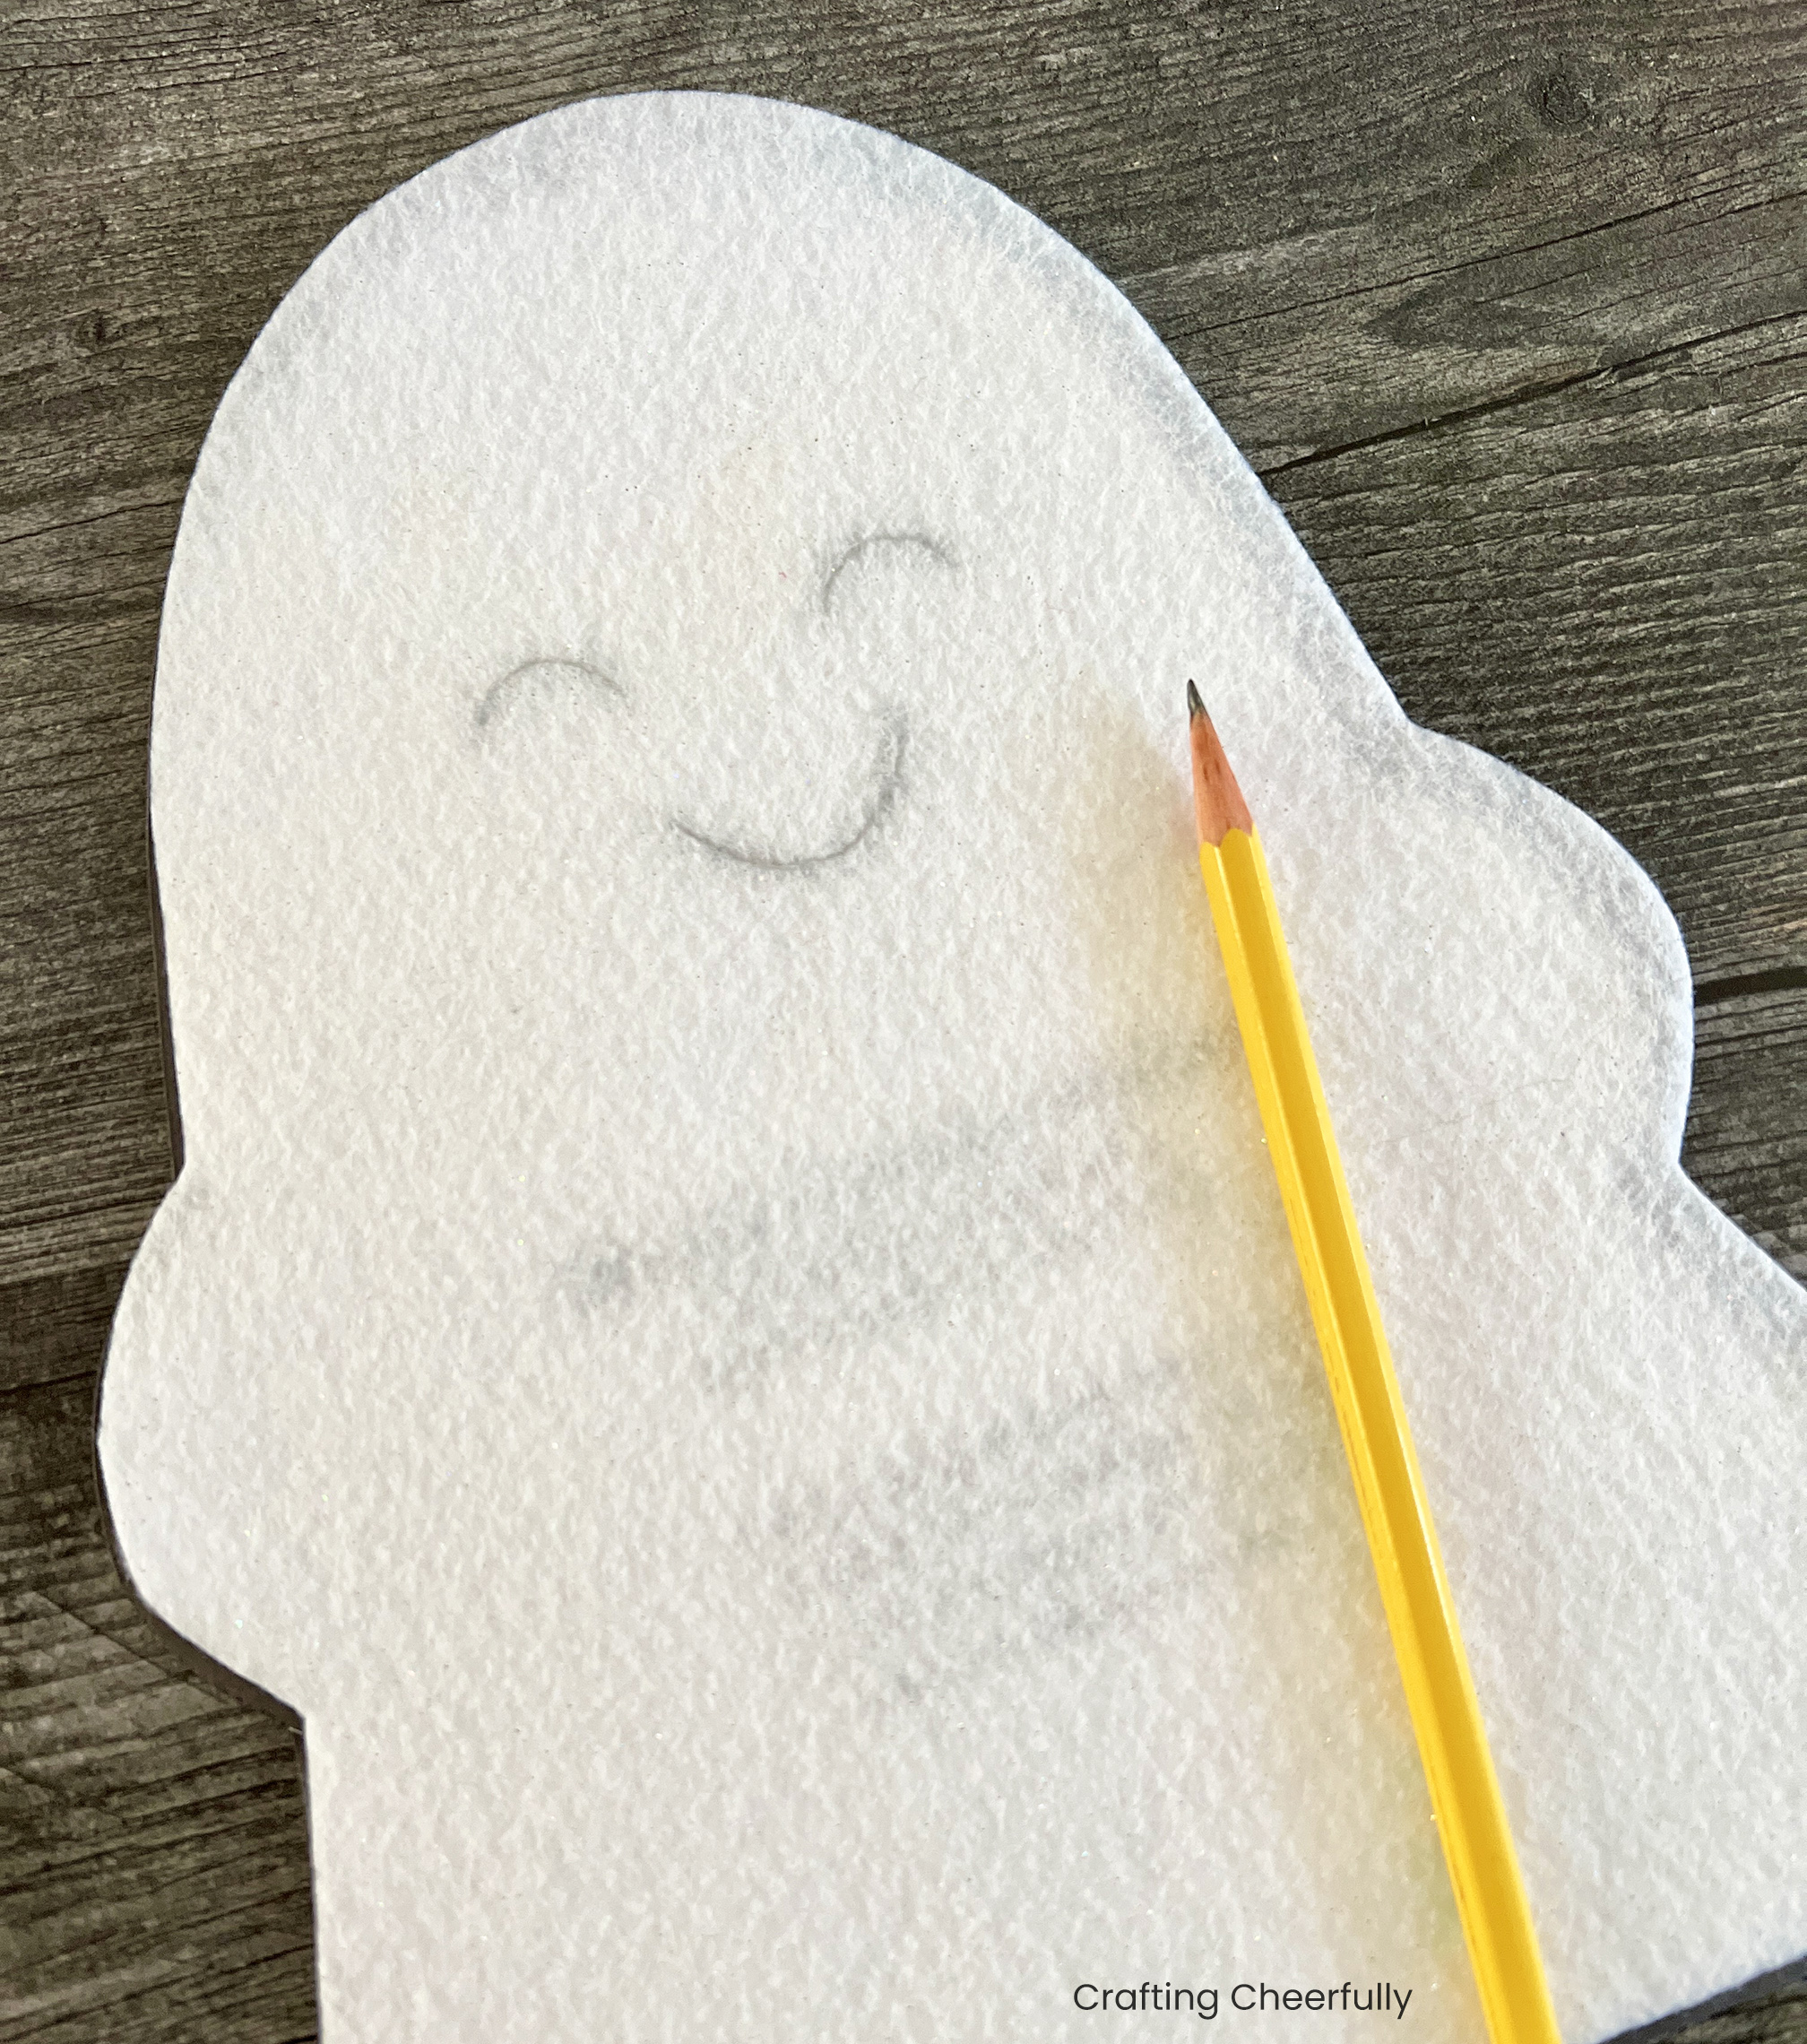
Embroider the Felt Pieces
Step Three: Lay the felt ghost shape over the pattern and trace the face with pencil. The white felt should be light enough to see the face underneath.
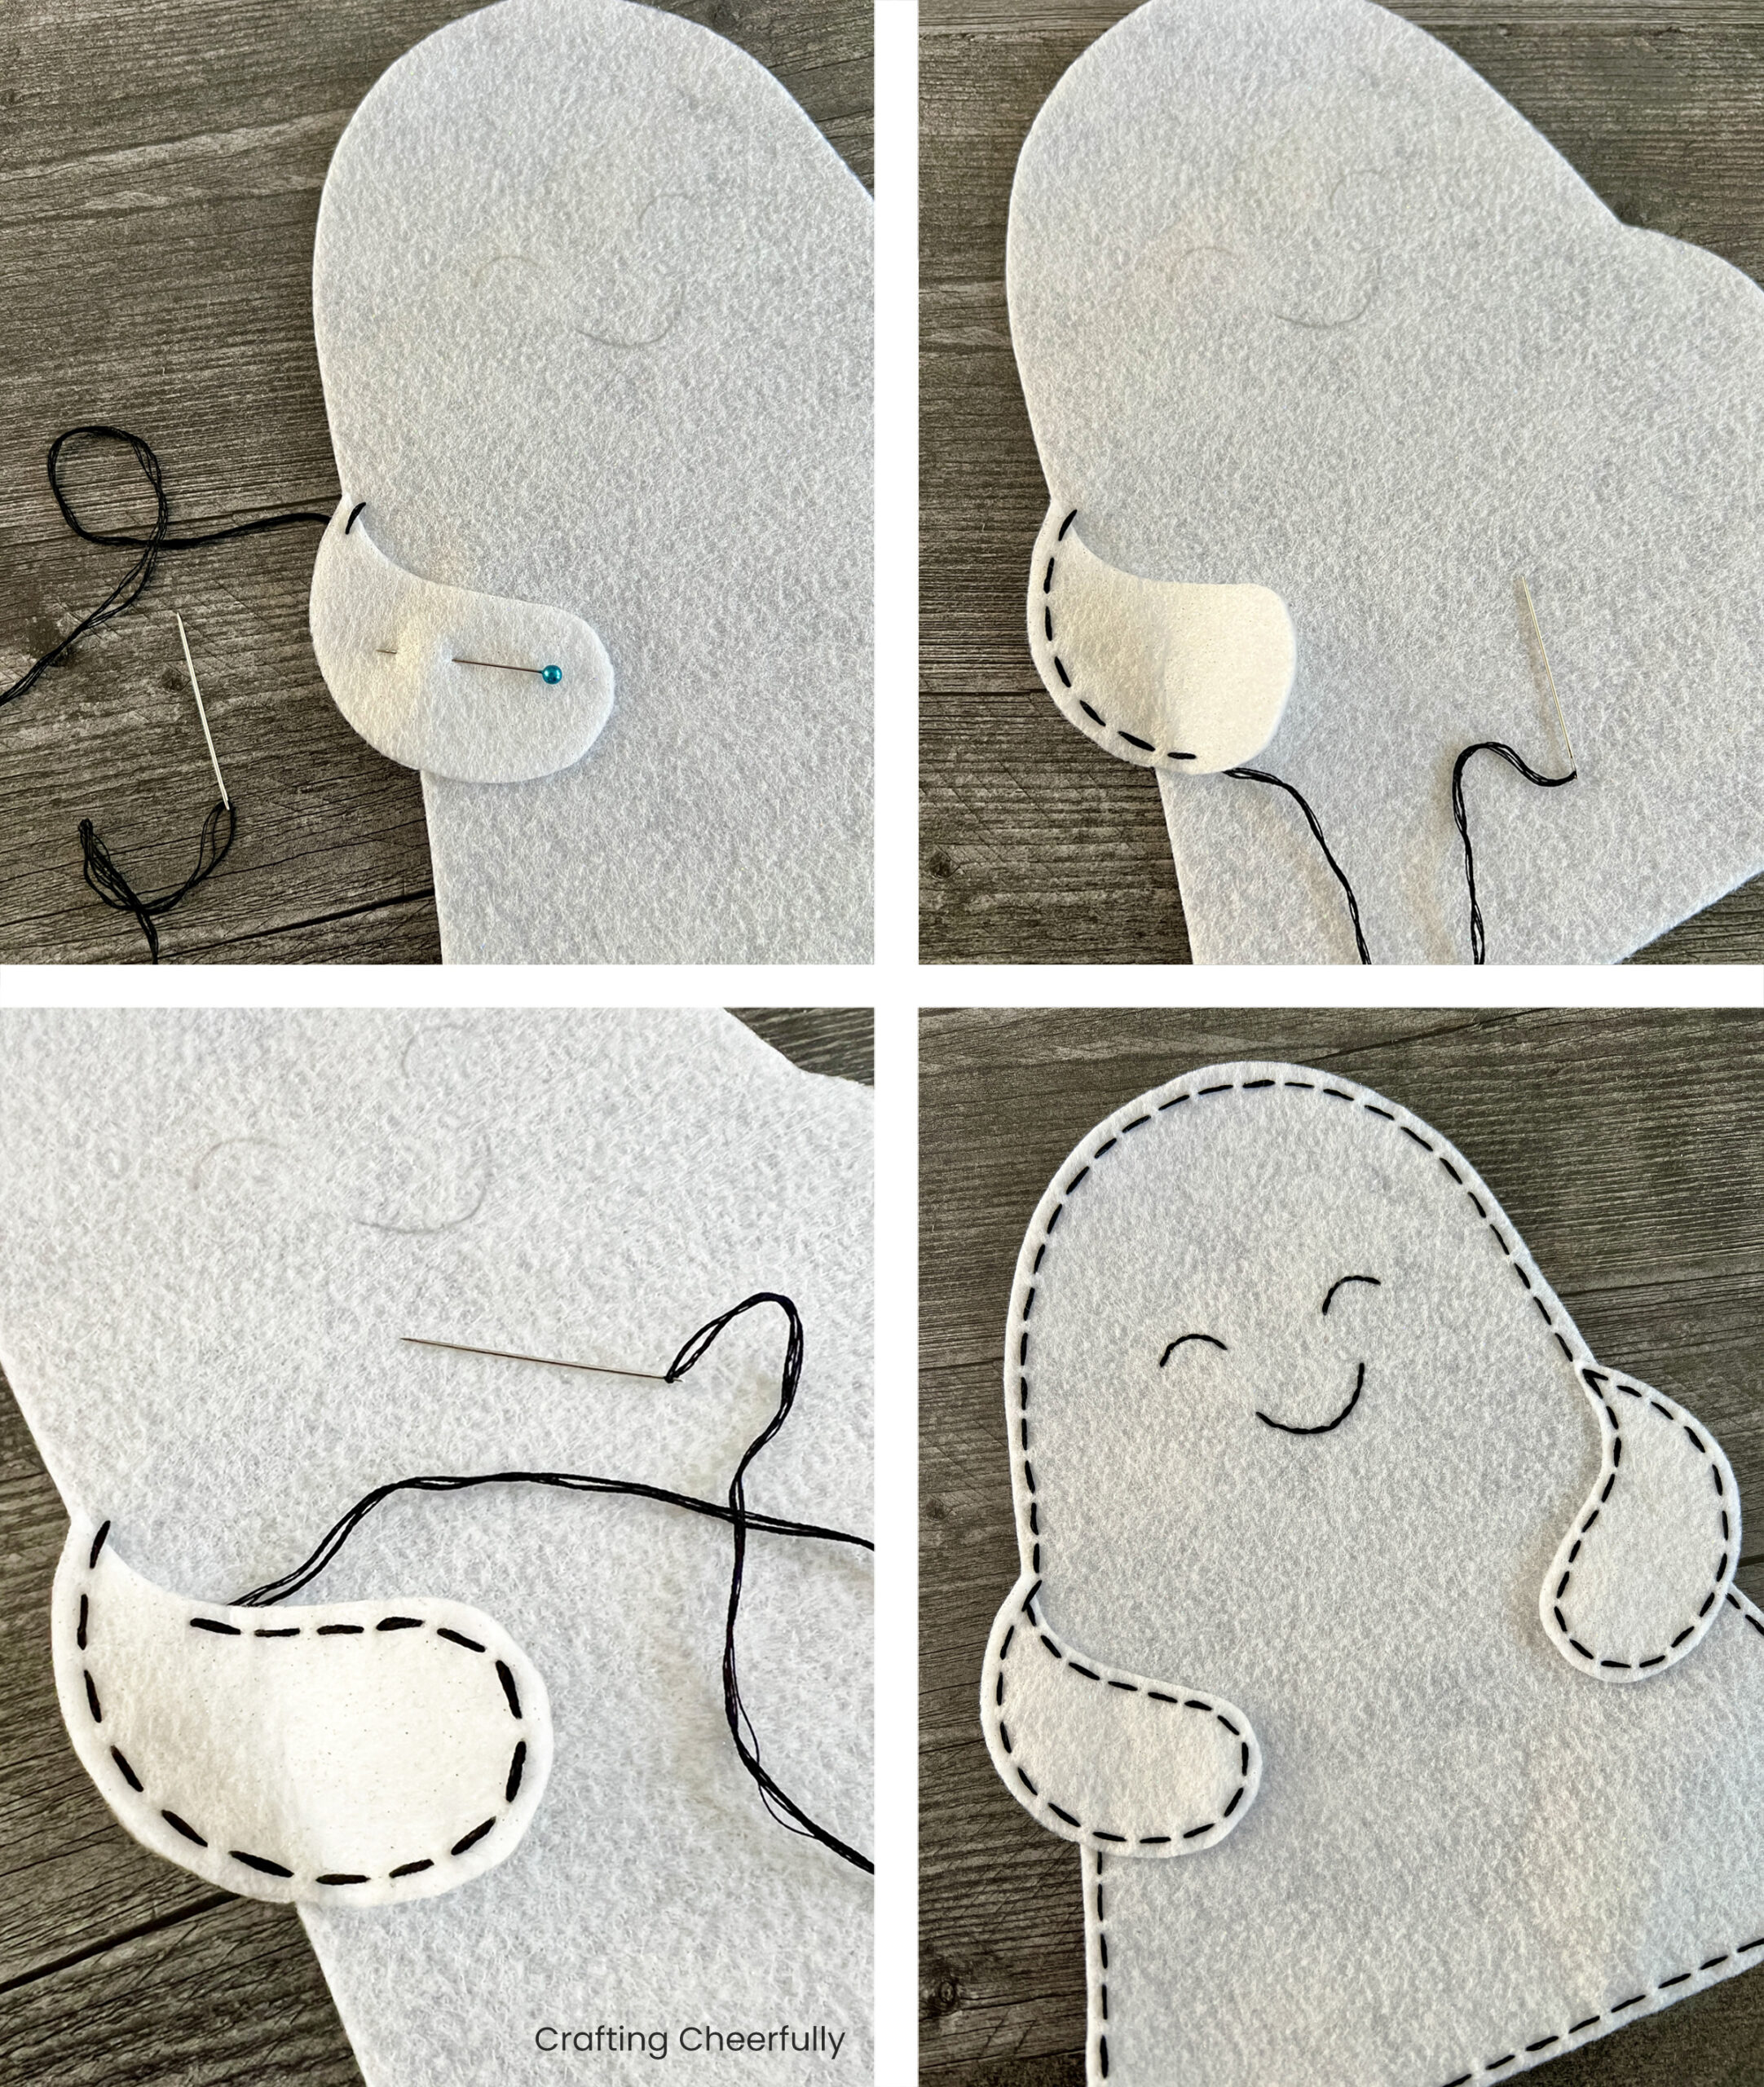
Step Four: Use black embroidery floss to outline the ghost and attach his little arms using a simple running stitch. Embroidery floss is made of 6 strands – separate the floss so you have two long strands. Thread your needle with the two long strands and tie them into a knot at the end so you are stitching with 4 strands.
Start your stitching by attaching the left arm to the large ghost. Stitch through both layers of felt until they no longer follow the same edge. Continue stitching through just the arm so that the “hand” part can be lifted up from the body of the ghost. Continue stitching around the edge of the ghost shape, repeating the same process for the other arm. Stitch the ghost’s face using a small backstitch and black embroidery floss.
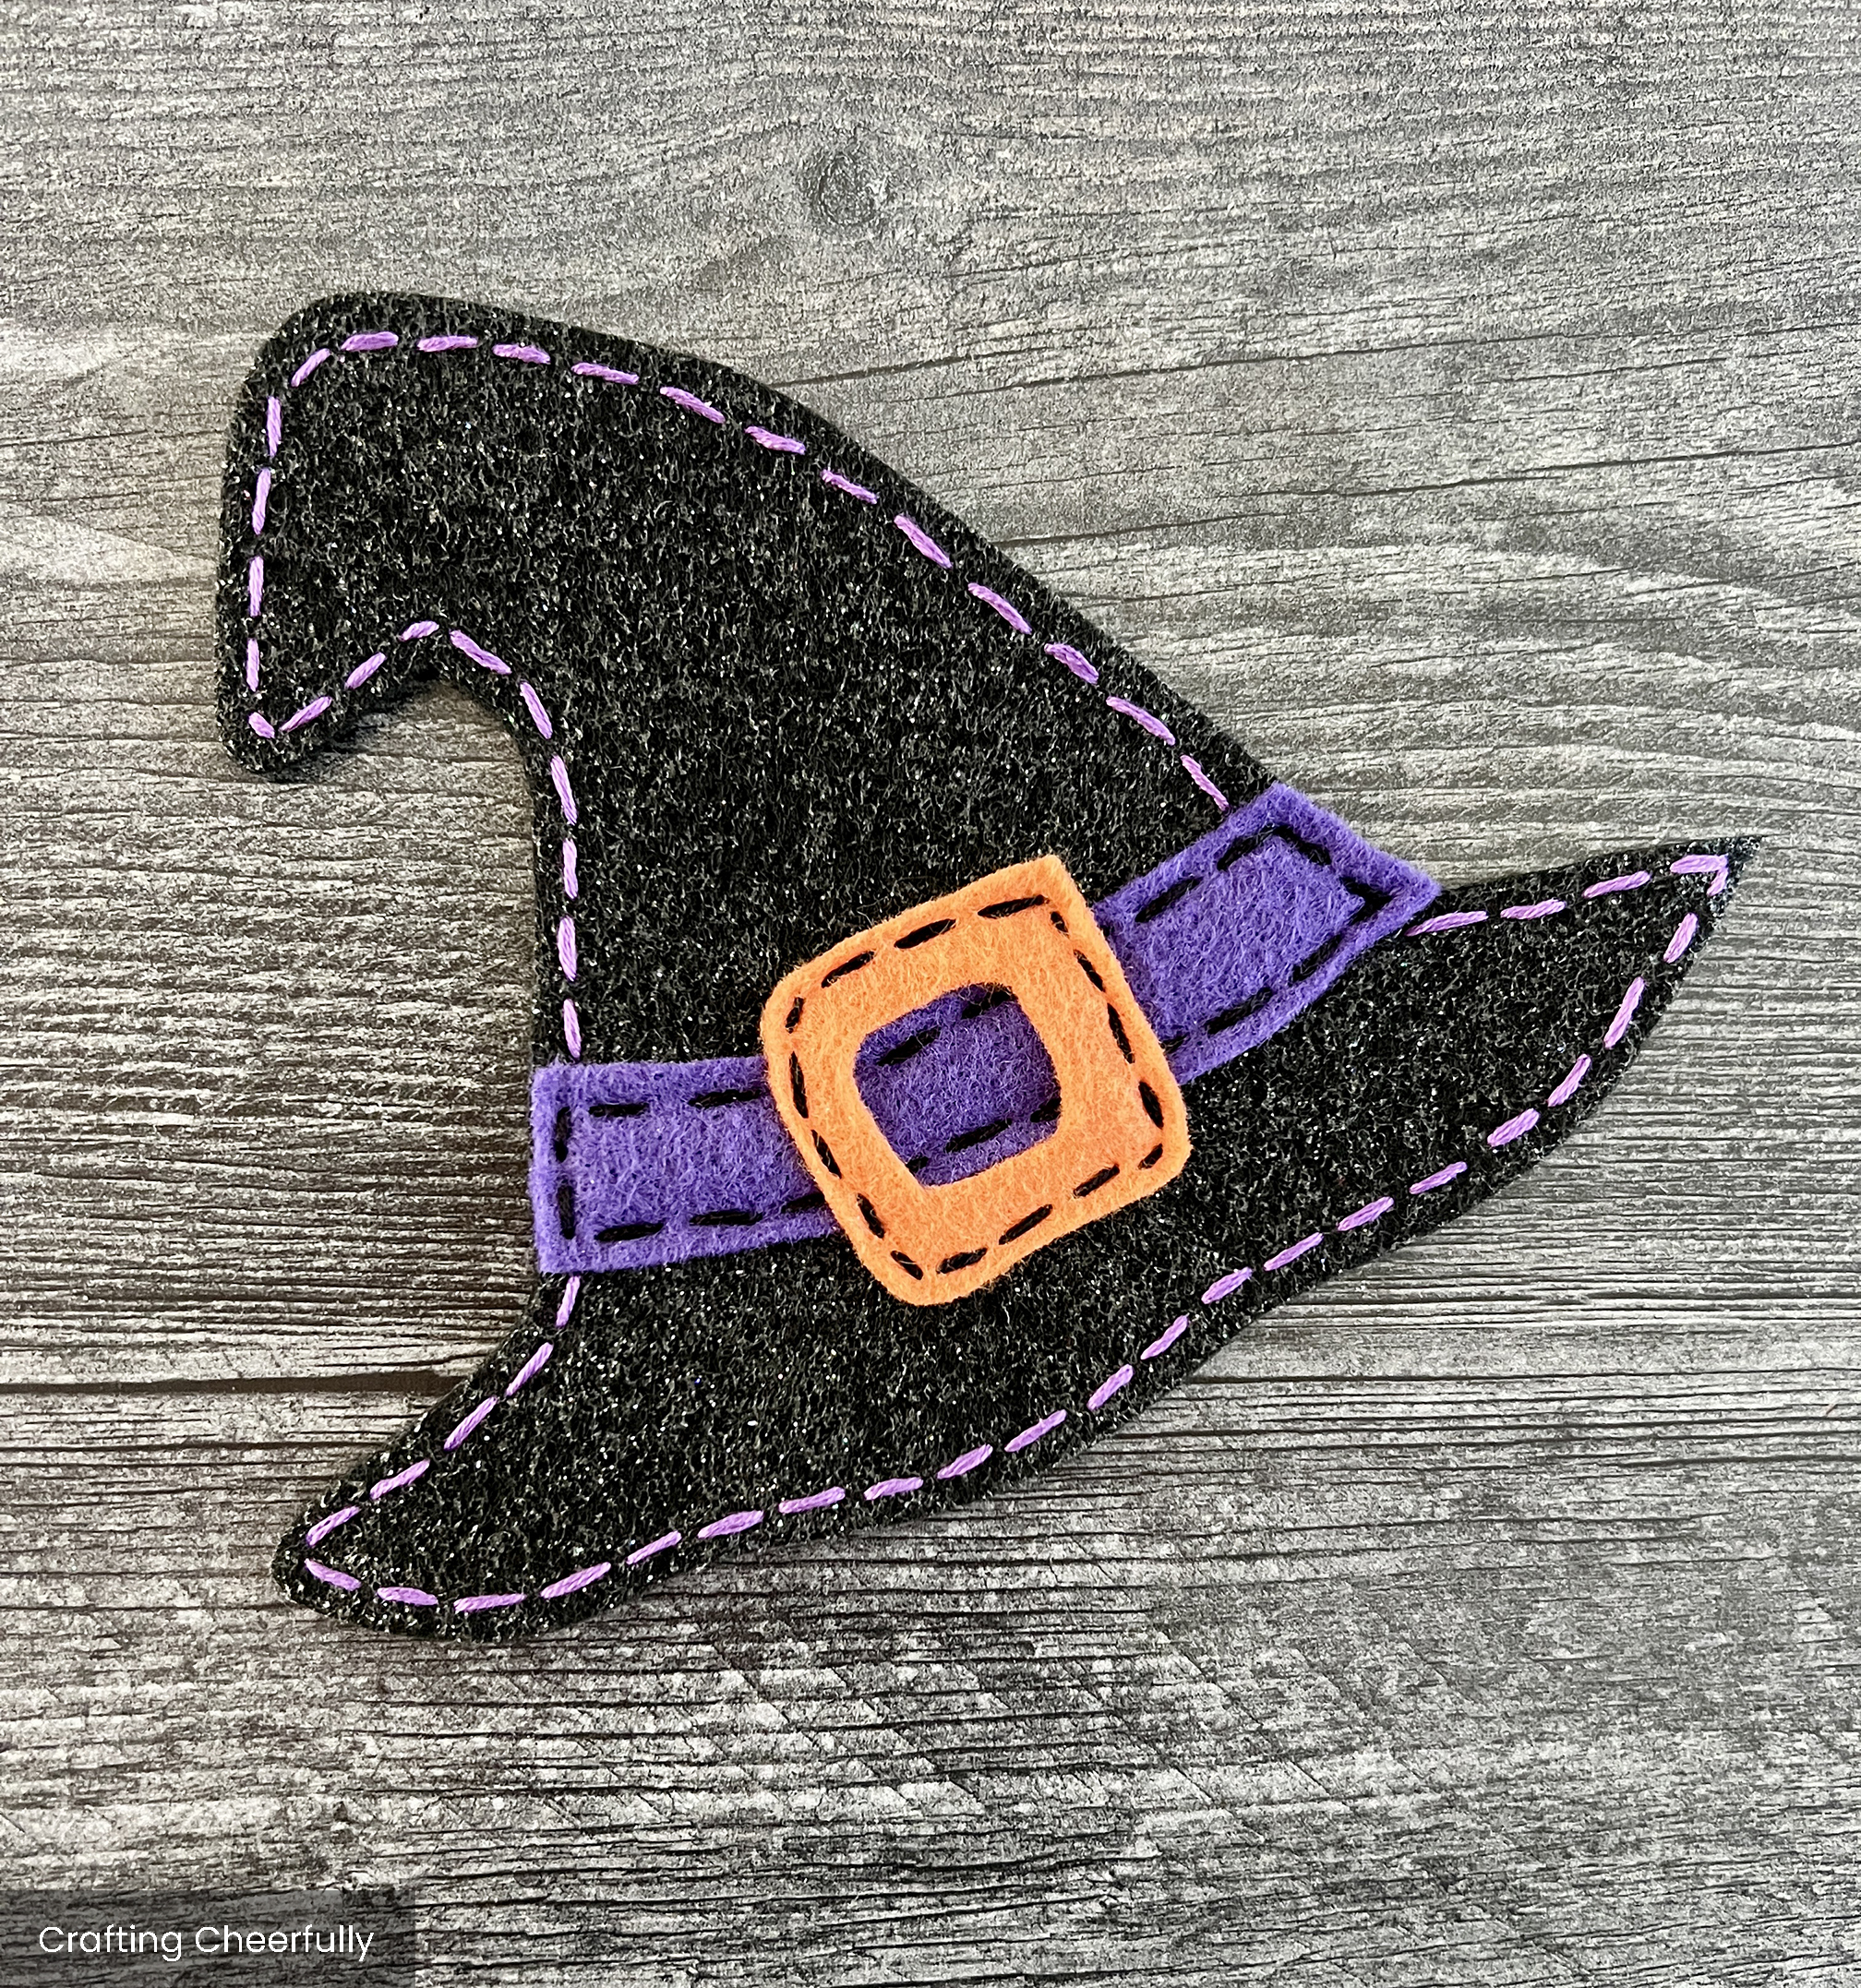
Step Five: Stitch around the hat with purple embroidery floss and a small running stitch. Use black embroidery floss to stitch the hat band and buckle into place.
Cut and Apply the Interfacing
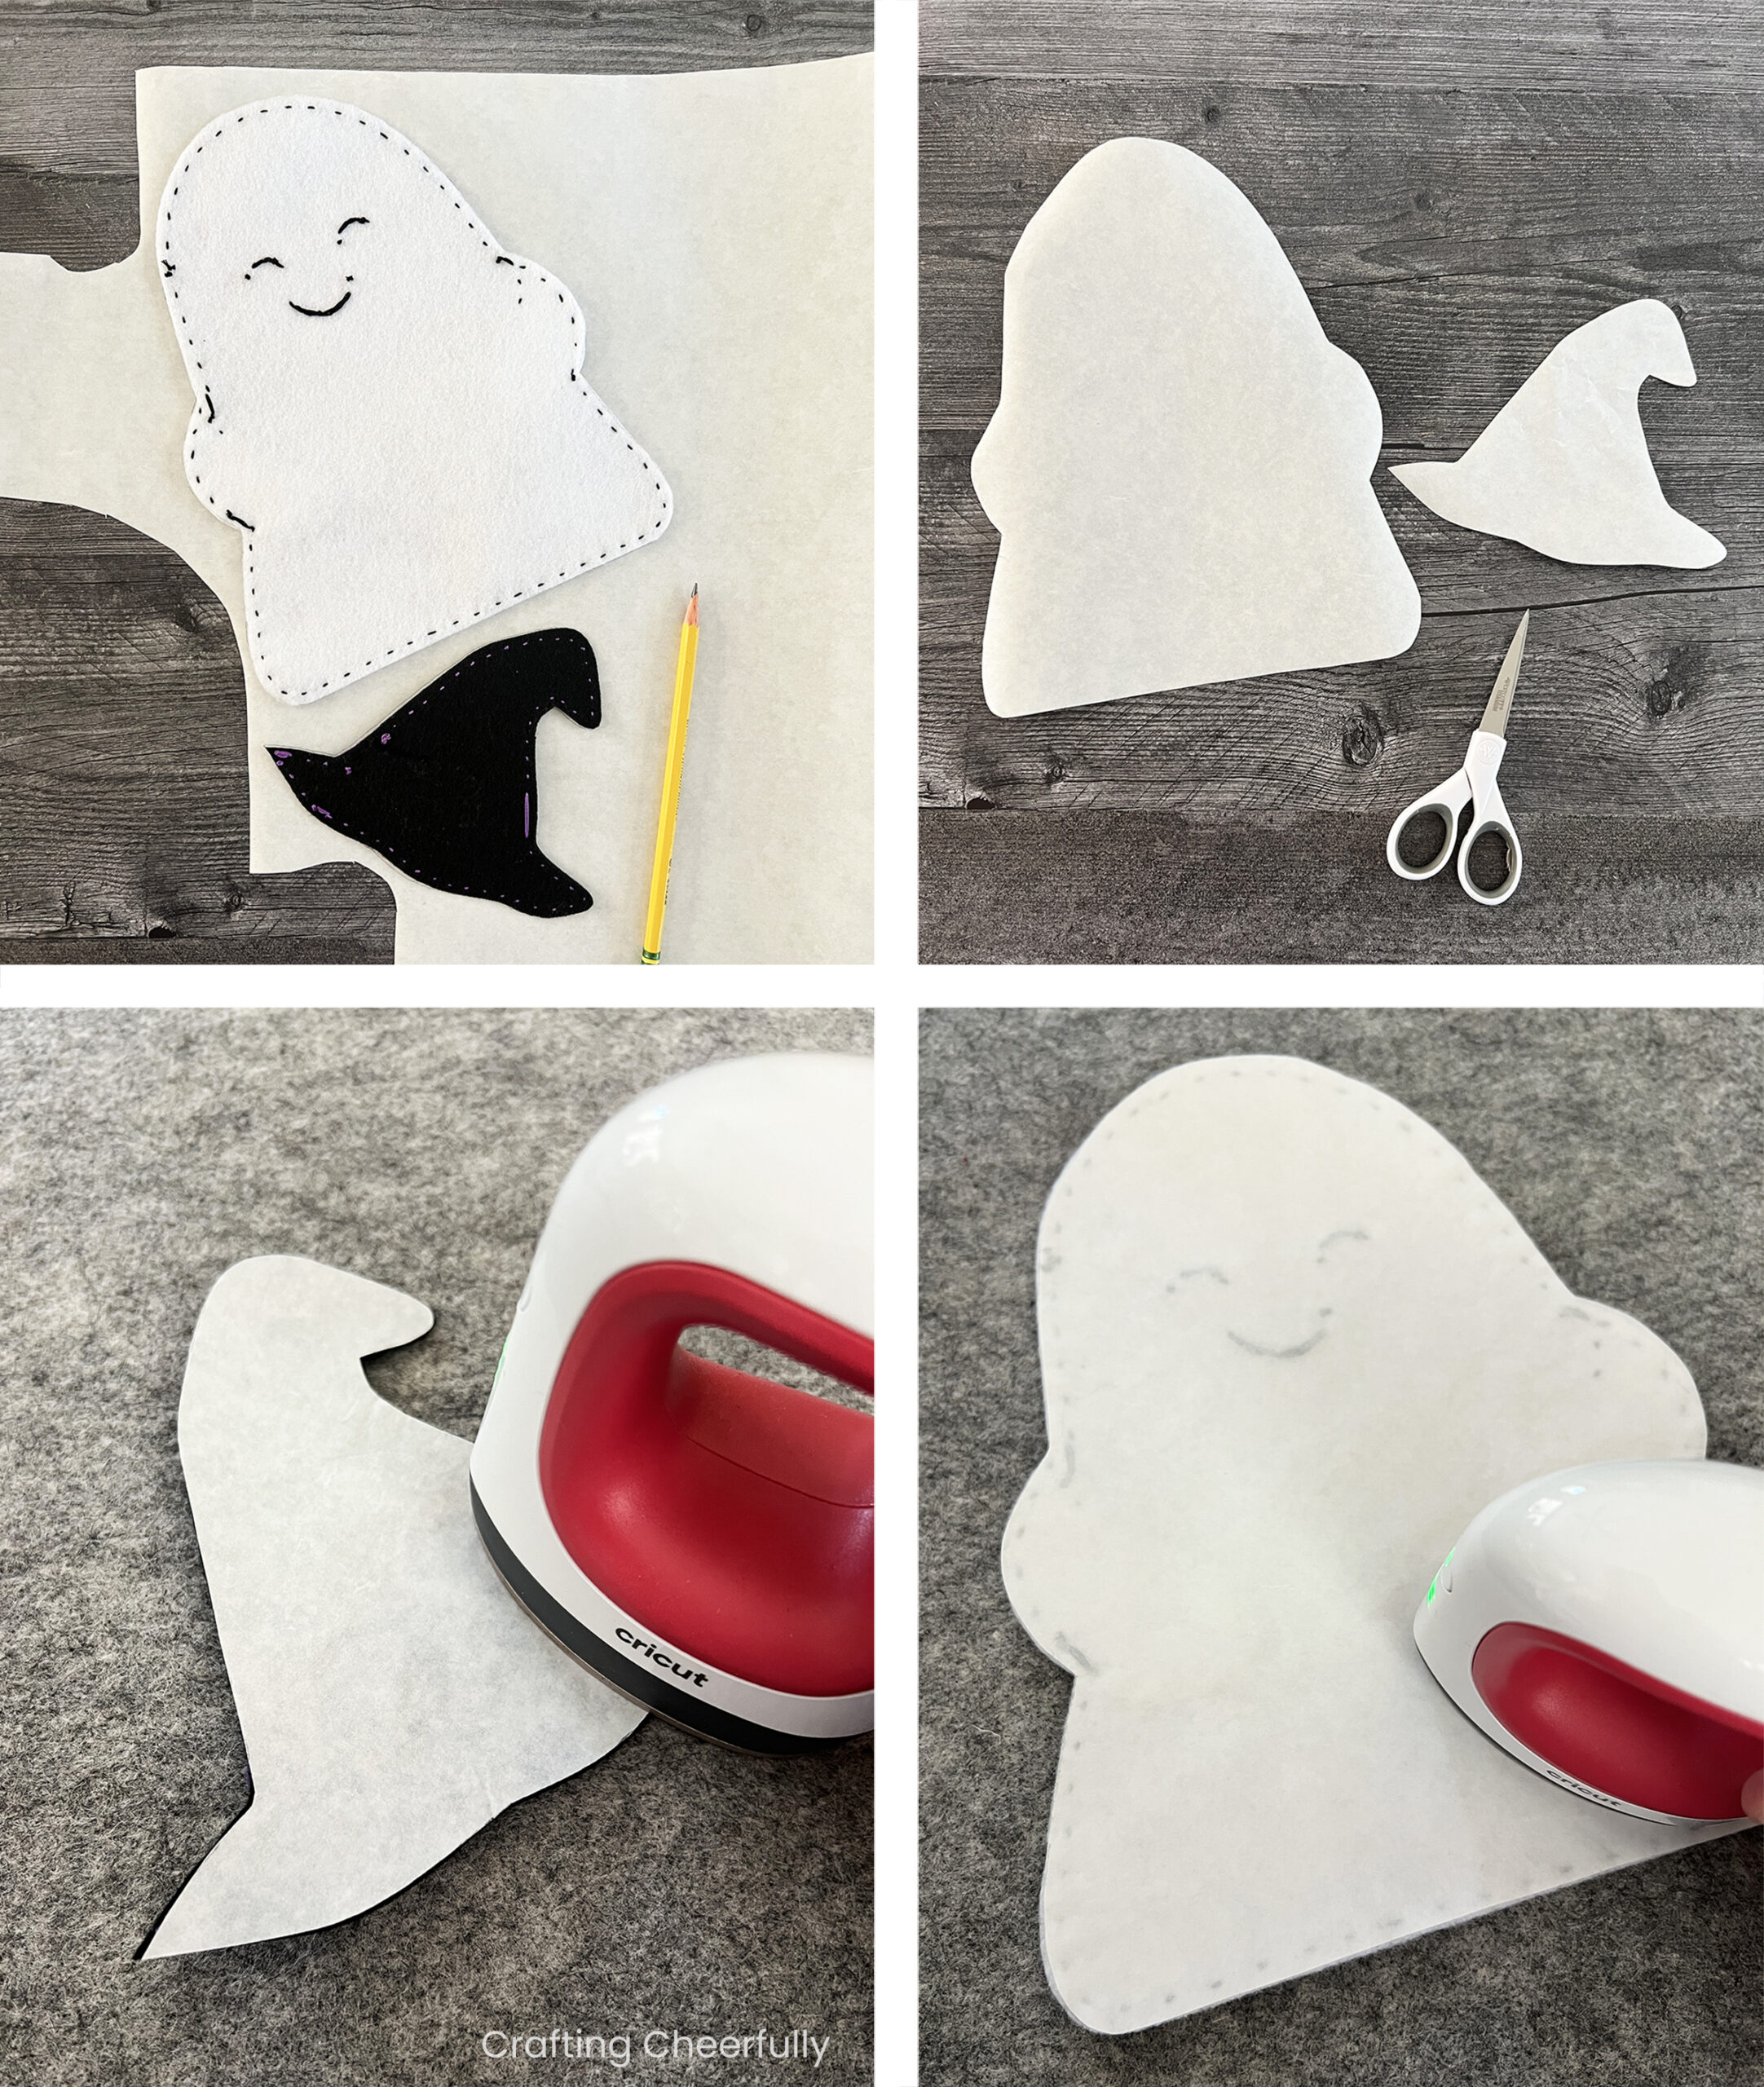
Step Six: Next, we will work on covering the back of the ghost to make it more sturdy and hide the backside of the stitching. Lay the embroidered ghost and hat shapes face down on a piece of interfacing and trace around thier shapes. You will want to make sure you are using HeatnBond Ultra Hold (which does not require stitching) and that your interfacing is paper side up.
Cut the interfacing along the traced lines, then iron the interfacing pieces to the back of the embroidered ghost and hat shapes.
Back the Ghost with Another Layer of Felt
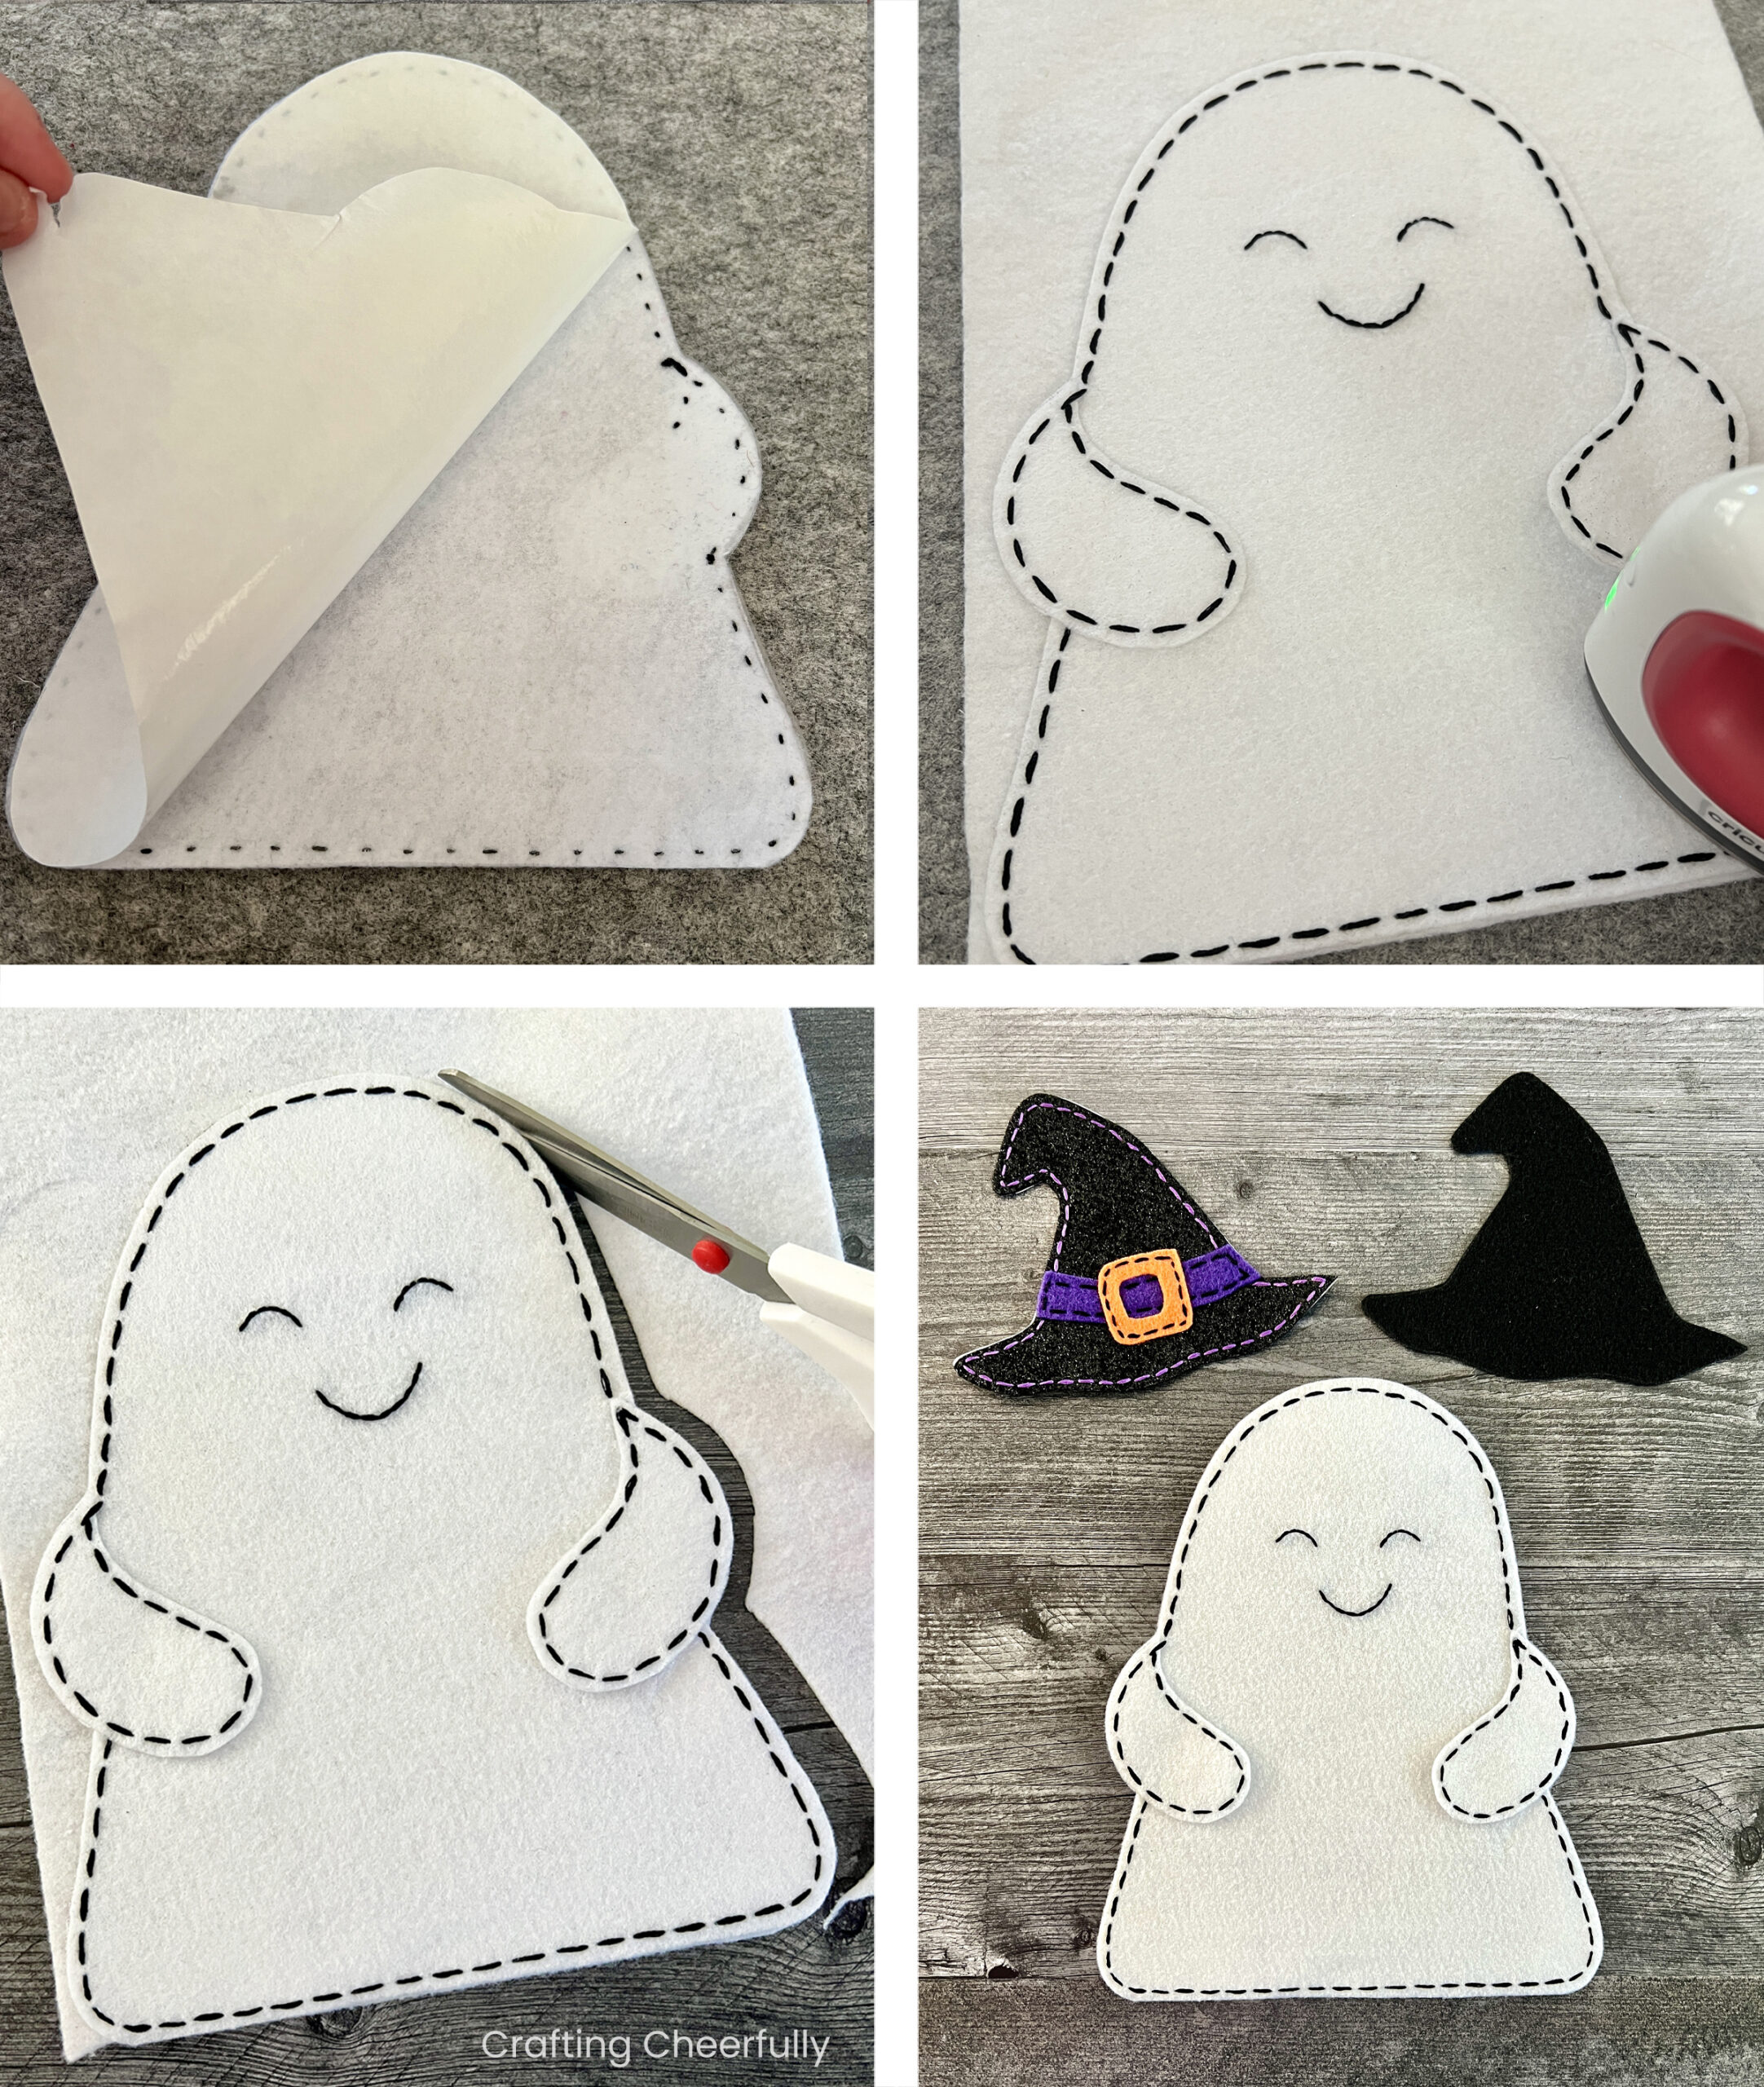
Step Seven: Peel the paper layer of the interfacing off of the ghost and place the ghost, embroidered side face up, onto another piece of white felt. Iron the ghost from the front and back until the two layers of felt are joined, then cut out. The ghost will now be two layers thick and feel more sturdy!
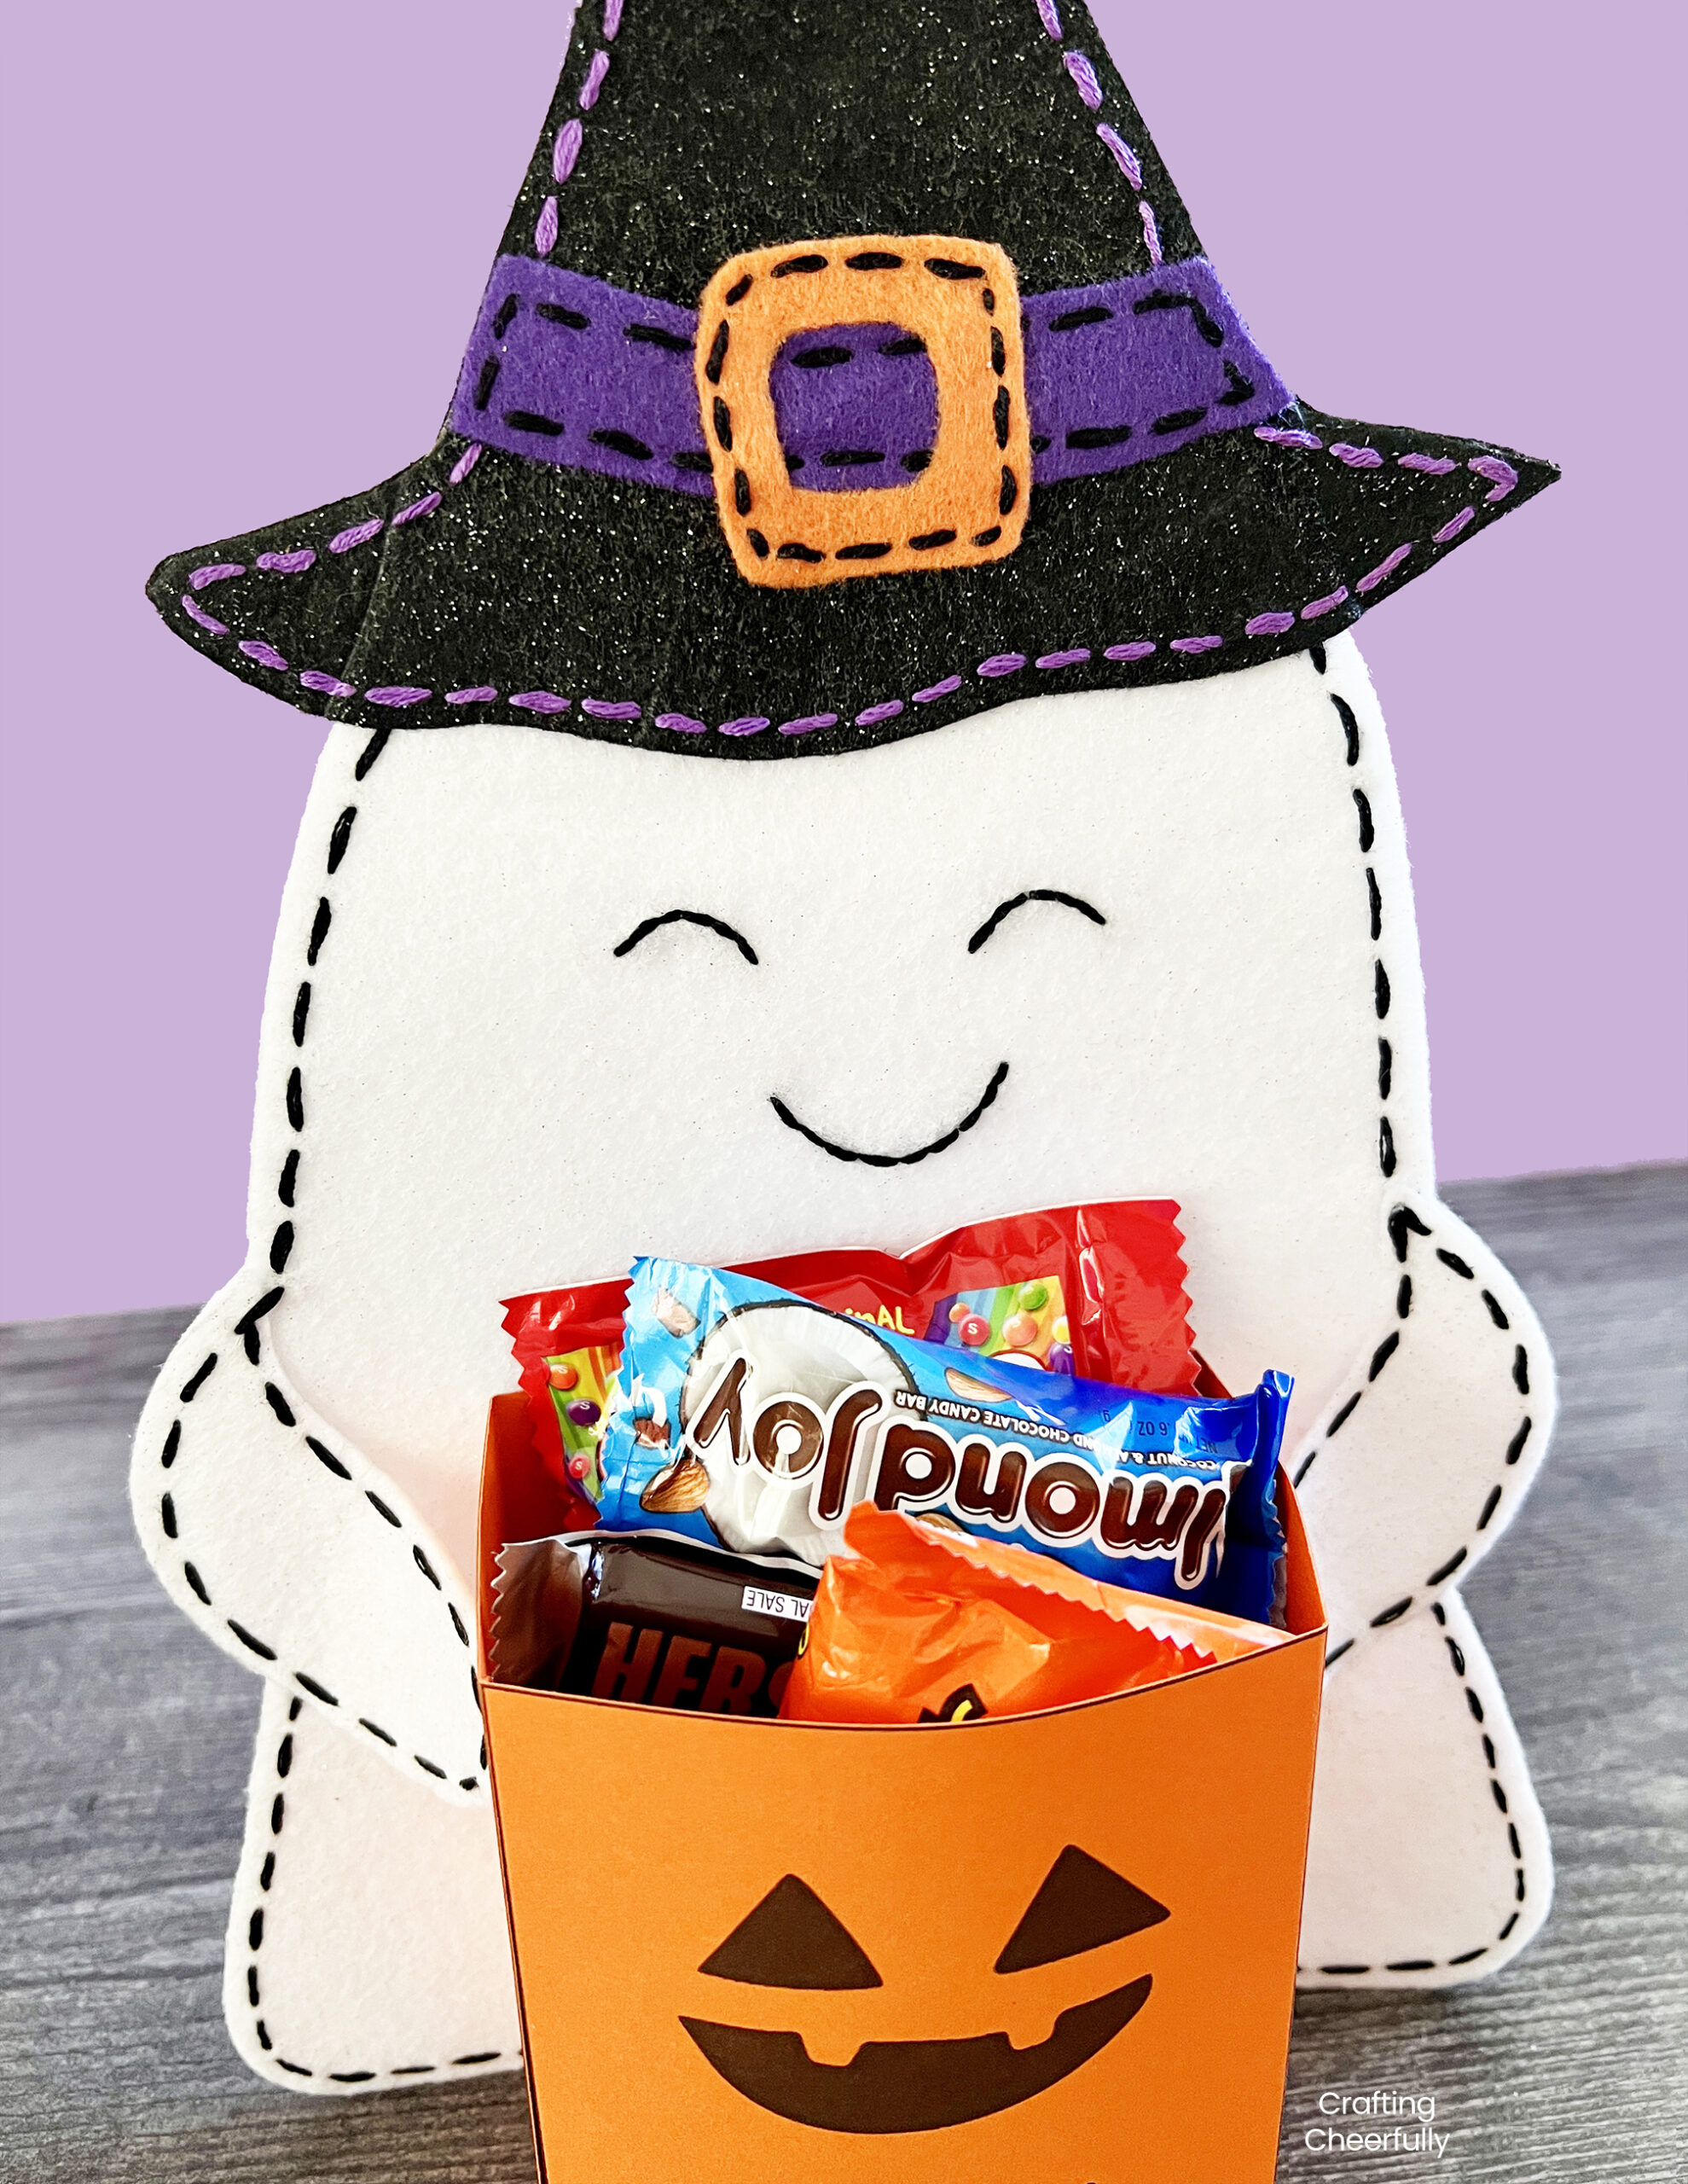
Add the Witch Hat
Step Eight: Time to add the witch hat to our ghost friend! Peel the paper layer of the interfacing off the embroidered witch hat. Place the two witch hats so they line up with one another with the top of the ghost’s head in-between. Iron the hat from both sides to adhere it.
Add the Paper Treat Bag!
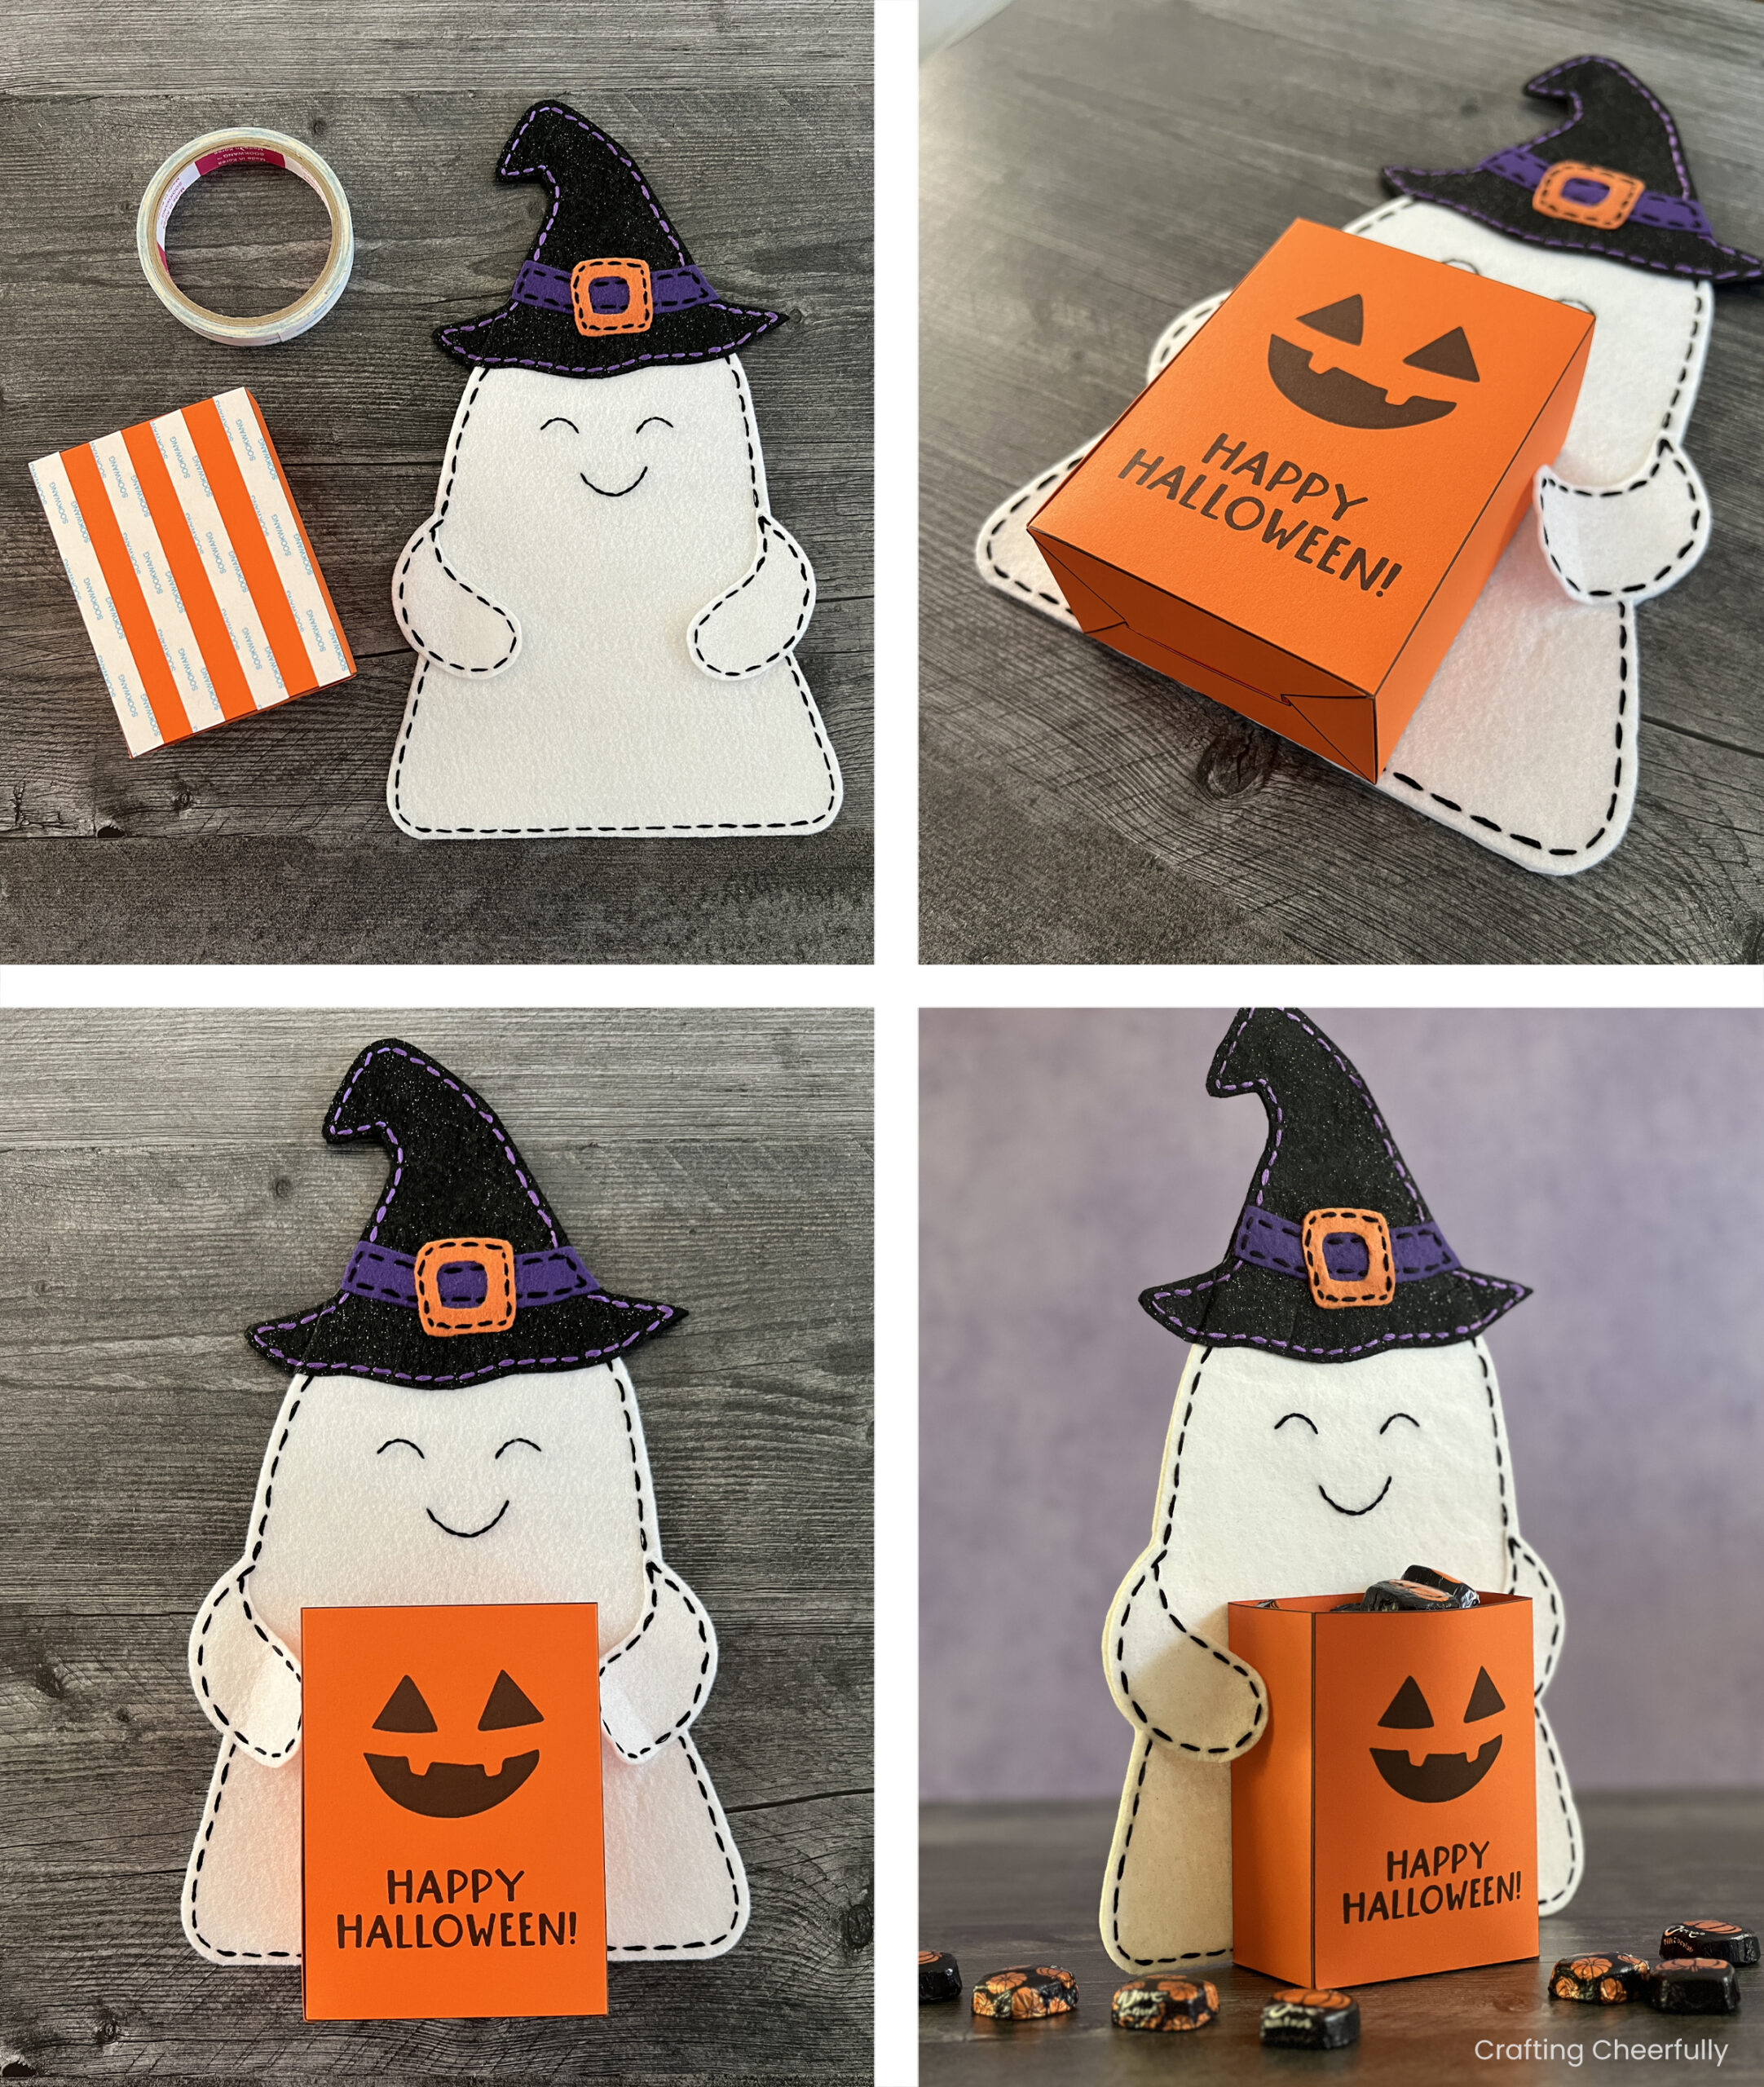
Step Nine: The final step is adding the Jack-o’-Lantern paper treat bag. The printable for the box is included with the ghost pattern and you will find directions for assembling the box on this blog post, DIY Pumpkin Treat Boxes. Skip adding the handle of the box and instead cover the back of the box with strips of double-sided tape. Line the box up with the bottom of the ghost, keeping it centered, and attach the box. Lift the cute ghost arms to rest around the box.
Fill the box up with candy and treats! I place two pattern weights in the bottom of my treat box. This helps my felt ghost stand up and keeps him standing as people take candy from the box.
I hope you enjoyed this fun felt craft! I really love felt embroidery. If you enjoyed this project I recommend checking out my other felt projects for Halloween!
More Felt and Fabric Halloween Crafts
- Halloween Felt Cat Treat Bag
- Candy Corn Stuffie
- Felt Halloween Cat Banner
- Felt Phoenix Mask
- Halloween Pillow Wreath

Get the Free Ghost Candy Holder Pattern
Fill out the purple form below with your first name and email address! The free file will be sent straight to your inbox! If you have already filled out the form below, don’t worry – you won’t be added to my list twice! This freebie is for personal use only. I hope you enjoy crafting something special. Please let me know if you have any questions :)